
- Joined
- Sep 25, 2015
- Messages
- 280
- Motherboard
- z390
- CPU
- 7700K
- Graphics
- RX580
- Mac
- Classic Mac
[Guide]El Capitan/ Yosemite on Dell Inspiron 3x37 - 5x37 -7x37 with Clover
Guide to Install El Capitan/Yosemite on Dell Inspiron 3x37 - 5x37 -7x37 with Clover.

Mainly for Dell Inspiron 3437, 3537, 3737, 5437, 5537, 5737, 7437, 7537, 7737
Original guide by nguyenmac (Dell Inspiron 3x37 - 5x37 -7x37 Clover Install Guide)
Requirements:
Here, I’m using my dell 7537 with intel 4500U,intelHD4400,nvidia GT750M[disabled with DSDT/SSDT] with 1080p display and empty 1TB 5400rpm toshiba hard drive .
For wifi Broadcom BCM4352 Azurewave AW-CE123H card replaced.
If you need to keep your windows partition follow this guide (Mavericks & Windows 8 on same drive without erasing)
What's working!!
Pre installation:Better to read....
[Guide] Booting the OS X installer on LAPTOPS with Clover
[FAQ] READ FIRST! Laptop Frequent Questions
Creating the OS X installer:
Use a flash five 16GB or above for El Capitan.
Here i used 'createinstallmedia' method:-
prepare your usb drive: Format: osx extended journaled Name it as: install_osx
if you are installing El Capitan:
If you are installing Yosemite:
Assuming you have prepared OS X installer :
creating clover usb:
[For this task even a 256mb flash drive would be enough] but if you don’t ; just use a simple 4GB/8GB usb flash drive for this process.
Use provided config.plist_for_installer.zip >extract it and place it in EFI>CLOVER (press “replace” if it asks).
Further info with detailed guide[Guide] Booting the OS X installer on LAPTOPS with Clover
Using the OS X Installer to complete OS X Installation:
Do not connect to the internet until we go to the Desktop *********************************************************************************************************
Post installation.
First step is to install clover boot loader to your internal drive(SSD/HDD)
Use latest clover boot loader (which we already dowloaded ) and
RTL8111: https://github.com/RehabMan/OS-X-Realtek-Network
RTL8100: http://www.insanelymac.com/forum/top...hernet-series/
use provided config.plist_for_installer.zip >extract it and place it in EFI>CLOVER
(press “replace” if it asks)
SMBIOS: create your new SMBIOS (Macbook Air 6,2/Macbook Pro 11,1) with suitable Serial Number
For this task you might need more attention and effort to get successful results
In clover usb drive, go to:EFI>CLOVER>ACPI>origin
Now you have disassembled your ACPI files (which have .dsl extension )download this MacIASL version from rehabman https://github.com/RehabMan/OS-X-MaciASL-patchmatic and place it under Applications folder :
Note when working with refs.txt please note that in [Guide] Patching LAPTOP DSDT/SSDTs
to_DSDT_dsl.txt.zip
click compile ;if no errors you can go to next steps ….(if not you have to fix them)
click patch again :
Click patch again, and apply this patch(to fix brightness controlling issue ..)
brightness_fix.txt
if it compiles without errors you can continue.. this step is only if you are installing 10.11 or above relating to usb problems.
Again apply this code (by rehabman original post here [Guide] 10.11+ USB changes and solutions)
After compilation without errors save those patched files(in separate location) both ACPI Machine Language Binary(file format:.aml) & disassembled ASL(file format: .dsl>>>>for future modifications/fix problems)
Now find and open SSDT-7.dsl open it with same MaciASL and patch:
File Format: ACPI Machine Language Library, name: SSDT-1.aml in separate location (location like "DSDT/SSD patched"etc..)
[FOR MODEL WITH NVIDIA/AMD]
Go to DSDT folder on desktop, find SSDT-8.dsl, open MacIASL and apply the patch use the code given in txt format)
to_ssdt-8_dsl.txt
Click Compile to check for errors, If no error, you can save the file with File Format: ACPI Machine Language Library, name: SSDT-2.aml in separate location ((location like where you saved your DSDT.aml+SSDT-1.aml)if you have SSDT-9.dslOpen SSDT-9.dsl, apply this patch then save as SSDT-3.aml use the code in txt format)
to_dsdt-9.txt
copy all DSDT.aml+SSDT-1.aml+SSDT-2.aml+SSDT-3.aml[if you have] to /EFI/Clover/ACPI/patched/ (in your internal EFI partition)
For power management:
Generate SSDT for your native power management ; use nguyenmac’s prebook installer
HP Probook Installer Clover Edition
only select SSD generator >install (this tool will patch your cpu PM and place it under EFI>clover>ACPI>patched named “ssdt.aml”)
For backlight control with smooth transition using New Brightness kext:-
IntelBacklight.kext(from rehabman)
https://github.com/RehabMan/OS-X-Intel-Backlight
For this kext, you can use your existing:
If it didn’t work for your laptop(most of the time it should work this series of laptops)
Try second method:
ACPIBacklight.kext.
Battery driver install: https://github.com/RehabMan/OS-X-ACPI-Battery-Driver
PS2-contraller: https://github.com/RehabMan/OS-X-Voodoo-PS2-Controller
FakeSMC: https://github.com/RehabMan/OS-X-FakeSMC-kozlek
Fix intel HD4400:
https://bitbucket.org/RehabMan/os-x-fake-pci-id/downloads
FYI: card that i used
http://www.ebay.co.uk/itm/Broadcom-...338?pt=LH_DefaultDomain_0&hash=item417ed20142
For WIFI
http://www.insanelymac.com/forum/topic/253395-kext-wizard-easy-to-use-kext-installer-and-more/
Disable Hibernation..
Final steps….Reset Network Settings to Fix iCloud/AppStore +Fix WiFi issues...
If you use any USB Wifi device, or use Mobile Phones to connect to Internet before completing the guide, you won't be able to access to AppStore or iCloud. You must reset your network settings:- Go to /Library/Preferences/SystemConfiguration/ and delete these files:
How to add clover as boot option
In your system bios : boot >add boot option(may vary with laptops slightly)
 )
)
Fix Audio:By using rehab man’s ALC 283 kext)
Lenovo-U430-Touch-DSDT-Patch install ALC_283kext using kext wizardAudio: After installing new/updated kexts or after the initial installation, you may lose audio.
To fix:
install codec commander from rehabman in S/L/E
RehabMan/EAPD-Codec-Commander
Display garble when El Capitan/Yosemite boots up
[Fix] Resolve boot screen garble
Can't control brightness/volume with multimedia keys?

If you have a issue like this:"Laptop won't sleep/shutdown after a few hours of uptime"
which can be fixed by updating ME firmware ,either you can fix it by adding kexts to patch under kernel and kext patches in provided config plist(noteatches not included in the given config.plist)original patch by Vbo
use plist edit pro/Xcode(free from App Store) add above patches to your config plist
NO Bluetooth after wake from sleep?
some users have reported they have no BT after wake from sleep, which implies either you have installed kexts wrongly or your port injector is not implemented wrongly ....(or some other prob..) http://www.tonymacx86.com/el-capitan-laptop-support/178406-solved-no-bt-after-sleep-4.html
fix usb fix El Capitan
You’ll need to create a port injector to fix your various usb related issues (most of time usb 3.0).
Here I’ll attach my injector for dell 7537 (but better to create your own by following this guide:[Guide] 10.11+ USB changes and solutions )
Fix iMessages :How to Fix iMessage
Windows 10/8 UEFI Dual Boot-
Use Disk Utility to prepare a Mac OS X Extended partition (don’t use Fat32, Disk Utility will mess up your drive)- Create a FAT32 usb drive, extract Windows 10/8 64-bit iso there or use this nice tool (rufus)to create bootable UEFI usb using a windows based machine- Boot with usb drive, format the new partition to NTFS, install Windows there.
- Go to BIOS, move the Clover boot entry to top.
Update from Yosemite to El Capitan.
Before Problem reporting:
Credits:nguyenmac, RehabMan,vbo, JVital2013, the-darkvoid and people from this forum and all others
Notice:files have been updated in zip format and extract before use them properly
Guide to Install El Capitan/Yosemite on Dell Inspiron 3x37 - 5x37 -7x37 with Clover.
Original guide by nguyenmac (Dell Inspiron 3x37 - 5x37 -7x37 Clover Install Guide)
Requirements:
- Your Dell 3x37 - 5x37 -7x37 series laptop .. with internet connection .
- OS X El Capitan.app/Yosemite from App Store (currently version 10.11.5).
- Two USB flash drives (only one should be 16 GB or lager )-better if you can use usb 2.0 drives/hub
- Latest clover installer http://sourceforge.net/projects/cloverefiboot/
- Some amount of free time to read and follow those instructions carefully..
- Optional—since built-in intel 7260 wifi card not compatible with OS X, better WIFI+BT performance can be obtained using BCM4352
- Bios settings: update to latest(currently A13 for dell 7537)
- - Disk: AHCI
- - Intel Rapid Storage: Disabled
- - UEFI Boot: Enabled
- - Secure Boot: Disabled
- - Legacy Rom: enabled(to avoid distorted boot screen when booting to recovery partition)
- Function key behavior - multimedia key.
Here, I’m using my dell 7537 with intel 4500U,intelHD4400,nvidia GT750M[disabled with DSDT/SSDT] with 1080p display and empty 1TB 5400rpm toshiba hard drive .
For wifi Broadcom BCM4352 Azurewave AW-CE123H card replaced.
If you need to keep your windows partition follow this guide (Mavericks & Windows 8 on same drive without erasing)
What's working!!
- Native power management
- Accelerated graphics for HD4400 (including OpenCL)
- Built-in keyboard (with special function keys)
- Built-in trackpad
- WIFI+BT via BCM94352HM
- Built-in Audio
- Airdrop + Bluetooth (with handoff) using BCM94352HMB
- Native USB3 with AppleUSBXHCI (with USB2.0 )
- Backlight controls with smooth transitions(thanks to new intel backlight kext)
- Touchscreen (only single touch )
- All the apple services(iMessages/FaceTime ,Location services,Mac App Store,iCloud,Find My Mac etc...)
- Built-in web-cam. (only not working in some dell 7537 laptops )
- Built-in SD card reader.
- Discrete Nvidia GT750M graphics/AMD graphics card.
Pre installation:Better to read....
[Guide] Booting the OS X installer on LAPTOPS with Clover
[FAQ] READ FIRST! Laptop Frequent Questions
Creating the OS X installer:
Use a flash five 16GB or above for El Capitan.
Here i used 'createinstallmedia' method:-
prepare your usb drive: Format: osx extended journaled Name it as: install_osx
if you are installing El Capitan:
Code:
# copy installer image
sudo "/Applications/Install OS X El Capitan.app/Contents/Resources/createinstallmedia" --volume  /Volumes/install_osx --applicationpath "/Applications/Install OS X El Capitan.app" --nointeraction
# rename
sudo diskutil rename "Install OS X El Capitan" install_osx
Code:
# copy installer image
sudo "/Applications/Install OS X Yosemite.app/Contents/Resources/createinstallmedia" --volume  /Volumes/install_osx --applicationpath "/Applications/Install OS X Yosemite.app" --nointeraction
# rename
sudo diskutil rename "Install OS X Yosemite" install_osxcreating clover usb:
[For this task even a 256mb flash drive would be enough] but if you don’t ; just use a simple 4GB/8GB usb flash drive for this process.
- Format:MS-DOS(FAT).
- name: clover.
- since we install Clover UEFI, run the Clover Installer package:
- select the target of the install to "clover” using "Change Install Location"
- select "Customize" (since default is legacy install -> we must change it)
- check "Install for UEFI booting only", "Install Clover in the ESP" ->automatically selected.
- check "Bluemac" from Themes (or you can choose whatever you like )
- check "OsxAptioFixDrv-64" from Drivers64UEFI.
- After making your selections go ahead and continue to "Install" the Clover to your USB flash drive.
- After installation successful you should see folder named “EFI”inside of your clover usb.
- Get EFI driver for the Clover installer(HFSPlus.efi) https://github.com/JrCs/CloverGrower...64/HFSPlus.efiandcopy it to /EFI/Clover/drivers64UEFI
- Remove EFI/CLOVER/kexts/10.6, 10.7, 10.8, 10.9, 10.10,10.11 and keep only 'Other' folder and copy essential kexts to there
- FakeSMC.kext :https://github.com/RehabMan/OS-X-FakeSMC-kozlek
- it contains FakeSMC.kext + PlugIns(use only FakeSMC.kext for now )
- Voodoo PS2Contraller: https://github.com/RehabMan/OS-X-Voodoo-PS2-Controller
Use provided config.plist_for_installer.zip >extract it and place it in EFI>CLOVER (press “replace” if it asks).
Further info with detailed guide[Guide] Booting the OS X installer on LAPTOPS with Clover
Using the OS X Installer to complete OS X Installation:
- Boot with your clover usb (press F12 at boot) and you’’ll see clover boot screen;
- then plug your OS X Installer drive also;
- your need to press F4 extract ACPI tables for your device(this takes several seconds to complete).
- Then select your OS X installer and press space bar and boot verbose (incase we ran into a problem,to see what’s going on there )
- After passing the welcome screen you have to go to Disk utility and format your entire drive as GUID partition table ,Format: OS X extended journaled and close the disk utility.
- Install OS X into your SSD/HDD
Do not connect to the internet until we go to the Desktop *********************************************************************************************************
Post installation.
First step is to install clover boot loader to your internal drive(SSD/HDD)
Use latest clover boot loader (which we already dowloaded ) and
- Select the target of the install to “your system partition” using "Change Install Location"
- select "Customize" (since default is legacy install -> we must change it)
- Check "Install for UEFI booting only", "Install Clover in the ESP" ->automatically selected..
- check your "Bluemac"theme from Themes (or you can choose whatever you like )
- check "OsxAptioFixDrv-64" from Drivers64UEFI
- install clover preferences plane(Optional)
- Get EFI driver for the Clover installer(HFSPlus.efi) https://github.com/JrCs/CloverGrower...64/HFSPlus.efiandcopy it to /EFI/Clover/drivers64UEFI.
RTL8111: https://github.com/RehabMan/OS-X-Realtek-Network
RTL8100: http://www.insanelymac.com/forum/top...hernet-series/
use provided config.plist_for_installer.zip >extract it and place it in EFI>CLOVER
(press “replace” if it asks)
- open this config.plist with clover configurator.app (can be found mackie100projects.altervista.org) -use only if you're not familiar with Xcode
SMBIOS: create your new SMBIOS (Macbook Air 6,2/Macbook Pro 11,1) with suitable Serial Number
- using OS X terminal.app type “uuidgen” (without quotes )several times to get unique one and past only last idin smbios section >SmUUID ...
- save the file and exit from that app.
- make sure that your config.plist is under EFI>clover path with the changes you made!!
- Remove EFI/CLOVER/kexts/10.6, 10.7, 10.8, 10.9, 10.10,10.11 , keeping only 'Other' folder, and copy essential kexts to there.
- post install Essential kexts :- FakeSMC, VoodooPS2Controller...
For this task you might need more attention and effort to get successful results
- Make sure you have read those great posts by RehabMan:
In clover usb drive, go to:EFI>CLOVER>ACPI>origin
- you’ll find bunch of files there, and copy them to folder called DSDT in desktop
- Remove others to trash....
- So now we have only important ACPI files for disassembling precess.
- Also place refs.txt in our DSDT folder
- Get this iasl version and extract and place under /usr/bin path

- Now open terminal app:
Code:
cd ~/Desktop/DSDT
iasl -da -dl -fe refs.txt *.aml- open DSDT.dsl with MaciASL.app and go to preferences >set Compiler options to ACPI 5.0
- Go to Sources tab then add new :
- Name: Laptop patches
- URL: http://raw.github.com/RehabMan/Laptop-DSDT-Patch/master
Note when working with refs.txt please note that in [Guide] Patching LAPTOP DSDT/SSDTs
Close Preferences window, click Patch button, paste the code then apply:The iasl disassembler will place these External declarations before all the other External declarations. This, also, is a poor choice. Most of the time, you'll need to move them so they follow the other External declarations instead of preceding them. It will be obvious as you'll get errors from the External declarations that follow those inserted from refs.txt.
to_DSDT_dsl.txt.zip
click compile ;if no errors you can go to next steps ….(if not you have to fix them)
click patch again :
- Rename GFX0 to IGPU
- 7/8-series USB
- IRQ Fix
- SMBUS Fix
- RTC Fix
- Shutdown Fix 2
- HPET Fix
- OS Check Fix(Windows 7/8 -test with both and choose best for you! )
- AC Adapter Fix
- Add MCHC
- Fix _WAK arg0 2
- Fix PNOT/PPNT
- Add IMEI
- Fix _WAK IAOE
- Rename B0D3 to HDAU
- USB3 _PRW(0x6D)—-to fix instant wake from sleep
- Add MCHC
- [battery]Dell-Inspiron-15-7xxx
- may add if more…(depending on what need to be fixed/errors you have)
Click patch again, and apply this patch(to fix brightness controlling issue ..)
brightness_fix.txt
if it compiles without errors you can continue.. this step is only if you are installing 10.11 or above relating to usb problems.
Again apply this code (by rehabman original post here [Guide] 10.11+ USB changes and solutions)
After compilation without errors save those patched files(in separate location) both ACPI Machine Language Binary(file format:.aml) & disassembled ASL(file format: .dsl>>>>for future modifications/fix problems)
Now find and open SSDT-7.dsl open it with same MaciASL and patch:
- Rename GFX0 to IGPU
- Haswell HD4400/HD4600/HD5000
- Brightness fix (Haswell/broadwell )
- Rename B0D3 to HDAU
File Format: ACPI Machine Language Library, name: SSDT-1.aml in separate location (location like "DSDT/SSD patched"etc..)
[FOR MODEL WITH NVIDIA/AMD]
Go to DSDT folder on desktop, find SSDT-8.dsl, open MacIASL and apply the patch use the code given in txt format)
to_ssdt-8_dsl.txt
Click Compile to check for errors, If no error, you can save the file with File Format: ACPI Machine Language Library, name: SSDT-2.aml in separate location ((location like where you saved your DSDT.aml+SSDT-1.aml)if you have SSDT-9.dslOpen SSDT-9.dsl, apply this patch then save as SSDT-3.aml use the code in txt format)
to_dsdt-9.txt
copy all DSDT.aml+SSDT-1.aml+SSDT-2.aml+SSDT-3.aml[if you have] to /EFI/Clover/ACPI/patched/ (in your internal EFI partition)
For power management:
Generate SSDT for your native power management ; use nguyenmac’s prebook installer
HP Probook Installer Clover Edition
only select SSD generator >install (this tool will patch your cpu PM and place it under EFI>clover>ACPI>patched named “ssdt.aml”)
Done patching DSDT/SSDT section
Kexts installation:
Kexts installation should be done only to /S/L/E or /L/E and no anywhere else (unless otherwise specified ).Kexts installation:
For backlight control with smooth transition using New Brightness kext:-
IntelBacklight.kext(from rehabman)
https://github.com/RehabMan/OS-X-Intel-Backlight
For this kext, you can use your existing:
- PNLF patch ("Brightness Fix (HD3000/HD4000)", or "Brightness Fix (Haswell/Broadwell)",
- Or you can just use the simple "Brightness Fix" (which is easier to apply).
If it didn’t work for your laptop(most of the time it should work this series of laptops)
Try second method:
ACPIBacklight.kext.
- For Haswell, and Broadwell (HD4400/HD4600/HD5000+, HD5500/HD6000+).
Battery driver install: https://github.com/RehabMan/OS-X-ACPI-Battery-Driver
PS2-contraller: https://github.com/RehabMan/OS-X-Voodoo-PS2-Controller
FakeSMC: https://github.com/RehabMan/OS-X-FakeSMC-kozlek
Fix intel HD4400:
https://bitbucket.org/RehabMan/os-x-fake-pci-id/downloads
- Install both FakePCIID.kext and FakePCIID_Intel_HD_Graphics.kext in /System/Library/Extensions,or EFI/Clover/kexts, or /Library/Extensions (10.11+).
- Use config plist >kexts to patch provided(which means again you don’t have to nothing already done for you ).
FYI: card that i used
http://www.ebay.co.uk/itm/Broadcom-...338?pt=LH_DefaultDomain_0&hash=item417ed20142
For WIFI
- place FakePCIID_Broadcom_WiFi.kext+FakePCIID (which we already did) EFI>clover kexts>other
- BrcmPatchRAM2.kext+BrcmFirmwareRepo.kext in System/Library/Extentions using kext installer (kext wizard)
http://www.insanelymac.com/forum/topic/253395-kext-wizard-easy-to-use-kext-installer-and-more/
Disable Hibernation..
Code:
sudo pmset -a hibernatemode 0
sudo rm /var/vm/sleepimage sudo mkdir /var/vm/sleepimage
Final steps….Reset Network Settings to Fix iCloud/AppStore +Fix WiFi issues...
If you use any USB Wifi device, or use Mobile Phones to connect to Internet before completing the guide, you won't be able to access to AppStore or iCloud. You must reset your network settings:- Go to /Library/Preferences/SystemConfiguration/ and delete these files:
- CaptiveNetworkSupport
- com.apple.airport.preferences.plist
- com.apple.network.eapolclient.configuration.plist
- NetworkInterfaces.plist
- com.apple.network.identification.plist
- com.apple.wifi.message-tracer.plist
- preferences.plist
How to add clover as boot option
In your system bios : boot >add boot option(may vary with laptops slightly)
- Boot option name >>Clover(or name you like)>>>press tab
- file system list >do not modify anything >just press tab
- File Name:EFI,BOOT,BOOTX64.efi (each comma should replace with a backslash-

)- save and move clover entry to the top of boot oder
- Go to BIOS, move the Clover boot entry to top.
Fix Audio:By using rehab man’s ALC 283 kext)
Lenovo-U430-Touch-DSDT-Patch install ALC_283kext using kext wizardAudio: After installing new/updated kexts or after the initial installation, you may lose audio.
To fix:
- reboot without caches (hit space at Clover, select without caches)
- rebuild cache:in terminal paste this code..
Code:
sudo touch /System/Library/Extensions && sudo kextcache -u /- reboot normally (if needed, two times)
- update about audio in 10.11.4 :[Fix] 10.11.4 broken audio with AppleHDA injector (dummyHDA)
install codec commander from rehabman in S/L/E
RehabMan/EAPD-Codec-Commander
Display garble when El Capitan/Yosemite boots up
[Fix] Resolve boot screen garble
Can't control brightness/volume with multimedia keys?
If you have a issue like this:"Laptop won't sleep/shutdown after a few hours of uptime"
which can be fixed by updating ME firmware ,either you can fix it by adding kexts to patch under kernel and kext patches in provided config plist(note
atches not included in the given config.plist)original patch by Vbo
Code:
<dict>
    <key>Name</key>
    <string>AppleIntelFramebufferAzul</string>
    <key>Comment</key>
    <string>AppleIntelMEIDriver::writeMessageToME</string>
    <key>Find</key>
    <string>4883EC1844894DD04589C589CB</string>
    <key>Replace</key>
    <string>4883EC18E9E5010000909089CB</string>
</dict>
<dict>
    <key>Name</key>
    <string>AppleIntelFramebufferAzul</string>
    <key>Comment</key>
    <string>AppleMEClientController::start</string>
    <key>Find</key>
    <string>4885C00F8405030000488B05E50D0100488945D0</string>
    <key>Replace</key>
    <string>4885C0E90603000090488B05E50D0100488945D0</string>
</dict>NO Bluetooth after wake from sleep?
some users have reported they have no BT after wake from sleep, which implies either you have installed kexts wrongly or your port injector is not implemented wrongly ....(or some other prob..) http://www.tonymacx86.com/el-capitan-laptop-support/178406-solved-no-bt-after-sleep-4.html
fix usb fix El Capitan
You’ll need to create a port injector to fix your various usb related issues (most of time usb 3.0).
Here I’ll attach my injector for dell 7537 (but better to create your own by following this guide:[Guide] 10.11+ USB changes and solutions )
Fix iMessages :How to Fix iMessage
Windows 10/8 UEFI Dual Boot-
Use Disk Utility to prepare a Mac OS X Extended partition (don’t use Fat32, Disk Utility will mess up your drive)- Create a FAT32 usb drive, extract Windows 10/8 64-bit iso there or use this nice tool (rufus)to create bootable UEFI usb using a windows based machine- Boot with usb drive, format the new partition to NTFS, install Windows there.
- Go to BIOS, move the Clover boot entry to top.
Update from Yosemite to El Capitan.
- Perform a full backup..
- update clover to latest:http://sourceforge.net/projects/cloverefiboot/
- Update kexts to latest version..
- Make sure you have latest kexts to patches in config plist ..
- build you port injector using this guide: [Guide] 10.11+ USB changes and solutions
Good luck!!!
Tested laptops: Dell 7537 &dell 3537
Before Problem reporting:
Make sure your profile/signature reflects your hardware details:
Please provide complete details in your profile/signature
(Profile/Settings link in upper right corner of this site)
System: manufacturer/model + bootloader(Clover/Chameleon/Chimera)
CPU: detailed CPU model + motherboard chipset
Graphics: all graphics devices + laptop internal screen resolution
For example, typical Ivy laptop:
System: HP ProBook 4540s (Clover)
CPU: i5-3320m/HM76
Graphics: HD4000, 1366x768
Use CPU-Z on Windows to find CPU (Core iX-xxx) and motherboard chipset (HMxx), and graphics capabilities. For a laptop, these details are important and affect critical installation procedures.
It is a good idea to collect complete hardware information before you even start.
Credits:nguyenmac, RehabMan,vbo, JVital2013, the-darkvoid and people from this forum and all others
Notice:files have been updated in zip format and extract before use them properly
Attachments
-
config.plist_for_installer.zip2.3 KB · Views: 1,959
-
USBXHC_Dell.kext.zip2.7 KB · Views: 1,093
-
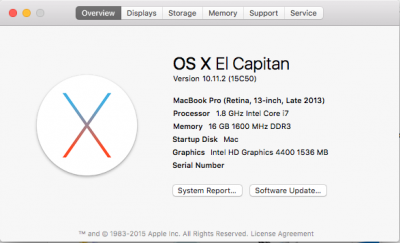 10.11.2.png60.2 KB · Views: 1,875
 -
to_DSDT_dsl.txt.zip1.3 KB · Views: 1,745
-
refs.txt.zip301 bytes · Views: 1,002
-
brightness_fix.txt.zip391 bytes · Views: 969
-
usb_renam.txt.zip739 bytes · Views: 703
-
to_ssdt-8_dsl.txt.zip972 bytes · Views: 830
-
to_ssdt-9.txt.zip887 bytes · Views: 771
Last edited:
