- Joined
- May 1, 2010
- Messages
- 385
- Motherboard
- motherboard or system make & model # > See Rules!
- CPU
- Intel> Need model # > See Rules!
- Graphics
- Graphics > model # > See Rules!
- Mac
- Mobile Phone
My built is inspired by Minihack's and WonkeyDonkey's works
on the same NUC on Maverick & Yosemite.
Latest version supported : MacOSX 10.11.6 (15G31)
Files 2016 05 02 / Clover r3354 / BIOS 41
on the same NUC on Maverick & Yosemite.
| Components | Installation | Configuration | Troubleshooting | Files |
Latest version supported : MacOSX 10.11.6 (15G31)
Files 2016 05 02 / Clover r3354 / BIOS 41
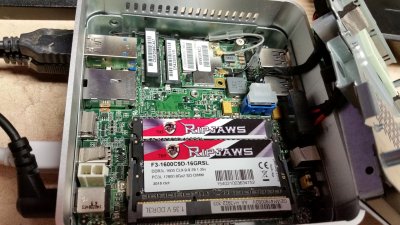
Components
|
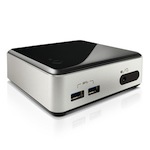
BOXD54250WYK2
Intel Core i5-4250U
Intel Graphic HD5000
Audio Realtek ALC283
LAN Intel I218-V | |||
|
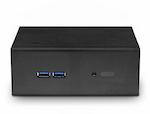
Streacom NC2
Fanless Chassis
4x INFI2 Internal WiFi Antenna | |||
|
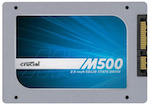
Crucial M500
SSD
SATA III (6Gb/s)
480 GB |
|||
|
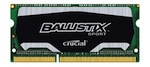
2 x Crucial 8 Go So-Dimm DDR3L
Ballistix Sport
PC 12800 1600Mhz CL9
BLS8G3N169ES4CEU
(DD3L 1,35v, not DDR3 1,5v)(PASR support) |
|||
|
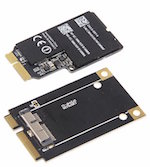
Broadcom BCM94360CDAX
Genuine Apple BCM94360 chipset
802.11 ac/n/g/b & Bluetooth 4.0
Mini-PCIe adapter (Full Size) |
Installation
1. Download MacOSX 10.11 "El Capitan" from the AppStore
2. Create a Bootable USB Drive / Create a partition for MacOSX
For the USB drive and the future MacOSX drive (if this one is not accessible perform the same from DiskUtility of the installer)
- Partition Table : GUID
- Number of partitions : at least 1 partition
- Size : at least 8 GB
- Format: Mac OS Extended (Journaled)
- Name : "USB" / "ElCapitan"
3. Create an Installer on this USB Drive
Choose the method of your choice :
- CreateInstallMedia
Code:sudo /Applications/Install\ OS\ X\ El\ Capitan.app/Contents/Resources/createinstallmedia --volume /Volumes/USB --applicationpath /Applications/Install\ OS\ X\ El\ Capitan.app --nointeraction - Detailed Unibeast method
- Restore InstallESD.dmg
- ...
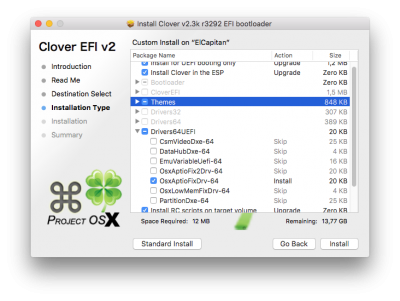
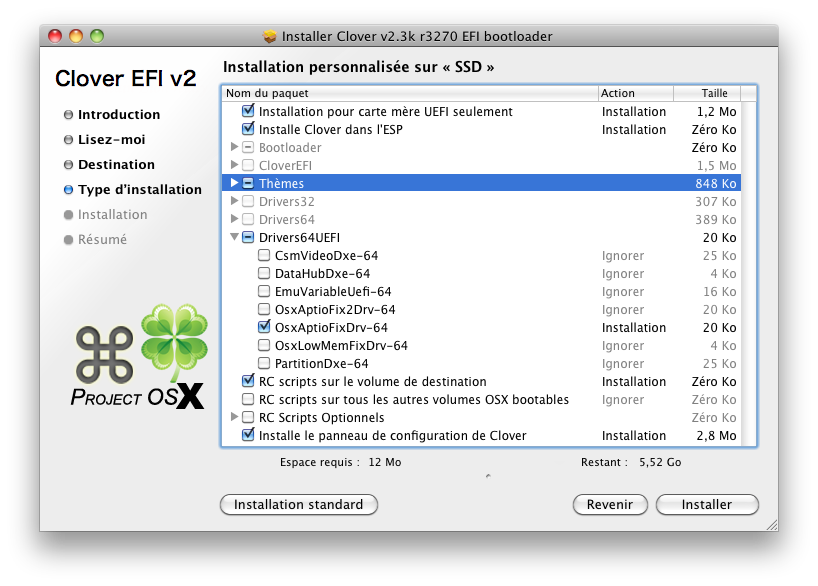
4. Install Clover this USB Drive
- Run the Installer
- Install for uefi booting only
- Install clover in the esp
- Drivers64 > Osxaptiofixdrv64 or Osxaptiofix2drv64
- Install rc scripts on target volume
- install Clover Configuration Panel
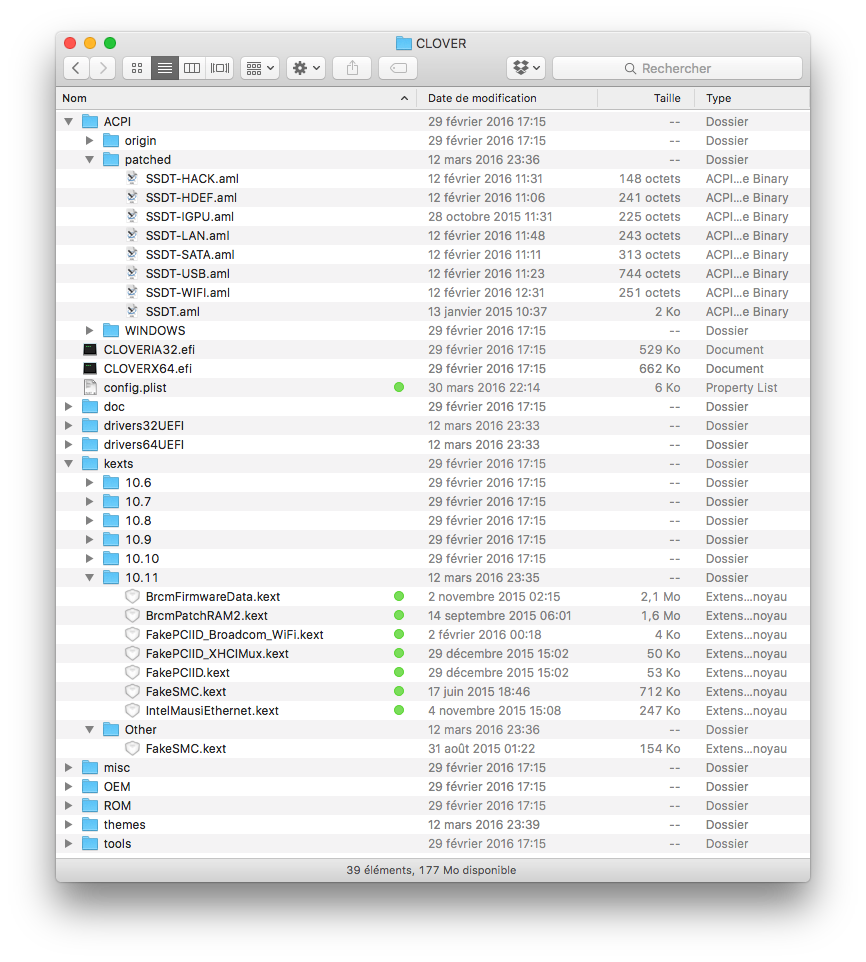
- Mount EFI partition of the USB Drive
- Copy the files from my package /Clover/* to /EFI/EFI/CLOVER/*
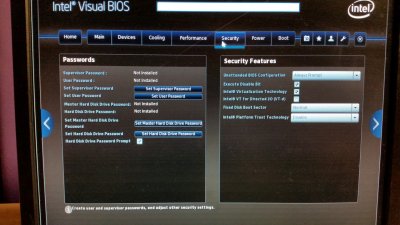
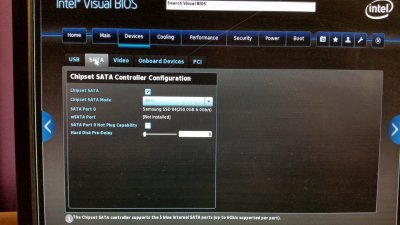
5. BIOS Settings (Credits ammulder)
Press F2 during boot to access BIOS
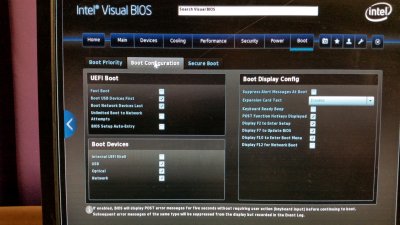
a. Boot > Boot Priority.
Enable 'UEFI Boot' and disable 'Legacy Boot' :
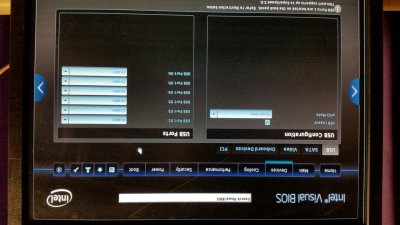
b. Boot > Boot Configuration
Enable 'Boot USB Devices First'
Disable 'Network Boot'
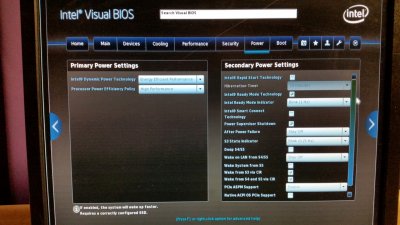
c. Power > Secondary Power Settings
Set Wake on LAN from S4/S5 to "Stay Off"
d. Security > Intel(R) VT for Directed I/O (VT-d).
Disable 'VT-d'
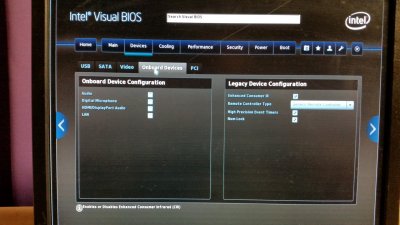
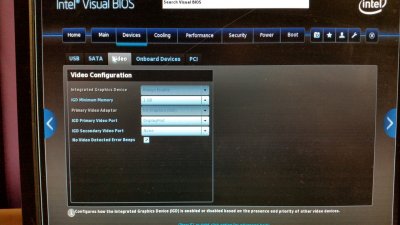
e. Devices > Video.
Set the "IGD Minimum Memory" to 128 Mo
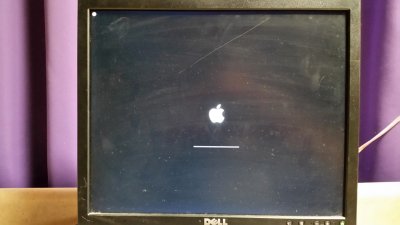
6. Install MacOS X 10.11 "El Capitan"
- Reboot (automatically on this USB Device ... normally)
- Select "Boot Mac OS X from USB" from Clover GUI
- Perform the install (if necessary format your HDD/SSD with Utility/DiskUtility from the upper menu bar)
7. Post-Installation
- Reboot (automatically on this USB Device ... normally)
- Select "Boot Mac OS X from El Capitan" from Clover GUI
- Complete MacOS X setup
- Install Clover on your "ElCapitan" HDD/SSD (same settings as above for USB)
- Mount EFI partition of your "ElCapitan" HDD/SSD
- Copy the files from my package /Clover/* to /EFI/EFI/CLOVER/*
- Customize your config.plist (serial and 5GHz patch)
- Copy AppleHDA_ALC283_out.kext in "ElCapitan" /System/Library/Extensions/ folder if you don't use Microphone
- Copy AppleHDA_ALC283.kext in "ElCapitan" /System/Library/Extensions/ folder if you use Microphone
- Run script "HDA permissions.command"
(enter your password when asked) - Unplug your USB Drive
- Reboot
- ...
- Enjoy
")

Configuration
SSDT
- SSDT.aml : CPU Power Management for Intel Core i5 4250U (Generated by ssdtPRGen)
- SSDT-HACK.aml : Region Fix
- SSDT-HDEF.aml : Audio HDEF "layout-id 1" (former SSDT-2.aml)
- SSDT-IGPU.aml : Graphics IGPU "0x0a26000d", Digital Audio HDAU (former SSDT-3.aml)
- SSDT-LAN.aml : DSM_ method for LAN Intel I218-V (cosmetic)
- SSDT-SATA.aml : SATA support (part of former SSDT-1.aml)
- SSDT-USB.aml : USB support (part of former SSDT-1.aml)
Config.plist
- ACPI>DSDT (USB reboot instead of shut down issue)
- Fixes / FixShutdown_0004 : Yes
- SlpSmiAtWake : Yes
- Fixes / FixShutdown_0004 : Yes
- Boot Arguments : none
- Graphics (Optional. Should be handled by SSDT)
- Inject / Intel : Yes
- ig-platform-id : 0x0a26000d
- Inject / Intel : Yes
- KernelAndKextPatches
- Asus : Yes (MSR 0xE2 bit 15 locked)
- KernelPM : Yes (MSR 0xE2 bit 15 locked)
- KextToPatch
- HDMI Audio Out
Code:
Comment 0x5 port DP>HDMI Name AppleIntelFramebufferAzul Find 0105 0900 0008 0000 0701 0000 Replace 0105 1200 0008 0000 0701 0000 - Trim Enabler
Code:
Comment Trim Enabler Name IOAHCIBlockStorage Find 4150504C4520535344 Replace 000000000000000000 - ALC283
Code:
Comment ALC283 | Zero ALC884 | Zero 1983 Name AppleHDA | AppleHDA | AppleHDA Find 8419D411 | 8408EC10 | 8319D411 Replace 8302EC10 | 00000000 | 00000000 - Second Boot Stage
Code:
Comment    Second Boot Stage
Name    IOGraphicsFamily
Find    0100007517
Replace    0100007417
- HDMI Audio Out
- Asus : Yes (MSR 0xE2 bit 15 locked)
- RtVariables
- CsrActiveConfig : 0x67 01100111
- BooterConfig : 0x28 00101000
- CsrActiveConfig : 0x67 01100111
- SMBIOS : MacMini Late 2014 (MacMini7,1)
BiosVendor Apple Inc. BiosVersion MM71.88Z.0220.B00.1409291751 Board-ID Mac-35C5E08120C7EEAF BoardManufacturer Apple Inc. BoardType 10 ChassisAssetTag Mini-Aluminum ChassisManufacturer Apple Inc. ChassisType 16 Family Mac mini Manufacturer Apple Inc. Mobile <false/> ProductName MacMini7,1 SerialNumber CK2wwrrrGCVH Trust <false/> Version 1.0
Kext
- FakeSMC.kext (Source)
- FakePCIID.kext & FakePCIID_XHCIMux.kext (Source) EHC(USB2.0) vs XHC(USB3.0) routing by Rehabman
- IntelMausiEthernet.kext : (Source)Ethernet support for Intel I218-V
- BrcmPatchRAM2.kext & BrcmFirmwareData.kext (Source) BCM94352HMB Bluetooth support
Audio ALC283
You have to choose between 2 kexts according what you uses the most : none of them is perfect ...
Always run the script "HDA permissions.command" after any modification on Audio.
- AppleHDA_ALC283_out.kext is "one plug only" for AudioIn (you need to reboot if you loose AudioIn) but it has no issue with quality drop after a few seconds if not used for AudioOut (EAPD Support, codec remains alive)
- AppleHDA_ALC283.kext is hot plug compatible for AudioIn (system detects presence of MIC) but it has issue with quality drop after a few seconds if not used for AudioOut (lack of EAPD Support, codec sleeps, a Sleep/wake cycle wakes it)
- PathMap
Headphone OUT
2 > 12 > 33 (dec)
MIC2
25 > 35 > 8 (dec)
- Verbs
Code:01971c10 01971d01 01971ea0 01971f90 01970c02 02171c50 02171d10 02171e21 02171f03 02170c02
- SSDT-WIFI.aml : WIFI support for BCM94352HMB (former SSDT-4.aml)
- KernelAndKextPatches
- KextToPatch
- BCM94352HMB
Customize your own patch : 66C706xxxxEB2B according to this page.Code:
Comment  Airport Extreme | Custom 5 GHz
Name     AirPortBrcm4360 | AirPortBrcm4360
Find     6B100000750D    | 4183FCFF742C48
Replace  6B1000009090    | 66C706xxxxEB2B
Code:Comment HandOff Name IOBluetoothFamily Find 4885FF7447488B07 Replace 41BE0F000000EB44
- BCM94352HMB
- KextToPatch
- Kext
- FakePCIID.kext & FakePCIID_Broadcom_WiFi.kext (Source) BCM94352HMB wifi support by Rehabman
Troubleshooting
- For troubleshoot attach Rapport.zip generated by the Hack_Report_Clov command attached to this post
- Huge screen resolution tested :
->3840 x 2160 @ 45 Hz (post#130, franzzup)
->3440 x 1440 @ 50 Hz (32bit) (post#96, gorila)
->1920 x 1200 @ 60 Hz (32bit) (post#1, sebinouse) - No Volume Control on HDMI Output : see #post426
- Installer not showing in Clover GUI (post#2, craig5571):
-> re-create the installer from scratch (prefer createinstallmedia command) - Installer not loading completely (spinning wheel) (post#7, craig5571):
-> use recent config.plist (2015 11 01 or newer), with "SystemParameters" populated - No ethernet after sleep (post#39 , innatech):
-> use Mausi'kext (post#59) instead of AppleIntelE1000e - Different wifi card (post#81, PaulyGlocke):
->Remove SSDT-4.aml - Nuc D34010WYK (Intel Core i3) (post#139, post#140& #post194, intopieces & bomsom):
-> Different files are needed : config.plist, SSDT.aml, SSDT-3.aml, 2 kexts for graphics, another HDMI audio patch and "IGP min mem"=32MB in BIOS
Files
Get Latest BIOS
Get Latest Clover Installer
2015 11 01 : New config.plist to allow Install
2016 02 12 : New solutions for ALC283, Ethernet, Wifi, BT, SSDTs
2016 05 02 : Instructions for ALC283, no more BCM94352 support
Attachments
Last edited: