P1LGRIM
Moderator
- Joined
- Mar 2, 2012
- Messages
- 26,462
- Motherboard
- Lenovo ThinkStation p700
- CPU
- 2x E5-2620 V3
- Graphics
- RX 560
- Mac
- Classic Mac
- Mobile Phone
[SUCCESS] P1LGRIM's Quick & Easy Build - Z77-DS3H Rev.1.0 F9 - i5 2500K - HD6850 - 16GB - Mountain Lion 10.8.3
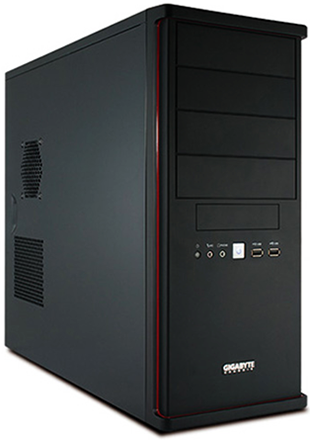
GIGABYTE GZ-X7 Black Middle Tower Case
[AMAZON-uk]http://www.amazon.co.uk/Gigabyte-24ZX7-BMD100-00R-gz-x7/dp/B00314O31E[/AMAZON-uk]
 Alpine 650W PSU 120mm Lo-Noise Red Fan 4 x SATA Black Casing
[AMAZON-uk]http://www.amazon.co.uk/ALPINE-120MM-LO-NOISE-CASING-RETAIL/dp/B004L5CWPQ[/AMAZON-uk]
 Gigabyte Z77-DS3H Skt 1155 Motherboard
[amazon-uk]http://www.amazon.co.uk/Gigabyte-GA-Z77-DS3H-SKT-1155-Z77-DS3H-Motherboard/dp/B007KZQFOS[/amazon-uk]
 Intel Sandybridge i5-2500K Unlocked Core i5 Quad-Core Processor
[AMAZON-uk]http://www.amazon.co.uk/Intel-Sandybridge-i5-2500K-Quad-Core-Processor/dp/B004FA8NX2[/AMAZON-uk]
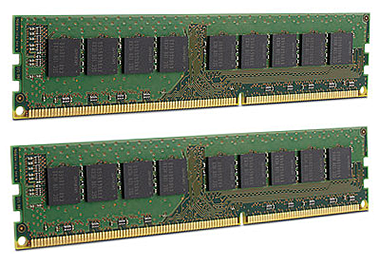 16GB DDR3 1600 Mhz RAM (2 x 8GB) - I can't remember which manufacturer's memory I used - They are covered with heat spreaders so I can't read them now.
 Asus 1GB Radeon HD 6850 DirectCU PCI-E 2
[amazon-uk]http://www.amazon.co.uk/Asus-Radeon-6850-DirectCU-PCI-E/dp/B004HXW5OU/[/amazon-uk]
 Western Digital WD AV 250GB 7200rpm 8MB, WD2500AVJS
[AMAZON-uk]http://www.amazon.co.uk/Western-Digital-250GB-7200rpm-WD2500AVJS/dp/B002S4OQ4M[/AMAZON-uk]
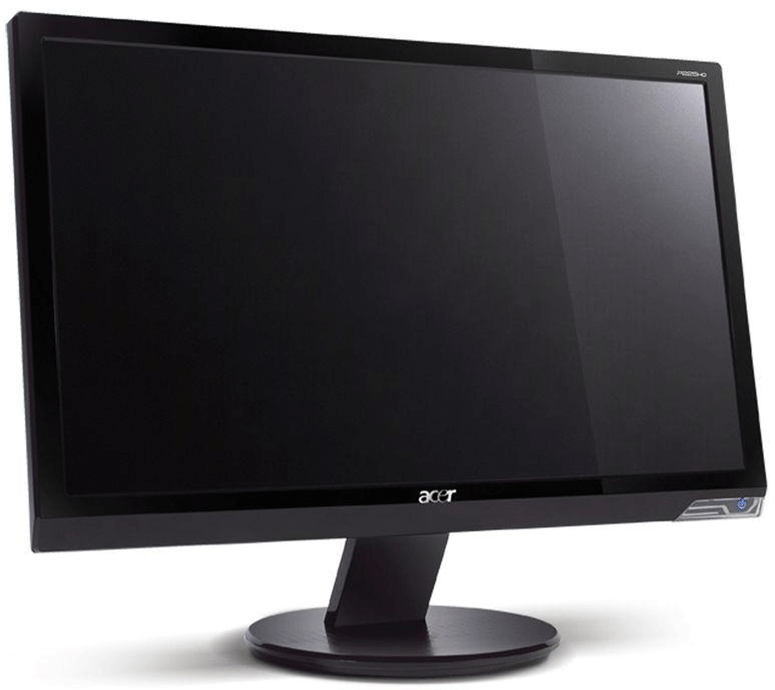 Acer P225HQ 21.5inch Wide LCD, TFT Monitor, 50000:1, 5m, 300/m2, VGA, DVI, Glossy Black
[amazon-uk]http://www.amazon.co.uk/Acer-P225HQ-21-5inch-Monitor-50000/dp/B002PU9R7K[/amazon-uk]
 Logitech S-150 USB Speakers Black
[AMAZON-uk]http://www.amazon.co.uk/Logitech-S-150-Speakers-Black-980-000029/dp/B002FO8NT4[/AMAZON-uk]
 Cherry Initial For Mac Usb Keyboard (white)
[AMAZON-uk]http://www.amazon.co.uk/Cherry-Initial-For-Keyboard-white/dp/B002JIKR72[/AMAZON-uk]
 Gaming Grade Optical USB Mouse
Came from eBay - Practically any USB mouse of your choice should be fine.
Comments
This is an extremely straightforward build and it should be possible for even someone with no prior knowledge of Hackintoshes to complete with relative ease.
It should be noted that there are two versions of this system board at the time of writing - This document relates to the Revision 1.0 version only.
The system was originally assembled and tested with Windows 7 - I also upgraded the BIOS to F9 at this time.
At the start of the build I replaced the Windows hard drive with a blank one.
I already had most of the parts but in the spirit of supporting the site I am including links for them where they are available.
Preparation
Download Unibeast - Mountain Lion 1.7.0 and Multibeast - Mountain Lion 5.2.1 from here : http://www.tonymacx86.com/downloads.php?do=cat&id=3
Create your USB flash drive as per the instructions up to the end of STEP 2 - Do NOT continue with STEP 3 and beyond : http://www.tonymacx86.com/61-unibeast-install-os-x-mountain-lion-any-supported-intel-based-pc.html
Copy MultiBeast to your USB flash drive.
BIOS Configuration
Power on and press [del] to enter BIOS setup

Press [F7] to load Optimized Defaults

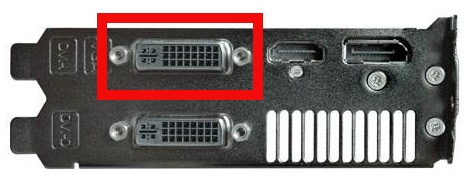
When the system has restarted, power off and connect monitor to the onboard graphics DVI connector
Installation
Insert USB flash drive
Power the system on
Press [F12] to select the boot menu
Select your USB flash drive and press [Enter]
When the bootloader screen appears type :
GraphicsEnabler=No
Press [Enter]
Choose the language for the installation - English in my case
Click the flag on the menu bar to select the desired nationality - British in my case
Click Utilities on the menu bar and select Disk Utility
Select your hard drive in the left pane then click Partition
Under Partition Layout click Current and then 1 Partition
Click Options and select GUID Partition Table - Click OK
Give your partition a name - eg Hackintosh
Click Apply - Click Partition
Quit Disk Utility
Click Continue
Click Agree
Click on the icon for your hard drive
Click Install
Watch the progress bar crawl across the screen
The screen will go blank for some time and then the system will restart
Press [F12] to select the boot menu
Select your USB flash drive and press [Enter]
Select Your Hackintosh Drive with the arrow keys and then type GraphicsEnabler=No
Press [Enter]
Chose your location - United Kingdom in my case
Click Continue
Choose your keyboard layout - British in my case
Click Continue
Select Not now - Click Continue
Enable Location Services if you wish and click Continue
Enter your Apple ID and Password and click Continue or click Skip
Click Continue for the Terms and Conditions and then click Agree
Fill in your account details and click Continue
Select your Time Zone and click Continue
Click on Skip at the registration screen
Click on Start using your Mac
Click on the apple symbol in the top left corner of the screen then click System Preferences
Click Security & Privacy
Click the Lock icon and then enter your password - Click Unlock
Change Allow applications downloaded from : to Anywhere and click Allow From Anywhere
Click the Lock icon to close it
Quit System Preferences
MultiBeast
Double Click your USB flash drive icon to open it
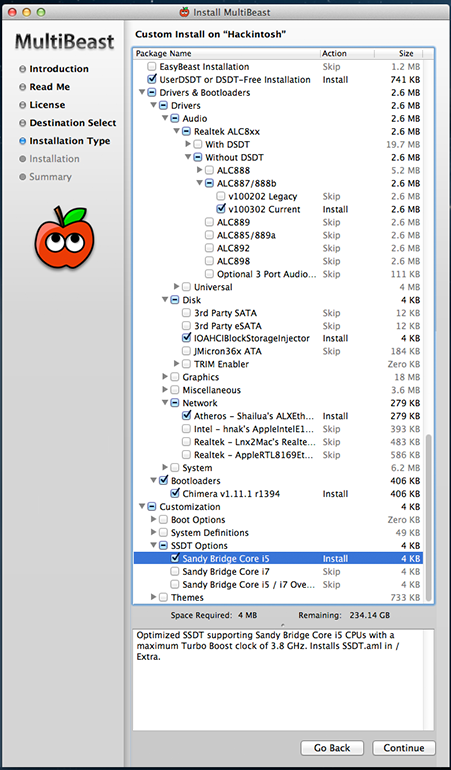
Run Multibeast
Select options shown
Click Continue three times and then Agree
Now, click Continue then Install
Enter your password and click Install Software
When the installation has completed click Close
Click Launchpad on the dock
Click the container called Other
Click Disk Utility
Select your Hackintosh partition in the left pane
Click Repair Permissions
When it has completed Quit Disk Utility
Click on the apple symbol in the top left corner of the screen then click Shutdown - Shutdown
Remove USB
Power on and press [del] to enter BIOS setup

Set Peripherals / Init Display First to Auto

Set Peripherals / Internal Graphics to Disabled
Press [F10] to Save & Exit
Power on
When the system restarts it will boot into Mountain Lion and you may begin customization.
This build has now been updated :
http://www.tonymacx86.com/user-builds/109948-success-p-lgrims-8ball-build-z77-ds3h-rev-1-0-f9-i5-2500k-hd6850-16gb-ml-10-8-5-a.html
The new build is even simpler.
P1LGRIM's Quick & Easy Build - Z77-DS3H Rev.1.0 F9 - i5 2500K - HD6850 - 16GB - Mountain Lion 10.8.3
Components
GIGABYTE GZ-X7 Black Middle Tower Case
[AMAZON-uk]http://www.amazon.co.uk/Gigabyte-24ZX7-BMD100-00R-gz-x7/dp/B00314O31E[/AMAZON-uk]
[AMAZON-uk]http://www.amazon.co.uk/ALPINE-120MM-LO-NOISE-CASING-RETAIL/dp/B004L5CWPQ[/AMAZON-uk]
[amazon-uk]http://www.amazon.co.uk/Gigabyte-GA-Z77-DS3H-SKT-1155-Z77-DS3H-Motherboard/dp/B007KZQFOS[/amazon-uk]
[AMAZON-uk]http://www.amazon.co.uk/Intel-Sandybridge-i5-2500K-Quad-Core-Processor/dp/B004FA8NX2[/AMAZON-uk]
[amazon-uk]http://www.amazon.co.uk/Asus-Radeon-6850-DirectCU-PCI-E/dp/B004HXW5OU/[/amazon-uk]
[AMAZON-uk]http://www.amazon.co.uk/Western-Digital-250GB-7200rpm-WD2500AVJS/dp/B002S4OQ4M[/AMAZON-uk]
[amazon-uk]http://www.amazon.co.uk/Acer-P225HQ-21-5inch-Monitor-50000/dp/B002PU9R7K[/amazon-uk]
[AMAZON-uk]http://www.amazon.co.uk/Logitech-S-150-Speakers-Black-980-000029/dp/B002FO8NT4[/AMAZON-uk]
[AMAZON-uk]http://www.amazon.co.uk/Cherry-Initial-For-Keyboard-white/dp/B002JIKR72[/AMAZON-uk]
Came from eBay - Practically any USB mouse of your choice should be fine.
Comments
This is an extremely straightforward build and it should be possible for even someone with no prior knowledge of Hackintoshes to complete with relative ease.
It should be noted that there are two versions of this system board at the time of writing - This document relates to the Revision 1.0 version only.
The system was originally assembled and tested with Windows 7 - I also upgraded the BIOS to F9 at this time.
At the start of the build I replaced the Windows hard drive with a blank one.
I already had most of the parts but in the spirit of supporting the site I am including links for them where they are available.
Preparation
Download Unibeast - Mountain Lion 1.7.0 and Multibeast - Mountain Lion 5.2.1 from here : http://www.tonymacx86.com/downloads.php?do=cat&id=3
Create your USB flash drive as per the instructions up to the end of STEP 2 - Do NOT continue with STEP 3 and beyond : http://www.tonymacx86.com/61-unibeast-install-os-x-mountain-lion-any-supported-intel-based-pc.html
Copy MultiBeast to your USB flash drive.
BIOS Configuration
Power on and press [del] to enter BIOS setup
Press [F7] to load Optimized Defaults
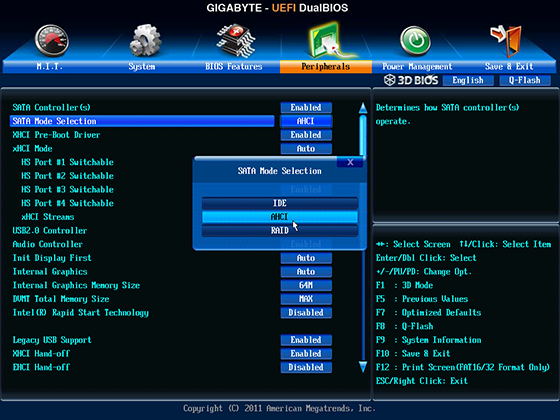
Set Peripherals / SATA Mode Selection to AHCI
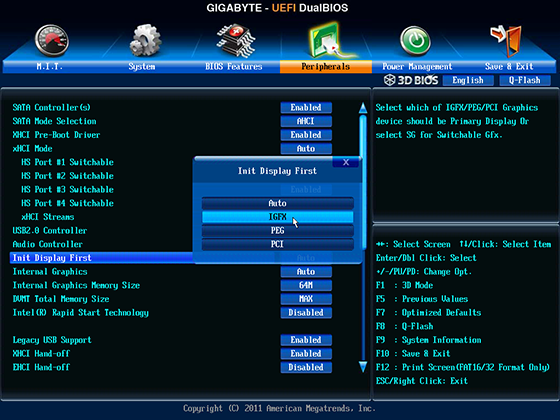
Set Peripherals / Init Display First to IGFX
Press [F10] to Save & Exit
When the system has restarted, power off and connect monitor to the onboard graphics DVI connector
Installation
Insert USB flash drive
Power the system on
Press [F12] to select the boot menu
Select your USB flash drive and press [Enter]
When the bootloader screen appears type :
GraphicsEnabler=No
Press [Enter]
Choose the language for the installation - English in my case
Click the flag on the menu bar to select the desired nationality - British in my case
Click Utilities on the menu bar and select Disk Utility
Select your hard drive in the left pane then click Partition
Under Partition Layout click Current and then 1 Partition
Click Options and select GUID Partition Table - Click OK
Give your partition a name - eg Hackintosh
Click Apply - Click Partition
Quit Disk Utility
Click Continue
Click Agree
Click on the icon for your hard drive
Click Install
Watch the progress bar crawl across the screen
The screen will go blank for some time and then the system will restart
Press [F12] to select the boot menu
Select your USB flash drive and press [Enter]
Select Your Hackintosh Drive with the arrow keys and then type GraphicsEnabler=No
Press [Enter]
Chose your location - United Kingdom in my case
Click Continue
Choose your keyboard layout - British in my case
Click Continue
Select Not now - Click Continue
Enable Location Services if you wish and click Continue
Enter your Apple ID and Password and click Continue or click Skip
Click Continue for the Terms and Conditions and then click Agree
Fill in your account details and click Continue
Select your Time Zone and click Continue
Click on Skip at the registration screen
Click on Start using your Mac
Click on the apple symbol in the top left corner of the screen then click System Preferences
Click Security & Privacy
Click the Lock icon and then enter your password - Click Unlock
Change Allow applications downloaded from : to Anywhere and click Allow From Anywhere
Click the Lock icon to close it
Quit System Preferences
MultiBeast
Double Click your USB flash drive icon to open it
Run Multibeast
Select options shown
MultiBeast Configuration
Click Continue three times and then Agree
Now, click Continue then Install
Enter your password and click Install Software
When the installation has completed click Close
Click Launchpad on the dock
Click the container called Other
Click Disk Utility
Select your Hackintosh partition in the left pane
Click Repair Permissions
When it has completed Quit Disk Utility
Click on the apple symbol in the top left corner of the screen then click Shutdown - Shutdown
Remove USB
Power on and press [del] to enter BIOS setup
Set Peripherals / Init Display First to Auto
Set Peripherals / Internal Graphics to Disabled
Press [F10] to Save & Exit
When the system has restarted, power off and connect monitor to the HD6850 graphics card DVI connector.
Power on
When the system restarts it will boot into Mountain Lion and you may begin customization.
This build has now been updated :
http://www.tonymacx86.com/user-builds/109948-success-p-lgrims-8ball-build-z77-ds3h-rev-1-0-f9-i5-2500k-hd6850-16gb-ml-10-8-5-a.html
The new build is even simpler.
Last edited by a moderator: