- Joined
- May 27, 2010
- Messages
- 2,364
- Motherboard
- Dell Optiplex 9030 All in One
- CPU
- i5-4690K
- Graphics
- HD 4600
- Mac
- Classic Mac
- Mobile Phone

Components
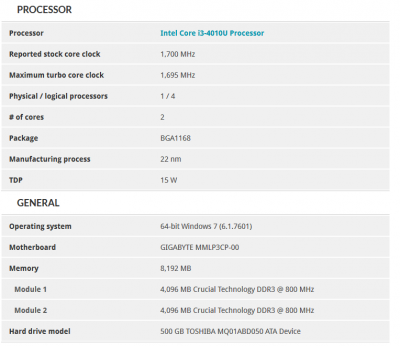
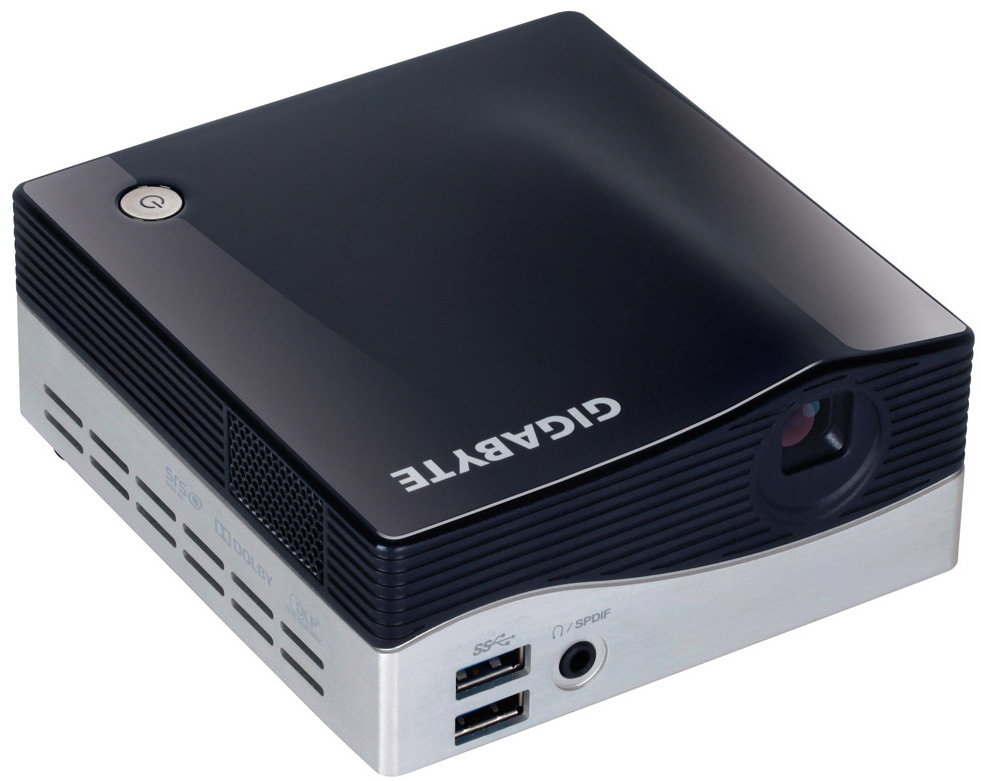
GIGABYTE GA-BXPi3—4010u. This was purchased new from eBay UK seller for £120
V8.0 EXP GDC Beast Laptop External Independent Video Card Dock Mini PCI-E — Purchased for £40
http://www.ebay.co.uk/itm/V8-0-EXP-...864835?hash=item2a5cb30e03:g:FqAAAOSwgyxWUGEe
Extra hard drive cable - £40*
8GB of Crucial low voltage memory CT51264BF160B.C16 - £32
[Amazon-uk]http://www.amazon.co.uk/Crucial-CT2KIT51264BF160B-PC3-12800-Unbuffered-NON-ECC/dp/B005LDLVAO//Amazon-uk]
Samsung 250GB 850 EVO mSATA SSD - £76
[Amazon-uk]http://www.amazon.co.uk/Samsung-250GB-850-EVO-mSATA/dp/B00TV49YFS/[/Amazon-uk]
Bluetooth Adapter Dongle, GMYLE® Ultra-Mini USB Broadcom BCM20702 - £8
Already Owned
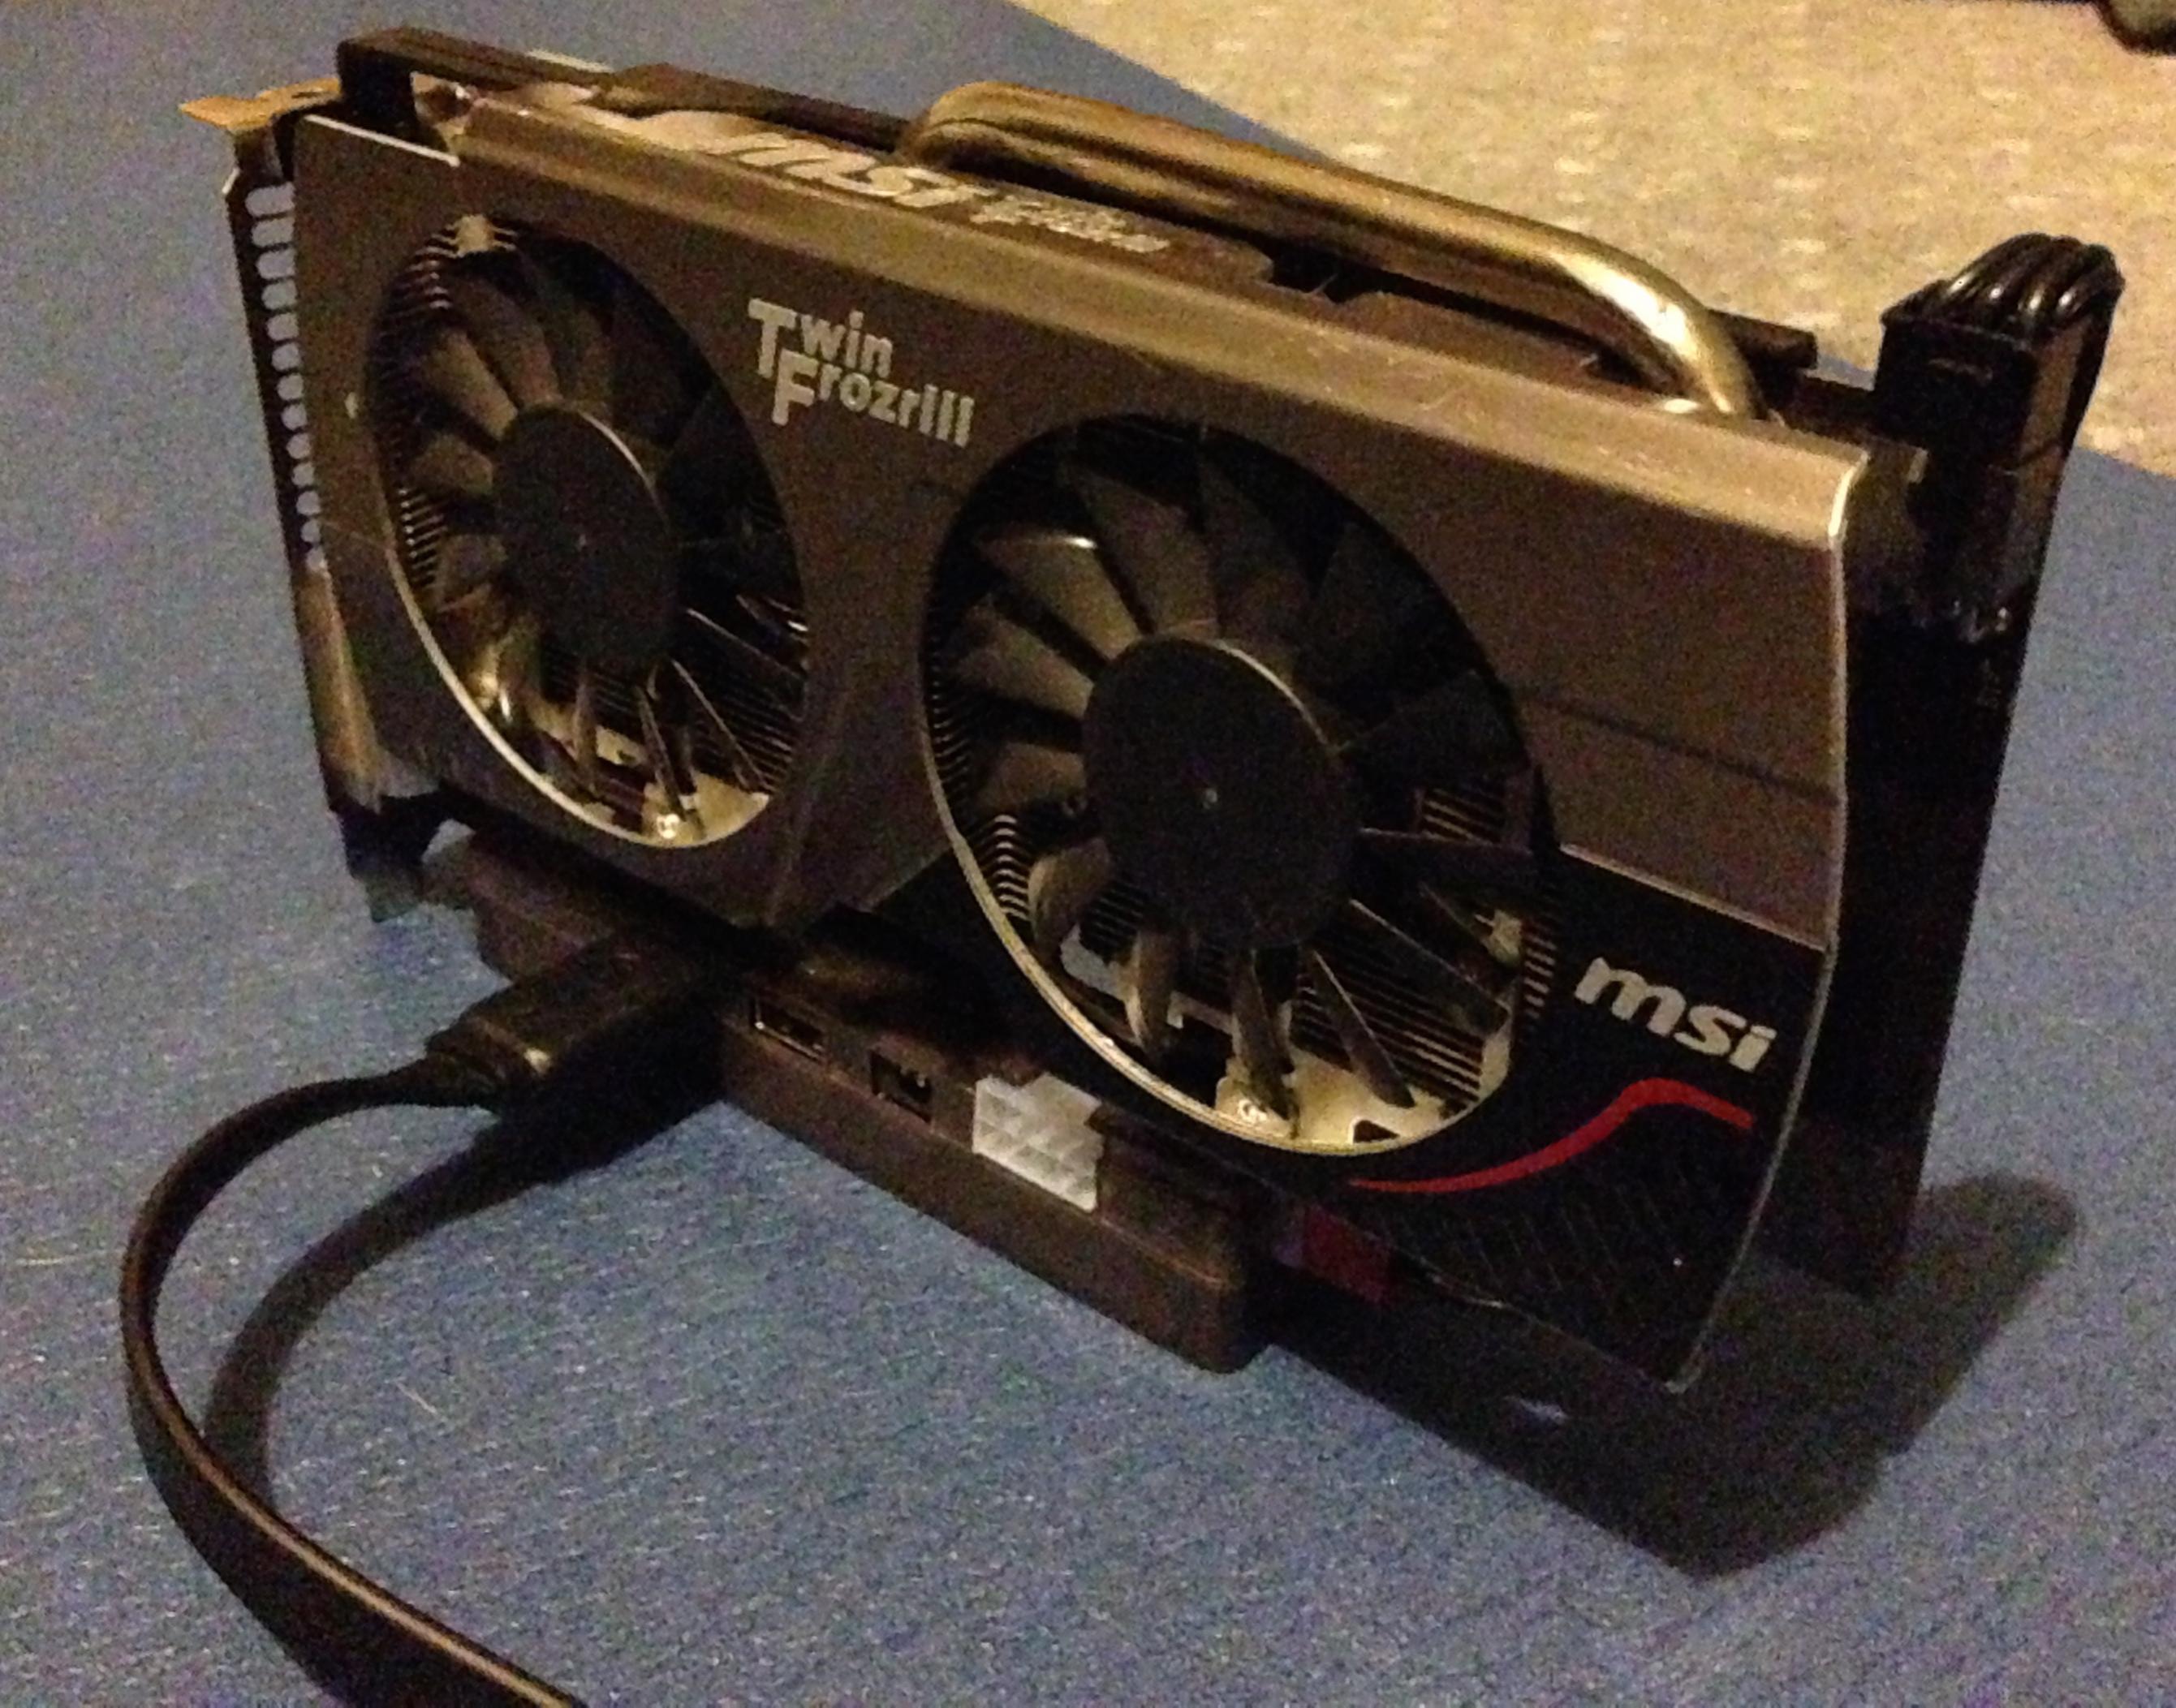
1 x MSI GTX 660 2GB Twin Frozr III - currently these are available on eBay for £85 approx.
150W 12v adapter- £15 eBay or Genuine Dell for £30
500GB hard drive 2.5” - £30
Total Outlay £316 or, if I include current prices for parts I owned already, then rises to £446
Comments.
This was to replace my NUC build which is moving along to my wife. Also I wanted to tackle an interesting member of the Brix family that at launch was super expensive but it had been tumbling in price to the point where I tracked down a new but ex-demo model for £120 (£200 less than the launch price).
This model with projector was shunned by people who just wanted a PC and also avoided by those who wanted a projector. If you want a PC why pay more for a projector? If you want a projector then why buy a mediocre one?
My reason to go for it was that the PC is the basis for the BXi3 4010U and examination of the main board showed it was identical - in fact the version without add on board for the projector has the solder pads for the projector connection (!) but not the connector. Also the Projector board has built in speakers (stereo), and the version without projector still sells for around £200.
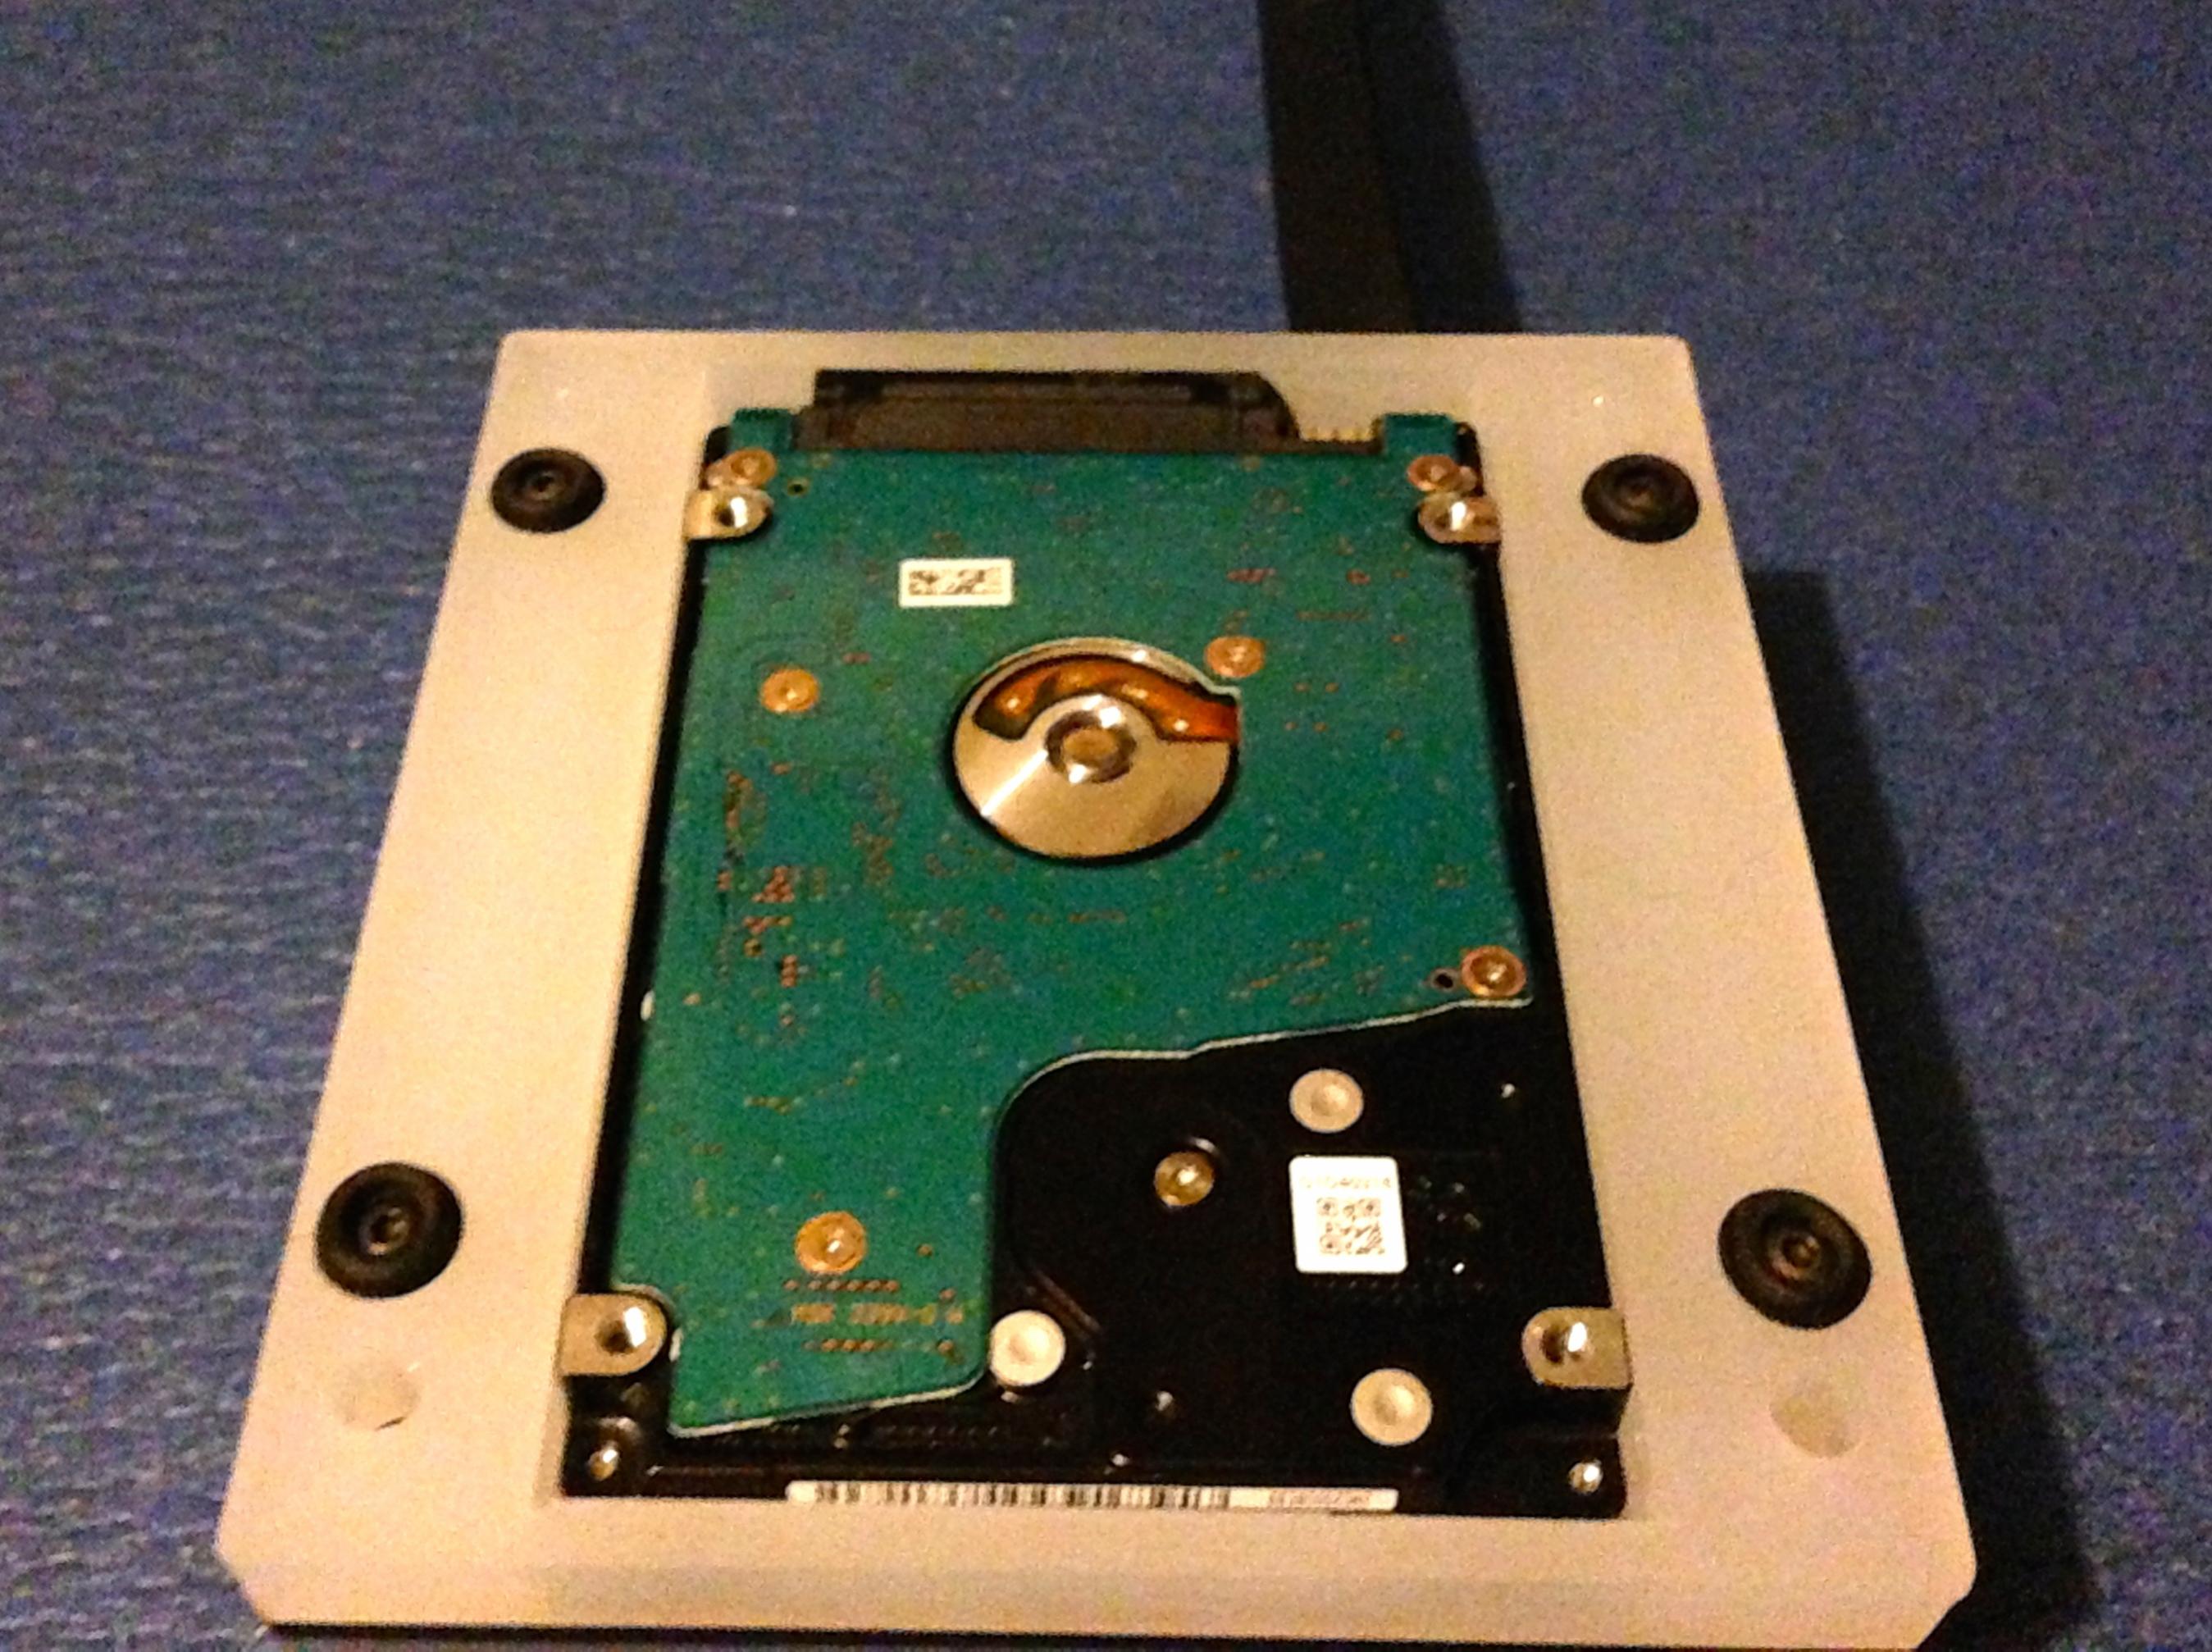
With my savings I tracked down a HD cable for the Brix (which came with a second hand Celeron based Brix obtained for £40 0n eBay) so that I could turn this into a dual SATA configuration with 250GB mSATA for OS X and SATA 500GB 2.5” drive for Win 7 and Ubuntu. To my relief the cable had the correct wiring and the extra drive was recognized in the UEFI bios when connected.
So, in the worst case, by buying this at £120 I have a tiny dual disk PC that is the same as the more expensive identical one and mine also has extra speakers with a projector as a bonus? What could possibly go wrong??
Answer - plenty, if you are planning to use the built in graphics for an OS X build.
The graphics on this are HD4400, but I had read that with the FakePCIID method for spoofing the graphics to be HD4600 this should not in itself be a deal breaker . However, despite trying my hardest and, having read and followed every thread, I could not get graphics to load. I do not want to over load the detail but you can read of my issues and my conversations with Rehabman over here: http://www.tonymacx86.com/yosemite-...0-hd4600-mobile-yosemite-152.html#post1171081 .
My conclusion at the moment is that this Brix - possibly due to the internal eDP connection for the projector and the way that this has been implemented by Gigabyte - has no known hack that will force QE/CI to work for the internal graphics. So at this point I either had to decide to just use Win 7/Linux or come up with another plan.
The other plan I settled on was to try out an external graphics card. I had already tried a USB to HDMI displaylink adapter and that worked great (stable connection but no QE/CI still) but as I have a MSI GTX 660 I looked into the possibility of using that with the Beast eGPU adapter and it seemed worth a try.
The eGPU adapter attaches to the Mini PCIe connection where the network card sat and is connected (as shown in the pic.s) via a longish 1 metre flat cable. The adapter comes with no power brick, but as I have a 150w 12volt brick already this was fine for me.

As the GTX 660 needs less than 150W total I can use the built in 6 pin plug at the end of the adapter to make a direct connection to the 6 pin plug on top of the graphics card:

The eGPU adapter in fact can only be used with a standalone power brick up to about 150w and if the graphics card requirements are higher than that then you need to make the connection using an ATX power supply. As I wanted still to have a compact build I was happy to be able to just use the power brick as this way I could hide the standalone eGPU behind my TV and the only visible part of my build is the Brix itself.
Also, because I had added a self cut acrylic case extension to house my SATA drive under the Brix I was lucky to be able to use this extension to make the trailing flat cable disappear and seem like it was just meant to be there.


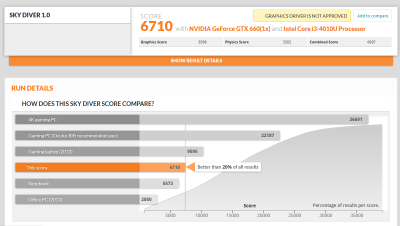
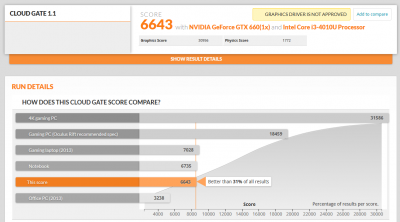
Performance
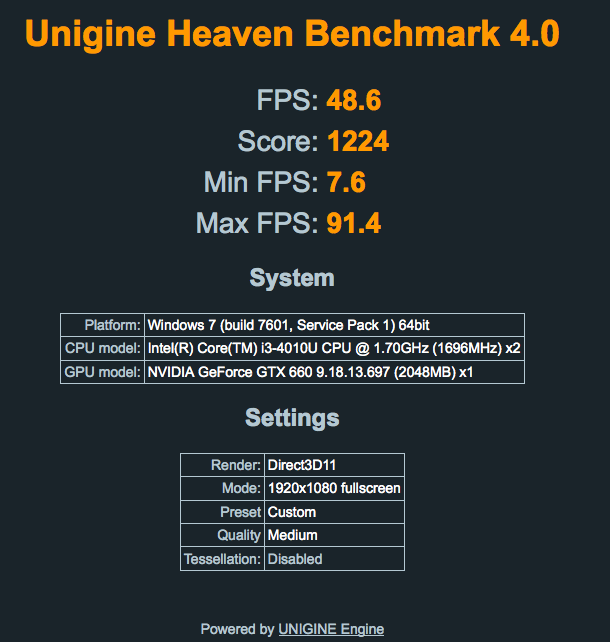
Unigine Heaven benchmark on OS X is below:

and for comparison (as I cannot compare fairly the benchmarks for OS X internal graphics) here are the two Heaven benchmarks from Windows 7.
and with HD4400:

To be honest I am staggered at the fact that the Mini PCIe slot is able to deliver enough through a single PCIe lane to give such a meaningful graphics improvement with my 660 - a normal heaven Benchmark in OS X with the same settings seems to be only about 6 to 10fps more as far as I can tell . So, while the single PCIe lane is undoubtedly a bottleneck, I think that I could even use this set up for gaming and it’d be interesting to compare the bang for buck against the more expensive Brix Pro models…..below for instance is the OS X Heaven benchmark Tony took for the BRIX "Gaming" i5G760:

The other thing to note is that under benchmarking with the HD4400 in Windows the tiny Brix gets very loud, whilst when doing the benchmarking with the eGPU I can hardly hear a thing from either the Brix or the 660. Also the two stay really cool as the Brix does not use graphics power (on board GPU is automatically disabled) and the 660 being ’standalone’ on the adapter plate has ideal cooling as thiere is no case surrounding it.
The user experience is good too from another perspective - the 660 powers up and down with the Brix without issue and does not itself need to be turned on or off, so the Beast graphics adapter does a great job all round.
By the way, if you just unplug the cable from the Beast adapter then the Brix will boot up as normal from the integrated graphics into Windows or Ubuntu.
The Install
Currently I am on Yosemite 10.10.5 with Clover.
Because of the rather difficult nature of the problems I faced my install method was not conventional and included running a cloned install of 10.10.5 until I found some reasonable Clover settings and worked through my problems. However, for the record, a fresh install method with my hardware, from scratch would be as follows.
Bios - disable Vt-d and unlock MSR (not sure why they have default setting of locked MSR - but nice you can just unlock it with a bios setting).
See: http://www.tonymacx86.com/yosemite-desktop-guides/144426-how-install-os-x-yosemite-using-clover.html
Use UEFI mode. Do NOT tick for injecting Intel or Nvidia (for the 660 GTX no graphics enablers should be set to achieve full QE/CI).
In post installation install voodoohda as this works better for my set up as it gives audio on HDMI as well as with the onboard speakers in the Brix.
Also use the script by Pike for SSDTprgen.sh to enable power management.
Only other kexts needed are RealtekRTL8111.kext and FakeSMC.kext (with all necessary plugins for HWMonitor (if wanted) to function).
I did also extract and modify DSDT and SSDTs but the build should function fine without (I will test and then update this if needed)
Drawbacks to this combination
Okay, you can see I am pretty pleased with the end result (even if it is different to how I had imagined when starting my journey…!). But the two drawbacks as I see them are (1) I need another power brick in the house and (2) you cannot get away from the fact it is no longer a single small unit - my system tricks the user into thinking it is a powerful single box simply because I can hide my GPU behind my TV (3) Using an eGPU means no network card for wifi/BT so you will need to either use ethernet (my choice) or a third part USB wifi plus a BT dongle.
I can live with the drawbacks comfortably for my own particular needs. I like the visual trick of an external (hidden) GPU, and my little i3 does a great job and also has easily upgradeable plug and play graphics!
Other things to say about the Beast eGPU kit: Go higher than 150W for a GPU and you need to use an ATX PSU (adapter plugs for this are supplied in the Beast kit); the eGPU adapter has an on-board USB connection but mine did not work. The kit works great on this Brix but it might not work on other hardware quite so well as there might be white/black lists to consider or other bios or timing issues to think of, so YMMV.
Last edited by a moderator: