
- Joined
- May 20, 2011
- Messages
- 3
- Motherboard
- ASRock X399 Taichi
- CPU
- Ryzen Threadripper 1950X
- Graphics
- GTX 2070 TI
Supermicro 8-Core Dual Xeon Build
Disclaimer: This is a (work in progress) guide to help people install Snow Leopard on your Supermicro Dual Xeon computer. I do not take any responsiblity or liability for damages done to any system, do this at your own risk.
--REMEMBER TO BACK UP YOUR DATA BEFORE FORMATTING A DRIVE--
CREDIT: Thank you to MaLd0n for DSDT Auto-Patcher. Also, tonymacx86 & MacMan for iBoot, Multibeast, and Nvidia Update. To the development team of Chameleon bootloader. Finally to anyone else that I have forgotten. Thank you all for your hard work and efforts to help the community.
About:
I have searched around on the forums and there are no good write ups on dual Xeon builds so I thought I would put together a good write up on installing Snow Leopard on one. While searching I found that a lot of people talk about, some even get it to work, but no one ever states how they did it. In this install guide I use a Retail Disc with a boot CD to get the OS on my harddrive. I am not sure if this method works for all Supermicro dual CPU boards but if it does let us know.
Note: With this motherboard I have not been able to get audio or internet working. For audio I have tried a couple of different ACL888 kexts with not sucess. As for internet I was not able to find anything on this dual port NIC card. I'm going to go and buy a PCI-E card from Newegg, so once I do and get it working I will add it to this post. Lastly, this is my first install guide so if I am forgetting anything or if I miss a step just ask me and I will add it.
Here is my setup with links to the parts on Newegg (Item Number):
(prices do not include discounts or mail-in offers)
Total Cost = $2,241.87
FILES NEEDED FOR INSTALL:
Note: Use IMG Burn or similar program to burn iBoot to CD. Also download the other files and put them on a USB flash drive so you can install them after you install Snow Leopard.
--PREP FOR INSTALL PROCESS--
Hardware configuration for install:
Both processors where installed.
All 24GB of RAM where installed in the proper DIMM slots (Refer to motherboard manual).
GTX 470 card is installed in PCI-E SLOT 2.
SATA HD was installed in I-SATA0.
DVD drive was installed in I-SATA5.
BIOS Setting for install:
ADVANCED TAB
Processor & Clock Options
Set to the following:
IDE / SATA Configuration
PCI/PnP Configuration
Now press F10 then ENTER to save BIOS configuration (the computer will turn off then turn back on due to turning off Virtualization).
Now get back in the BIOS for the final setting before we boot the disc.
BOOT TAB
Boot Device Priority
Hard Disk Drives
Now press F10 and ENTER again to save configuration.
--INSTALL PROCESS--
1- Install iBoot CD into DVD drive.
2- Once computer loads up iBoot CD and you have the bootloader screen (see example) eject iBoot CD
3- Insert Snow Leopard Retail Disc and press F5
4- Now start type PCIRootUID=1 and then press the down arrow and select Boot Verbose from the list and press ENTER.
5- When you get to the installation screen open Disk Utility (under Utilities Menu).
6- Select the HD you want to format and go to the partition tab. In the partition tab select 1 Partition in the drop down menu (I named my partition SnowLeopard). Then make sure to click the Options and pick GUID Partition from the list. Then partition drive.
7- When partition is done close Disk Utility.
8- Continue throught the installer and when you get to the choosing the disk make sure to click the Customize button (Uncheck Printer Support, Additional Fonts, and Language Translations).
9- Once install is complete Restart computer (I had to hold the power button to shutdown computer to be able to do next step).
10- Remove the Retail Snow Leopard Disc and insert the iBoot CD again.
11- When you get to iBoot screen type PCIRootUID=1 and then press down arrow and select Boot Verbose.
12- Now if everything has gone well to this point you should see the Snow Leopard Welcome Video play.
13- Fill out all the information on the few screens that come up after the video and then you should be on your new Snow Leopard Desktop.
--POST INSTALL PROCESS--
Note: You can now eject iBoot CD and set it aside as it won't be needed again unless something goes wrong with the post installation.
1- Now you want to plug in your USB flash drive.
2- Drag all your files to your Desktop and extact any that you need to.
3- First open DSDT Auto-Patcher.
4- Keep Extract DSDT from system checked.
5- From left drop-down menu select Generic and then press Apply (this will put the DSDT.aml file on your desktop).
6- Now quit DSDT Auto-Patcher.
7- Open MultiBeast, dont run it, just leave it open.
8- Now open Mac OS X 10.6.7 Combo Update.
9- Install the update. DO NOT REBOOT
10- Switch to MultiBeast (if it closes press Ignore on error window and just reopen it)
11- Installing MultiBeast choose the following:
12- Now Install
13- Once MultiBeast is done (install may fail, continue anyways) press Close.
14- Now open tonymacosx86 Nvidia Update and install. Press Close when complete.
15- (Optional) Now open Finder and navigate to SnowLeopard/extra. Open the com.apple.boot.plist and change <Kernal Flags>arch=i386<Kernal Flags> to <Kernal Flags>arch=i386 -v<Kernal Flags> (this will set the boot mode to verbose for every boot). Save and close.
16- Now reboot and cross fingers!!
If all went well when you reboot you should see Chameleon bootloader load without the iBoot CD and then you should see the Snow Leopard 10.6.7 Desktop in full screen resolution. If all is good at this point follow the last step to have a full CPU support.
--FINAL BIOS CONFIGURATION--
Reboot computer again and get back into the BIOS.
Now you will reverse some of the settings that you made in the Pre Install Section.
ADVANCED TAB
Processor & Clock Options
Set to the following:
BOOT TAB
Boot Device Priority
Now press F10 and ENTER again to save configuration.
DONE!!
Now you can boot up in your new Snow Leopard 10.6.7 install and have both Intel Xeon 2.4ghz processors reconized correctly with 24GB of RAM.
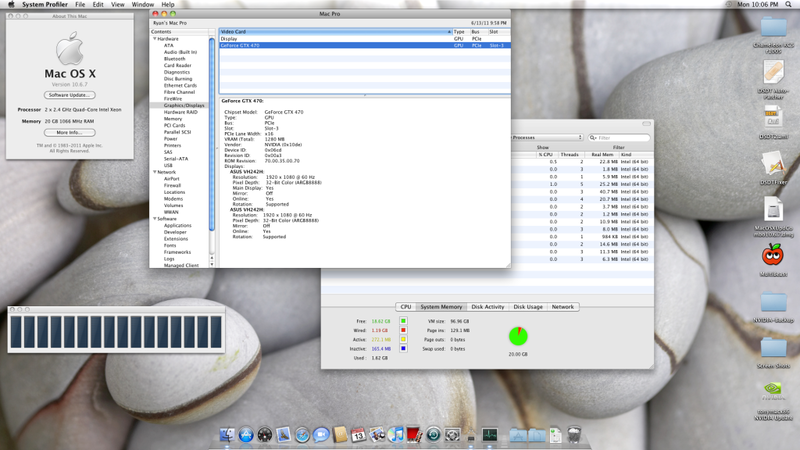
(Only shows 20GB of RAM because one of the sticks wasn't all the way in)
Build Pictures

Enjoy your 8-Core Hackintosh Pro!
Disclaimer: This is a (work in progress) guide to help people install Snow Leopard on your Supermicro Dual Xeon computer. I do not take any responsiblity or liability for damages done to any system, do this at your own risk.
--REMEMBER TO BACK UP YOUR DATA BEFORE FORMATTING A DRIVE--
CREDIT: Thank you to MaLd0n for DSDT Auto-Patcher. Also, tonymacx86 & MacMan for iBoot, Multibeast, and Nvidia Update. To the development team of Chameleon bootloader. Finally to anyone else that I have forgotten. Thank you all for your hard work and efforts to help the community.
About:
I have searched around on the forums and there are no good write ups on dual Xeon builds so I thought I would put together a good write up on installing Snow Leopard on one. While searching I found that a lot of people talk about, some even get it to work, but no one ever states how they did it. In this install guide I use a Retail Disc with a boot CD to get the OS on my harddrive. I am not sure if this method works for all Supermicro dual CPU boards but if it does let us know.
Note: With this motherboard I have not been able to get audio or internet working. For audio I have tried a couple of different ACL888 kexts with not sucess. As for internet I was not able to find anything on this dual port NIC card. I'm going to go and buy a PCI-E card from Newegg, so once I do and get it working I will add it to this post. Lastly, this is my first install guide so if I am forgetting anything or if I miss a step just ask me and I will add it.
Here is my setup with links to the parts on Newegg (Item Number):
(prices do not include discounts or mail-in offers)
[*]Supermicro MBD_X8DAH+-O Server Motherboard [Item=N82E16813182176] $449.99[/*:m:3dn3y0jj]
[*]2 x Intel Xeon E5620 Westmere 2.4GHz [Item=N82E16819117234] $389.99 Each[/*:m:3dn3y0jj]
[*]2 x Kingston 6GB DDR3 1333 Kit [Item=N82E16820139043] $75.99 Each[/*:m:3dn3y0jj]
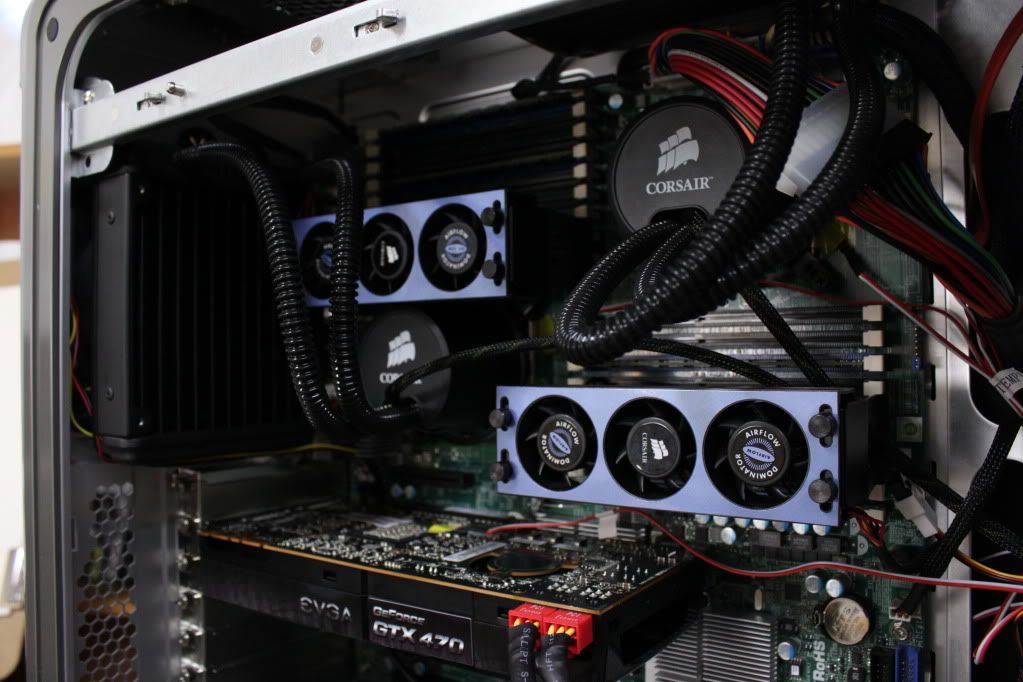
[*]EVGA GeForce GTX 470 1280MB GDDR5 [Item=N82E16814130616] $199.99[/*:m:3dn3y0jj]
[*]Hitachi SATA 500GB 7200RPM HDD [Item=N82E16822145299] $44.99[/*:m:3dn3y0jj]
[*]Samsung 22x DVD Burner [Item=N82E16827151233] $19.99[/*:m:3dn3y0jj]
[*]Kingwin Lazer 1000W Power Supply [Item=N82E16817121068] $239.99[/*:m:3dn3y0jj]
[*]Cooler Master 120mm Fan Kit [Item=N82E16835103052] $14.99[/*:m:3dn3y0jj]
[*]2 x Corsair H50 CPU Coolers [Item=N82E16835181010] $69.99 Each[/*:m:3dn3y0jj]
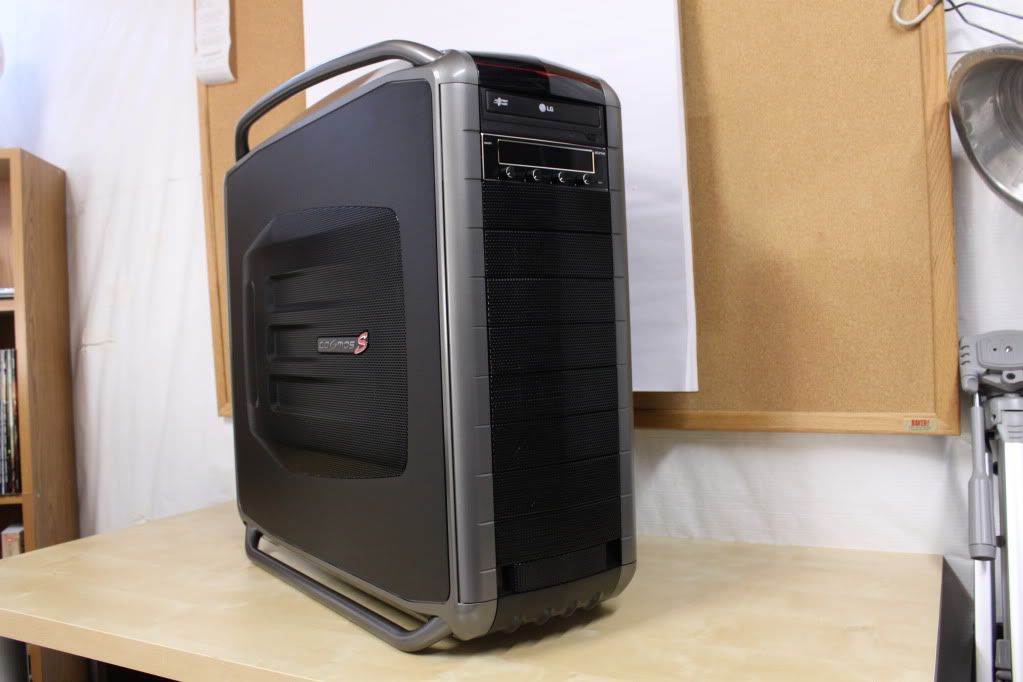
[*]Cooler Master COSMOS S Case [Item=N82E16811119150] $199.99[/*:m:3dn3y0jj]
Total Cost = $2,241.87
FILES NEEDED FOR INSTALL:
[*]Retail Snow Leopard Disc (10.6.3) [bought for $30 at Best Buy][/*:m:3dn3y0jj]
[*]Chameleon RC5 (I used r1005) [http://www.megaupload.com/?d=D1PSEZN8][/*:m:3dn3y0jj]
[*]DSDT Auto Patcher [http://www.insanelymac.com/forum/index.php?showtopic=235523][/*:m:3dn3y0jj]
[*]iBoot (I used 3.0.4) [http://www.tonymacx86.com/1010110101/iBoot-3.0.4.zip][/*:m:3dn3y0jj]
[*]Mac OS X 10.6.7 Combo Update [http://support.apple.com/kb/DL1361][/*:m:3dn3y0jj]
[*]Multibeast (I used 3.7.2) [http://www.tonymacx86.com/1010110101/MultiBeast-3.7.2.zip][/*:m:3dn3y0jj]
[*]Nvidia Update (I used 2.0.0) [http://www.tonymacx86.com/1010110101/tonymacx86-NVIDIA-Update-2.0.0.zip][/*:m:3dn3y0jj]
Note: Use IMG Burn or similar program to burn iBoot to CD. Also download the other files and put them on a USB flash drive so you can install them after you install Snow Leopard.
--PREP FOR INSTALL PROCESS--
Hardware configuration for install:
Both processors where installed.
All 24GB of RAM where installed in the proper DIMM slots (Refer to motherboard manual).
GTX 470 card is installed in PCI-E SLOT 2.
SATA HD was installed in I-SATA0.
DVD drive was installed in I-SATA5.
BIOS Setting for install:
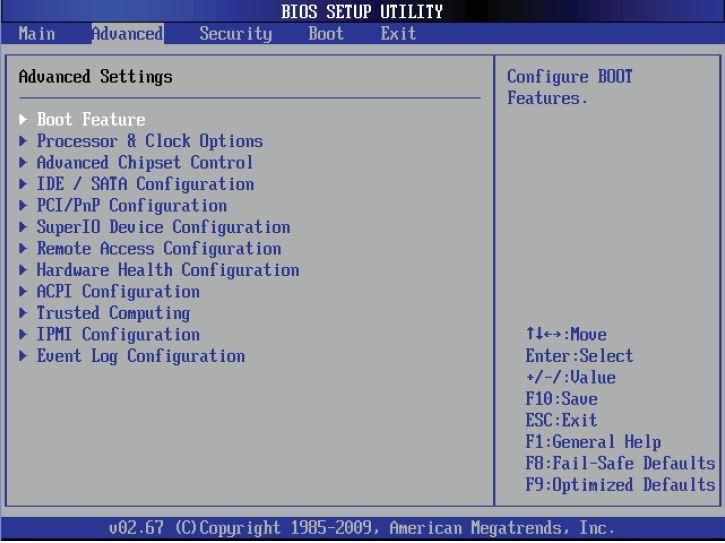
ADVANCED TAB
Processor & Clock Options
Set to the following:
- Intel Virtualization Technology [DISABLED][/*:m:3dn3y0jj]
- Simultaneous Multi-Threading [DISABLED][/*:m:3dn3y0jj]
- Active Processor Cores [ 1 ][/*:m:3dn3y0jj]
- Intel TurboMode Technology [DISABLED][/*:m:3dn3y0jj]
IDE / SATA Configuration
- Set SATA to AHCI[/*:m:3dn3y0jj]
PCI/PnP Configuration
- PCI-E Slot 1 [DISABLED][/*:m:3dn3y0jj]
- PCI-E Slot 2 [ENABLED][/*:m:3dn3y0jj]
- PCI-E Slot 3 [DISABLED][/*:m:3dn3y0jj]
- PCI-E Slot 4 [DISABLED][/*:m:3dn3y0jj]
- PCI-E Slot 5 [DISABLED][/*:m:3dn3y0jj]
- PCI-E Slot 6 [DISABLED][/*:m:3dn3y0jj]
- PCI-E Slot 7 [DISABLED][/*:m:3dn3y0jj]
- Boot Graphics Adapter Priority [Offboard VGA][/*:m:3dn3y0jj]
Now press F10 then ENTER to save BIOS configuration (the computer will turn off then turn back on due to turning off Virtualization).
Now get back in the BIOS for the final setting before we boot the disc.
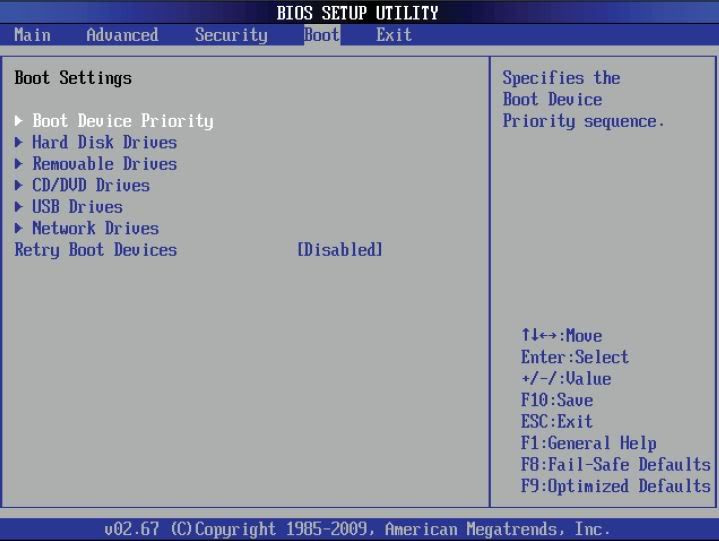
BOOT TAB
Boot Device Priority
- 1st Device [DVD Drive][/*:m:3dn3y0jj]
- 2nd Device [I-SATA0 500GB HD][/*:m:3dn3y0jj]
- Disable all other boot devices[/*:m:3dn3y0jj]
Hard Disk Drives
- 1st Drive (SATA0 500GB HD) [ENABLED][/*:m:3dn3y0jj]
- All other SATA Ports [DISABLED][/*:m:3dn3y0jj]
Now press F10 and ENTER again to save configuration.
--INSTALL PROCESS--
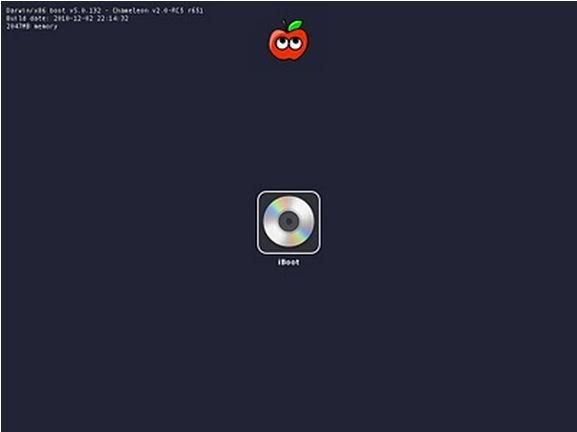
1- Install iBoot CD into DVD drive.
2- Once computer loads up iBoot CD and you have the bootloader screen (see example) eject iBoot CD
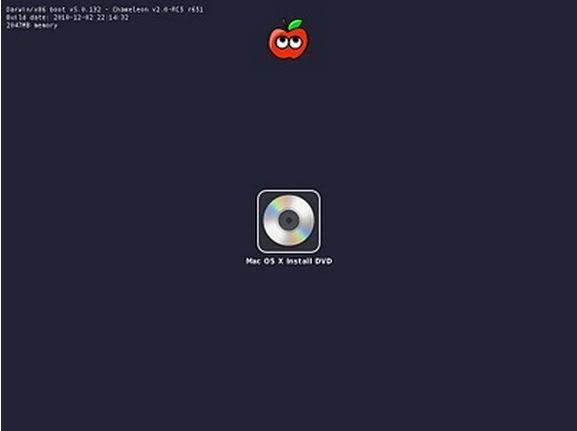
3- Insert Snow Leopard Retail Disc and press F5
4- Now start type PCIRootUID=1 and then press the down arrow and select Boot Verbose from the list and press ENTER.
5- When you get to the installation screen open Disk Utility (under Utilities Menu).
6- Select the HD you want to format and go to the partition tab. In the partition tab select 1 Partition in the drop down menu (I named my partition SnowLeopard). Then make sure to click the Options and pick GUID Partition from the list. Then partition drive.
7- When partition is done close Disk Utility.
8- Continue throught the installer and when you get to the choosing the disk make sure to click the Customize button (Uncheck Printer Support, Additional Fonts, and Language Translations).
9- Once install is complete Restart computer (I had to hold the power button to shutdown computer to be able to do next step).
10- Remove the Retail Snow Leopard Disc and insert the iBoot CD again.
11- When you get to iBoot screen type PCIRootUID=1 and then press down arrow and select Boot Verbose.
12- Now if everything has gone well to this point you should see the Snow Leopard Welcome Video play.
13- Fill out all the information on the few screens that come up after the video and then you should be on your new Snow Leopard Desktop.
--POST INSTALL PROCESS--
Note: You can now eject iBoot CD and set it aside as it won't be needed again unless something goes wrong with the post installation.
1- Now you want to plug in your USB flash drive.
2- Drag all your files to your Desktop and extact any that you need to.
3- First open DSDT Auto-Patcher.
4- Keep Extract DSDT from system checked.
5- From left drop-down menu select Generic and then press Apply (this will put the DSDT.aml file on your desktop).
6- Now quit DSDT Auto-Patcher.
7- Open MultiBeast, dont run it, just leave it open.
8- Now open Mac OS X 10.6.7 Combo Update.
9- Install the update. DO NOT REBOOT
10- Switch to MultiBeast (if it closes press Ignore on error window and just reopen it)
11- Installing MultiBeast choose the following:
- UserDSDT Install[/*:m:3dn3y0jj]
- Drivers & Bootloaders->Kext & Enablers->Miscellaneous->FakeSMC[/*:m:3dn3y0jj]
- Drivers & Bootloaders->Kext & Enablers->Miscellaneous->NullCPUPowerManagement[/*:m:3dn3y0jj]
- Drivers & Bootloaders->Customization->Boot Options->32-Bit Apple Boot Screen[/*:m:3dn3y0jj]
- Drivers & Bootloaders->Customization->System Definitions->Mac Pro->MacPro 5,1[/*:m:3dn3y0jj]
- Drivers & Bootloaders->OSX86 Software->Select All Programs[/*:m:3dn3y0jj]
12- Now Install
13- Once MultiBeast is done (install may fail, continue anyways) press Close.
14- Now open tonymacosx86 Nvidia Update and install. Press Close when complete.
15- (Optional) Now open Finder and navigate to SnowLeopard/extra. Open the com.apple.boot.plist and change <Kernal Flags>arch=i386<Kernal Flags> to <Kernal Flags>arch=i386 -v<Kernal Flags> (this will set the boot mode to verbose for every boot). Save and close.
16- Now reboot and cross fingers!!
If all went well when you reboot you should see Chameleon bootloader load without the iBoot CD and then you should see the Snow Leopard 10.6.7 Desktop in full screen resolution. If all is good at this point follow the last step to have a full CPU support.
--FINAL BIOS CONFIGURATION--
Reboot computer again and get back into the BIOS.
Now you will reverse some of the settings that you made in the Pre Install Section.
ADVANCED TAB
Processor & Clock Options
Set to the following:
- Intel Virtualization Technology [ENABLED][/*:m:3dn3y0jj]
- Simultaneous Multi-Threading [ENABLED][/*:m:3dn3y0jj]
- Active Processor Cores [ALL][/*:m:3dn3y0jj]
- Intel TurboMode Technology [ENABLED][/*:m:3dn3y0jj]
BOOT TAB
Boot Device Priority
- 1st Device [I-SATA0 500GB HD][/*:m:3dn3y0jj]
- Disable all other boot devices[/*:m:3dn3y0jj]
Now press F10 and ENTER again to save configuration.
DONE!!
Now you can boot up in your new Snow Leopard 10.6.7 install and have both Intel Xeon 2.4ghz processors reconized correctly with 24GB of RAM.
(Only shows 20GB of RAM because one of the sticks wasn't all the way in)
Build Pictures
Enjoy your 8-Core Hackintosh Pro!

