- Joined
- Sep 5, 2012
- Messages
- 65
- Motherboard
- G41M-ES2L
- CPU
- Q6600
- Graphics
- 9400GT
I want to thank everyone that has posted to this forum for inspiring me to do this project. I have seen many unwanted G4 machine go to the scrap pile over the years and I always thought that they deserved better. I am glad that I have been able to give at least one a new life.
I found someone on Craig's list that was advertising Mac parts for sale. It just happened that they had a complete G4 and one that had been gutted. They were willing to part with both for $20.
Here are the intended victims:


I was planning to use the back plate from a donor pc and I even mocked it up (below left). There did not seem to be an easy way to attach it and I ended up cutting up one of the original backplates.(below and below right)


I happened to have some 6 mm standoffs and they turned out to be the right size to mount the motherboard. The clearance was just enough to allow the latch to be installed. I had to put tape over the screws that hold the latch plate to prevent them from shorting the motherboard and make holes for the new standoff. I got overzealous with the Dremel and cut off some of the latch hold down tabs at the IO side. It does not affect the operation of the latch.


I thought I was in for serious soldering and wiring to get the front panel working until I found Minihack's wiring diagram for the front panel switch. I used a 1394 cable that I scavenged from another PC. Once I removed the registration plug from the switch end and rearranged the conductors, it worked great! In fact, I think it was easier than hooking PC front panel connectors. I left the hard drive led conductors free on the switch end for the hd led mod.


I desoldered a fan connector from a dead motherboard and attached it to the conductors at the switch end and applied heat shrink tubing. That provided me with a jack into which I can plug the hd led of my choice. I settled on a green one to match the color of the power switch. I decided to use the led diffuser from another dead computer to hold the led. A little piece of aquarium tubing did the trick and once the polarity was correct the led tested successfully. I decided that the elliptical shape of the diffuser would make a nice apple core and once I had an appropriate sized hole, made the diffuser (minus the white plastic) fit perfectly. I managed to get the correct depth set with hot glue and the whole assembly is held in place with duct tape! Maybe one of these days I will get around to epoxying it!")

I did the obligatory trim to the dvd drive holder to ensure that there was sufficient clearance for the old motherboard that I used for test fitting. As it turned out, the board I ended up using was narrower and probably would have cleared.
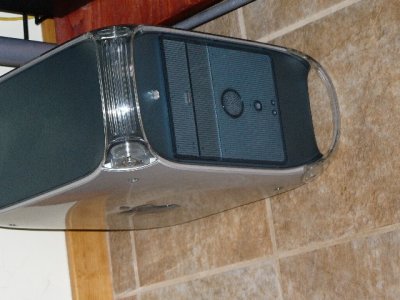
Here is the final product after my extension cables arrived:

The system was one that my wife was using for Ubuntu. I had already verified that Mountain Lion would run so I just had to transfer the hardware including the power supply and 120mm fan over to the G4 case. The motherboard is a Gigabyte GA-G41M-ES2L with a Pentium Dual Core E6500 and an Nvidia 8400GS. The ssd is 30gb and I use it for Mountain Lion with User and Ubuntu installed on the hard drive. The power supply is an Antec Earthwatts 380 which is about the only power supply that is configured like the G4 stock power supply.
The E6500 is a 65 watt processor so it does not demand superior cooling. Everything is a little warm but not too bad. I mostly run Netflix on this box while I am working on my main Ubuntu box. The processor stays right at 51c and the video card (passive cooled) is usually between 65 and 75c. The hard drive runs much cooler now that I moved it to the front of the case and away from the video card! The system is a little noiser than my other systems, but they are all built with Antec 300 or 100 cases with very quiet fans.
I am pleased with how it has turned out but I am still checking out the forum for new ideas!
A friend has also given me a complete G5 system. That will eventually receive my first OSX86 system, a Q6600 on the same motherboard as above. I am still pondering that mod.
I found someone on Craig's list that was advertising Mac parts for sale. It just happened that they had a complete G4 and one that had been gutted. They were willing to part with both for $20.
Here are the intended victims:
I was planning to use the back plate from a donor pc and I even mocked it up (below left). There did not seem to be an easy way to attach it and I ended up cutting up one of the original backplates.(below and below right)
I happened to have some 6 mm standoffs and they turned out to be the right size to mount the motherboard. The clearance was just enough to allow the latch to be installed. I had to put tape over the screws that hold the latch plate to prevent them from shorting the motherboard and make holes for the new standoff. I got overzealous with the Dremel and cut off some of the latch hold down tabs at the IO side. It does not affect the operation of the latch.
I thought I was in for serious soldering and wiring to get the front panel working until I found Minihack's wiring diagram for the front panel switch. I used a 1394 cable that I scavenged from another PC. Once I removed the registration plug from the switch end and rearranged the conductors, it worked great! In fact, I think it was easier than hooking PC front panel connectors. I left the hard drive led conductors free on the switch end for the hd led mod.
I desoldered a fan connector from a dead motherboard and attached it to the conductors at the switch end and applied heat shrink tubing. That provided me with a jack into which I can plug the hd led of my choice. I settled on a green one to match the color of the power switch. I decided to use the led diffuser from another dead computer to hold the led. A little piece of aquarium tubing did the trick and once the polarity was correct the led tested successfully. I decided that the elliptical shape of the diffuser would make a nice apple core and once I had an appropriate sized hole, made the diffuser (minus the white plastic) fit perfectly. I managed to get the correct depth set with hot glue and the whole assembly is held in place with duct tape! Maybe one of these days I will get around to epoxying it!
I did the obligatory trim to the dvd drive holder to ensure that there was sufficient clearance for the old motherboard that I used for test fitting. As it turned out, the board I ended up using was narrower and probably would have cleared.
Here is the final product after my extension cables arrived:
The system was one that my wife was using for Ubuntu. I had already verified that Mountain Lion would run so I just had to transfer the hardware including the power supply and 120mm fan over to the G4 case. The motherboard is a Gigabyte GA-G41M-ES2L with a Pentium Dual Core E6500 and an Nvidia 8400GS. The ssd is 30gb and I use it for Mountain Lion with User and Ubuntu installed on the hard drive. The power supply is an Antec Earthwatts 380 which is about the only power supply that is configured like the G4 stock power supply.
The E6500 is a 65 watt processor so it does not demand superior cooling. Everything is a little warm but not too bad. I mostly run Netflix on this box while I am working on my main Ubuntu box. The processor stays right at 51c and the video card (passive cooled) is usually between 65 and 75c. The hard drive runs much cooler now that I moved it to the front of the case and away from the video card!
The system is a little noiser than my other systems, but they are all built with Antec 300 or 100 cases with very quiet fans.I am pleased with how it has turned out but I am still checking out the forum for new ideas!
A friend has also given me a complete G5 system. That will eventually receive my first OSX86 system, a Q6600 on the same motherboard as above. I am still pondering that mod.