- Joined
- Dec 23, 2014
- Messages
- 41
- Motherboard
- H87-D3H
- CPU
- i7-4770
- Graphics
- HD5850
- Mac
- Classic Mac
- Mobile Phone
Hi there - this is my first post, so hopefully I've put it in the right place.
I’ve been using Hackintoshes for a while. Five years ago I’ve done my first attempt but that wasn’t working flawlessly like current hackintoshes, thanks a lot tonymac people you’ve made this so affordable and very easy with software and helping people with hardware via buyer’s guide and tons of help guides through the forum.
This is my 3[SUP]rd[/SUP] hackintosh and I want to make a machine able to play HD videos (any format not just a bunch) on the TV using the PS3 BD remote.
I decided to make a custom machine after reading a lot on tonymacx86 forum and following lots of threads.
Apple cases would fit perfectly, but a lot of things have already been done here so I want to do something different, so I started to search something else.
Found an old DVD player on my shelf and start thinking to converting it.
This one was not looking pretty enough and way too big in my opinion.
So after thinking a lot I decided to use a FAT PS3 case.
The case looks pretty.
It is not too big and doesn’t look like a “regular computer” case.
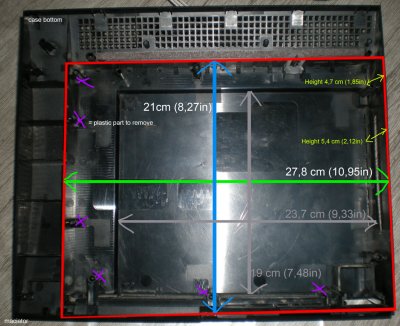
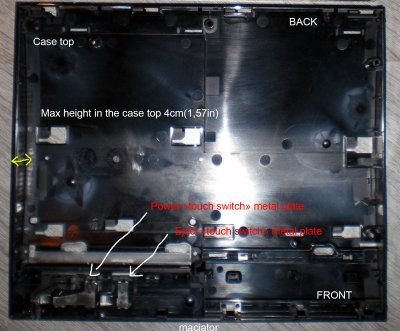
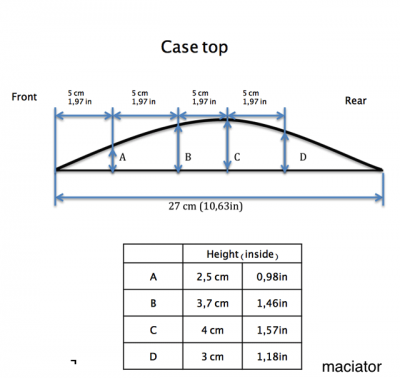
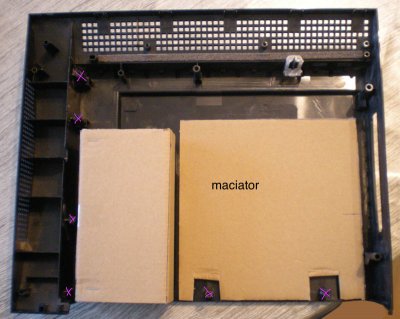
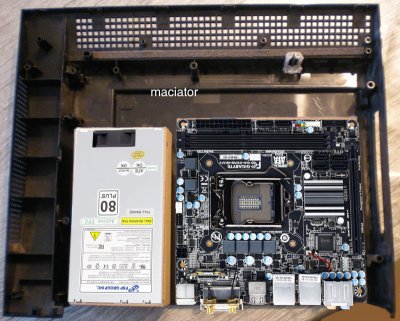
In my project every thing must fit inside the case including the PSU.
I bought a dead PS3 (YLOD = yellow light t of death)
A very wise man decided not to include Blu-ray discs player inside his cases so this project is not going to include Blu-ray discs playing capability but it will be able to play ISO backups of my already owned discs.
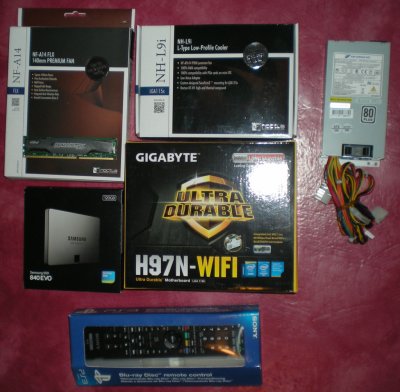
Here are the specs of the project:
Fat PS3 Case (bought last week 25 Euros approx. 30 US$).
Gigabyte GA-H97N-N-WIFI
Intel i3-4350T CPU
SAMSUNG 120 GB SSD Seagate 40GB from the PS3
FSP-270-60LE 80PLUS FLEX ATX, PSU
Noctua NH-9Li CPU cooler
Noctua NF-A14 FLX case cooler
Crucial 8GB DDR3 RAM (already owned)
Home made touch switch PCB to power ON the machine.
PS3 BD remote.
Software:
Yosemite (Multibeast / Unibeast)
KODI (XBMC)
Remote Buddy (didnt found free software to use the PS3 BD REMOTE, any advice welcome
 ).
).
Project spoilers:
“Original” case cooling system.
Outside look of the case should be kept.
Silent machine.
Any advice is welcome and thanks a lot !
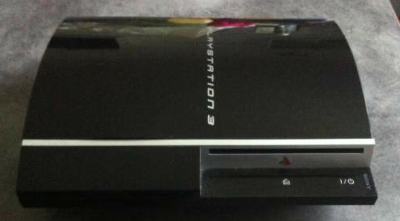
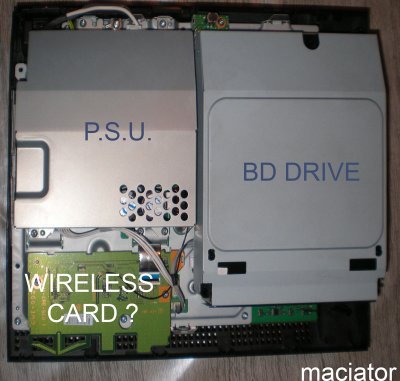
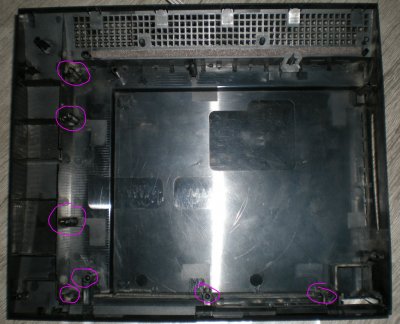
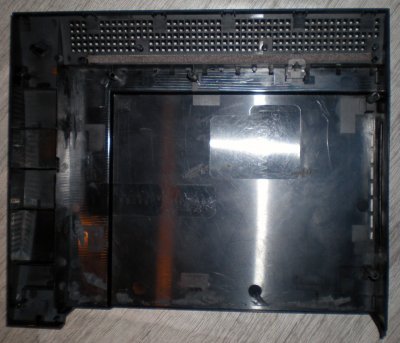
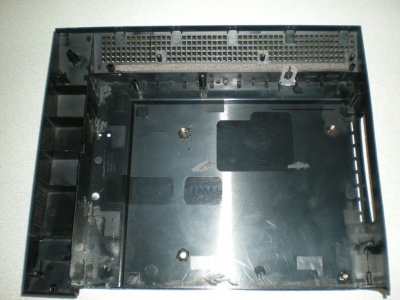
Here is the "dirty" stock machine !
Edit 1:
Changed specs since I received the hardware.
Edit 2: Changed the OS X version from Mavericks to Yosemite.
Changed the HDD, using the PS3 original HDD instead of the Samsung SSD.
Many thanks to rehpotsirhc following your advice decided to had the i3-4350T CPU to the project.
I’ve been using Hackintoshes for a while. Five years ago I’ve done my first attempt but that wasn’t working flawlessly like current hackintoshes, thanks a lot tonymac people you’ve made this so affordable and very easy with software and helping people with hardware via buyer’s guide and tons of help guides through the forum.
This is my 3[SUP]rd[/SUP] hackintosh and I want to make a machine able to play HD videos (any format not just a bunch) on the TV using the PS3 BD remote.
I decided to make a custom machine after reading a lot on tonymacx86 forum and following lots of threads.
Apple cases would fit perfectly, but a lot of things have already been done here so I want to do something different, so I started to search something else.
Found an old DVD player on my shelf and start thinking to converting it.
This one was not looking pretty enough and way too big in my opinion.
So after thinking a lot I decided to use a FAT PS3 case.
The case looks pretty.
It is not too big and doesn’t look like a “regular computer” case.
In my project every thing must fit inside the case including the PSU.
I bought a dead PS3 (YLOD = yellow light t of death)
A very wise man decided not to include Blu-ray discs player inside his cases so this project is not going to include Blu-ray discs playing capability but it will be able to play ISO backups of my already owned discs.
Here are the specs of the project:
Fat PS3 Case (bought last week 25 Euros approx. 30 US$).
Gigabyte GA-H97N-N-WIFI
Intel i3-4350T CPU
SAMSUNG 120 GB SSD Seagate 40GB from the PS3

FSP-270-60LE 80PLUS FLEX ATX, PSU
Noctua NH-9Li CPU cooler
Noctua NF-A14 FLX case cooler
Crucial 8GB DDR3 RAM (already owned)
Home made touch switch PCB to power ON the machine.
PS3 BD remote.
Software:
Yosemite (Multibeast / Unibeast)
KODI (XBMC)
Remote Buddy (didnt found free software to use the PS3 BD REMOTE, any advice welcome
Project spoilers:
“Original” case cooling system.
Outside look of the case should be kept.
Silent machine.
Any advice is welcome and thanks a lot !

Here is the "dirty" stock machine !
Edit 1:
Changed specs since I received the hardware.
Edit 2: Changed the OS X version from Mavericks to Yosemite.
Changed the HDD, using the PS3 original HDD instead of the Samsung SSD.
Many thanks to rehpotsirhc following your advice decided to had the i3-4350T CPU to the project.

