- Joined
- Nov 25, 2010
- Messages
- 1,211
- Motherboard
- AsRock X570M Pro4
- CPU
- Ryzen 3700x
- Graphics
- RX 580
Introduction
This story began on Christmas Day. We had the family over to our place for turkey dinner, and my iMac G5 A1076 build was purring away on the kitchen island. I had completed it about 6 weeks earlier and the system was running like a top. It is linked here.
My dad and my sister were thorougly enjoying using the iMac as the day went on, so much in fact that they asked me if I would build them each one. I said I would look around and try to find machines that would be good suitors for a mod. No guarantees of course, prestine iMacs are getting tough to find.
Craigslist was good to me in January. I managed to find not one, but two (yes TWO) gorgeous specimens without a single flaw on body, stand or screen. Both are A1076 (EMC 2056) ALS models. I subsequently put in orders all over the internet for the parts and supplies I'd need to complete the iMac builds.
Both would be built in a similar fashion to my own completed project. Many of the specific details I will reference from work completed on that thread rather than post redundantly here. I will use this post mainly to highlight any different methods implemented in these two new projects.
Power Map
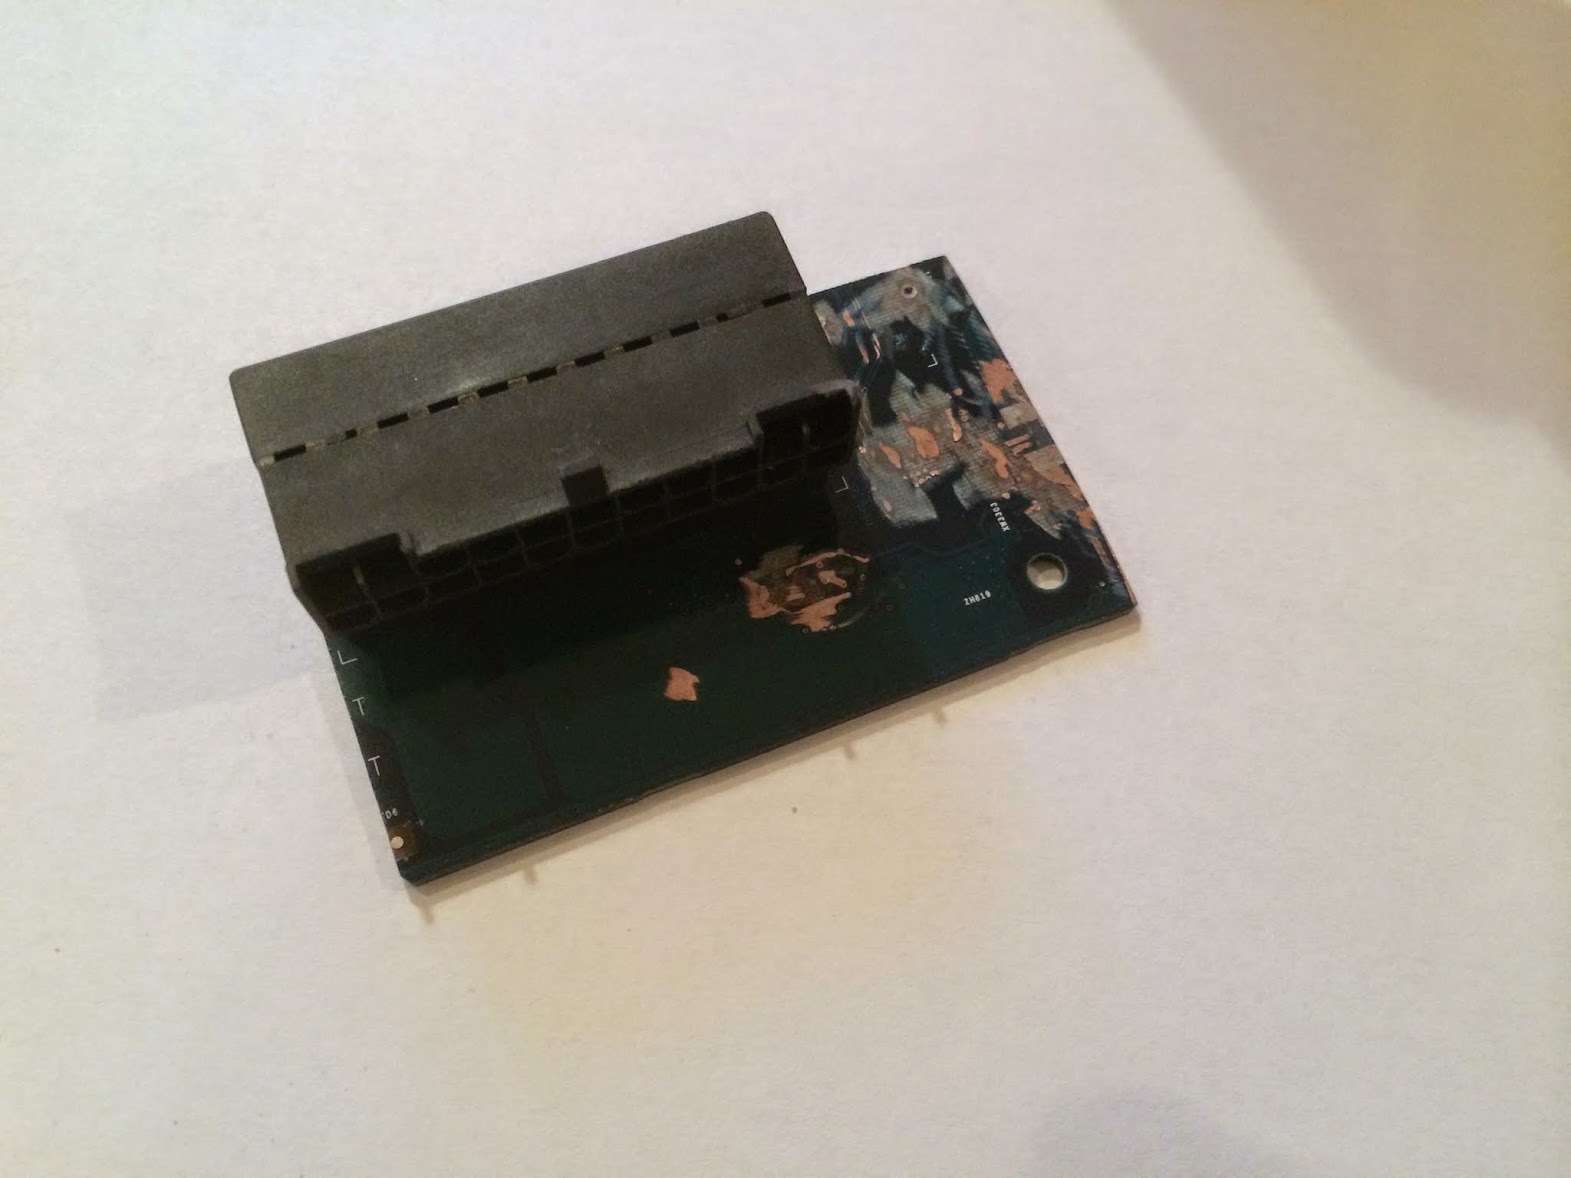
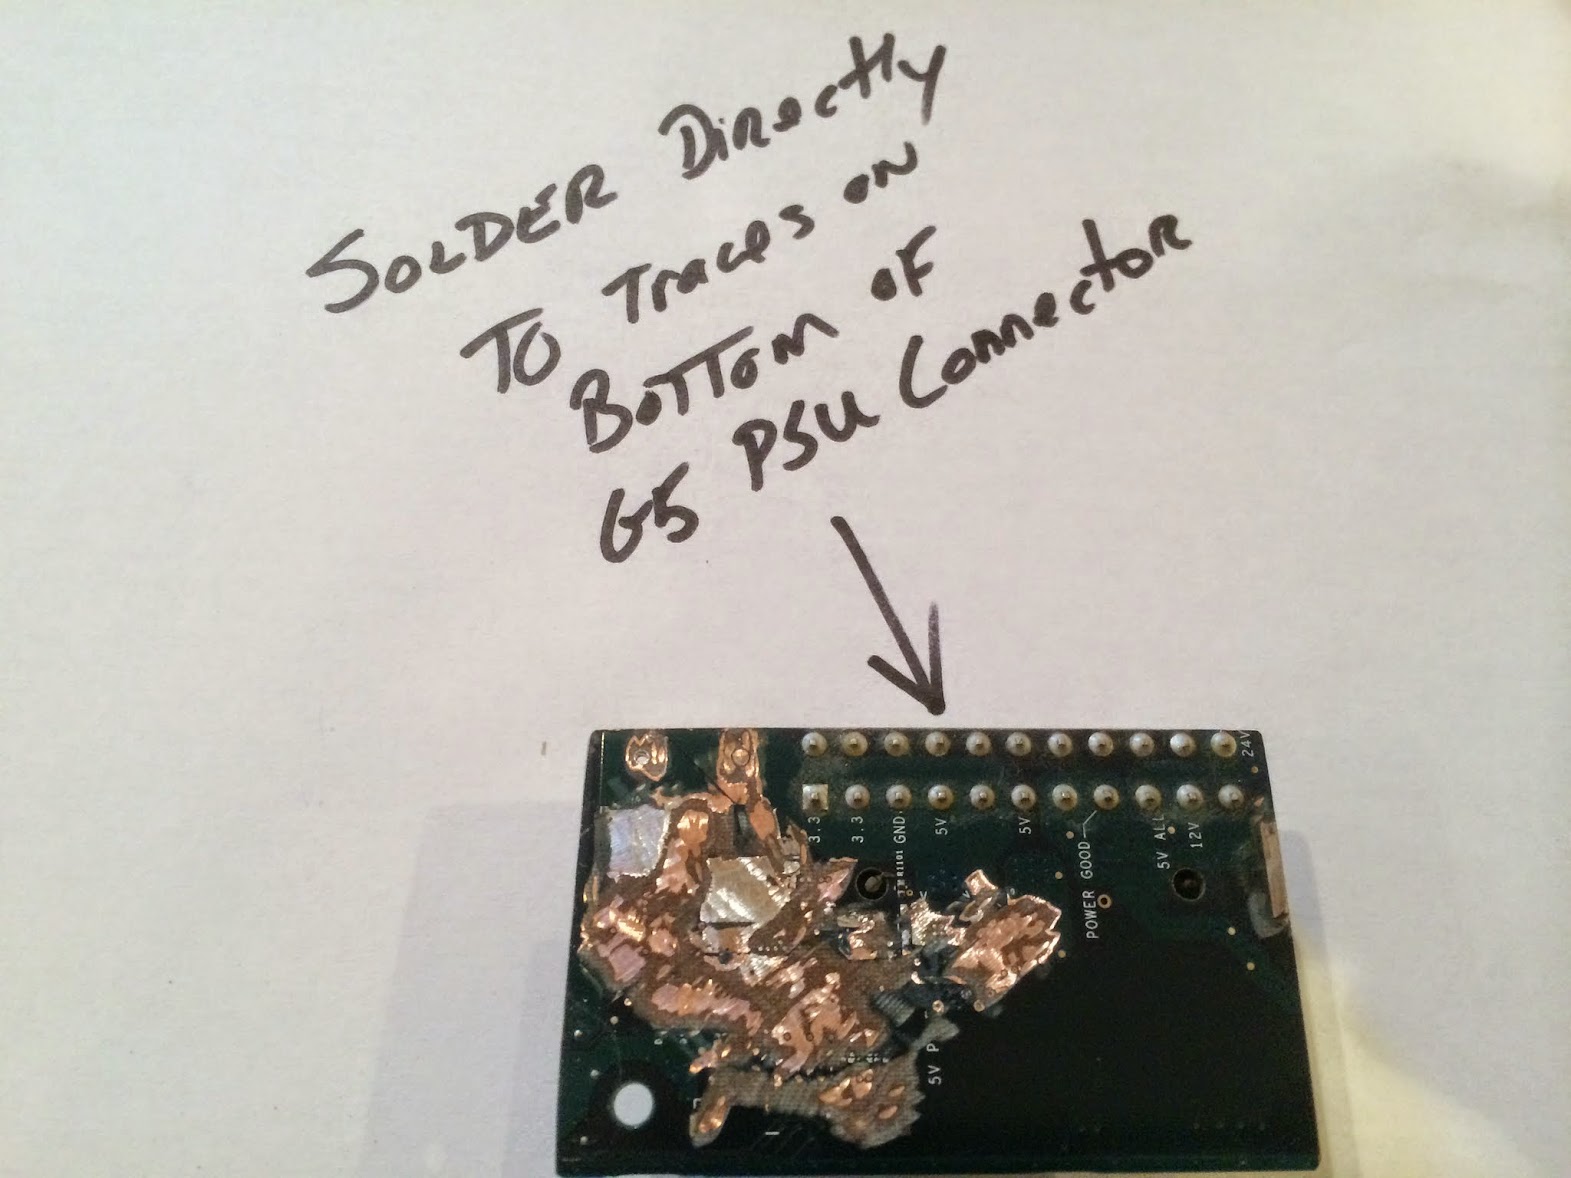
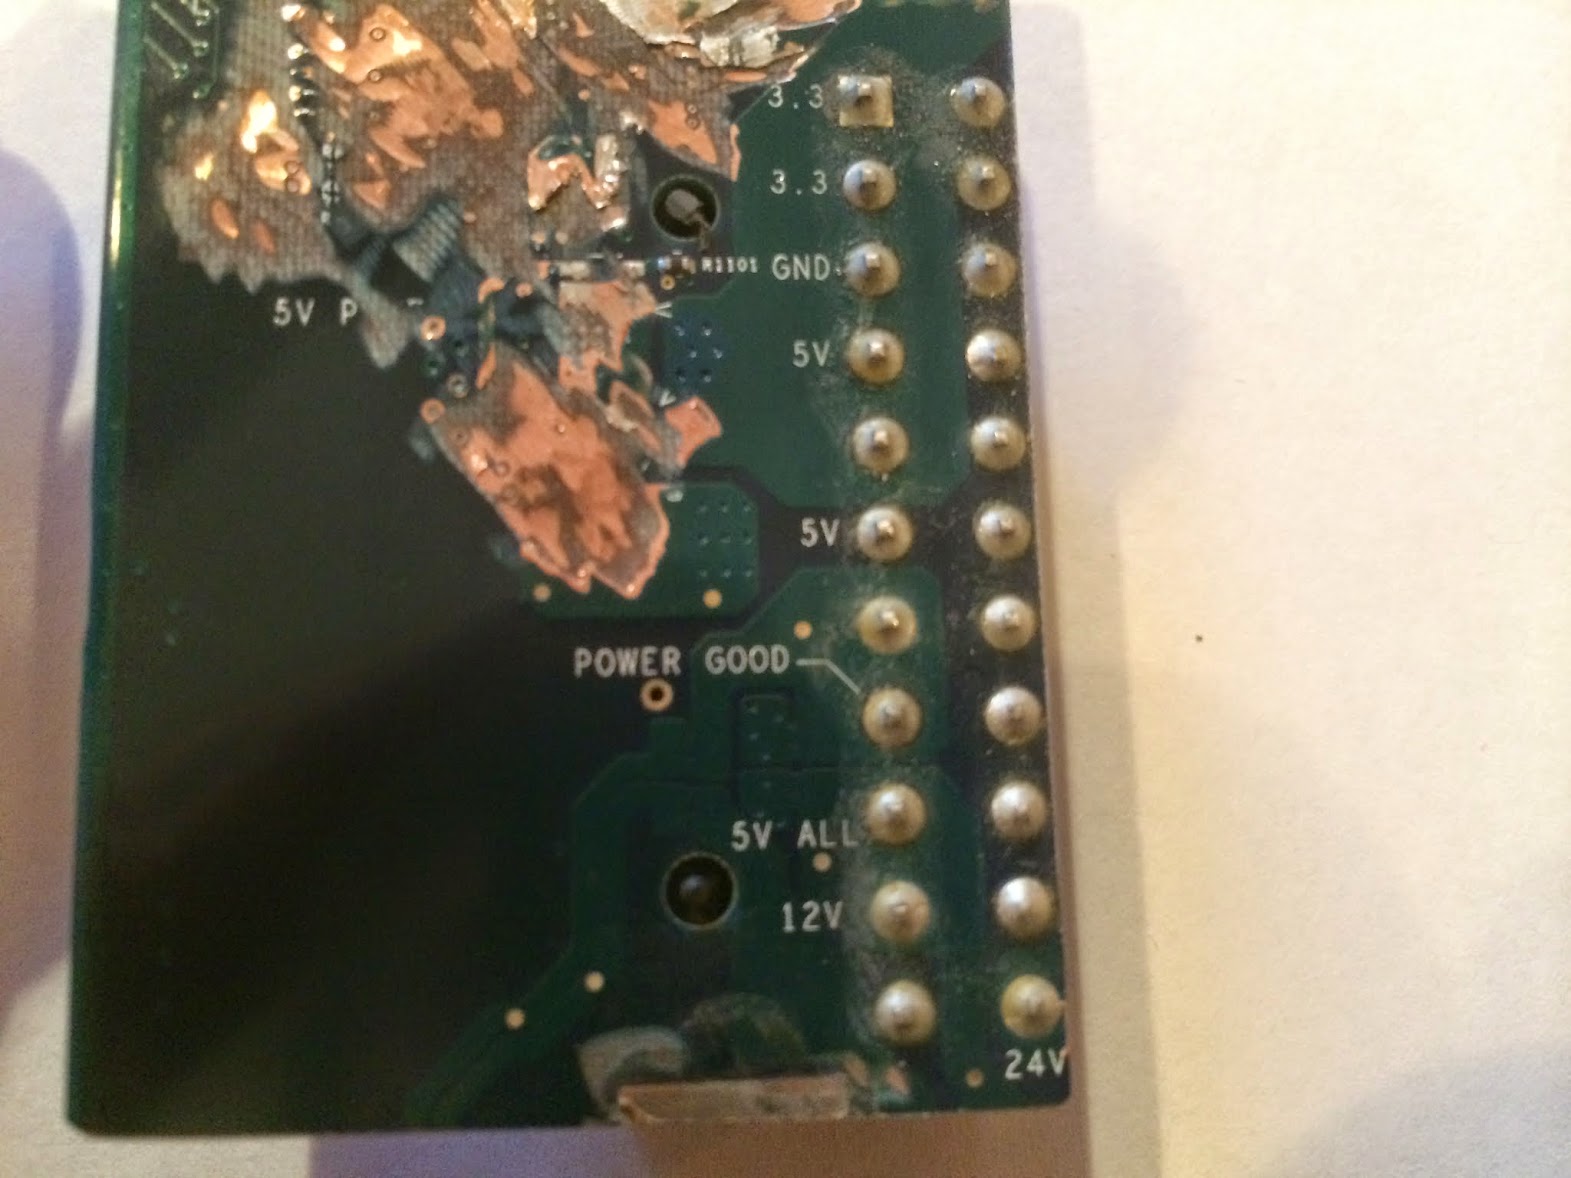
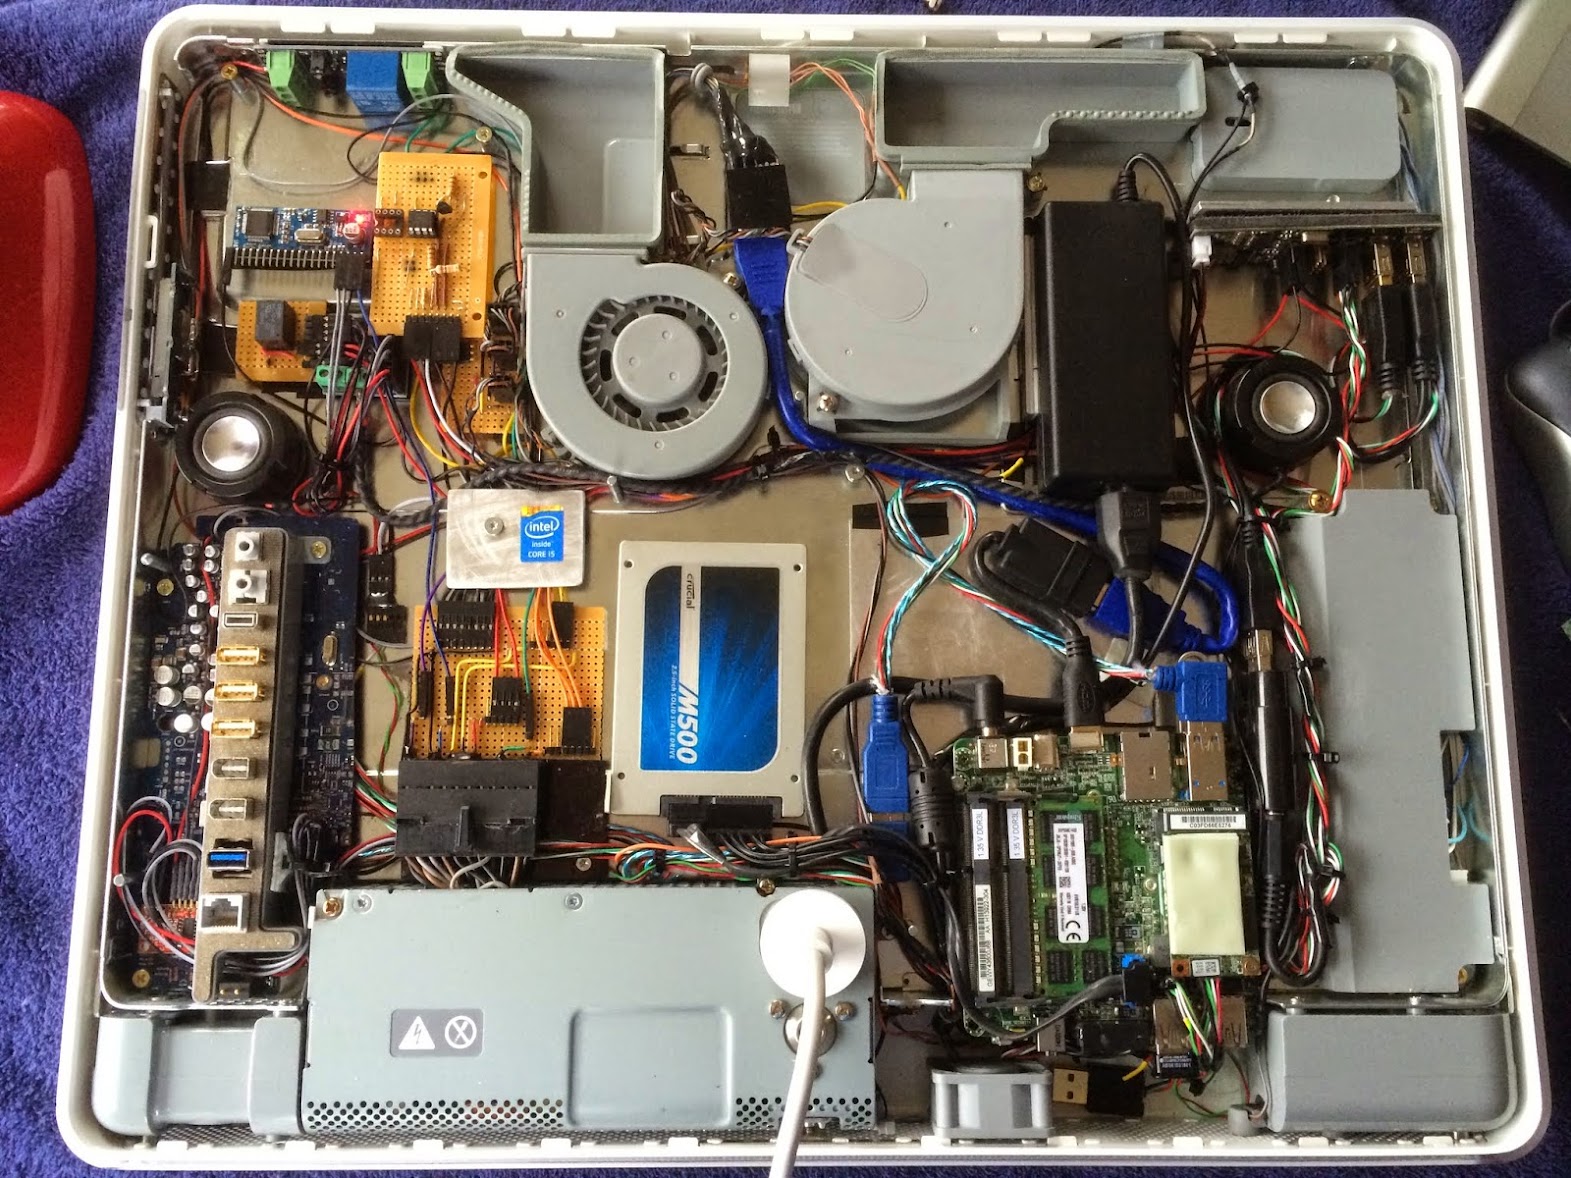
As previous, two separate power circuits were created; One utilizing the iMac G5 PSU and the other using the Intel NUC Power Brick. This kept the logic simple and the NUC isolated from all power except its own. See this link for details.
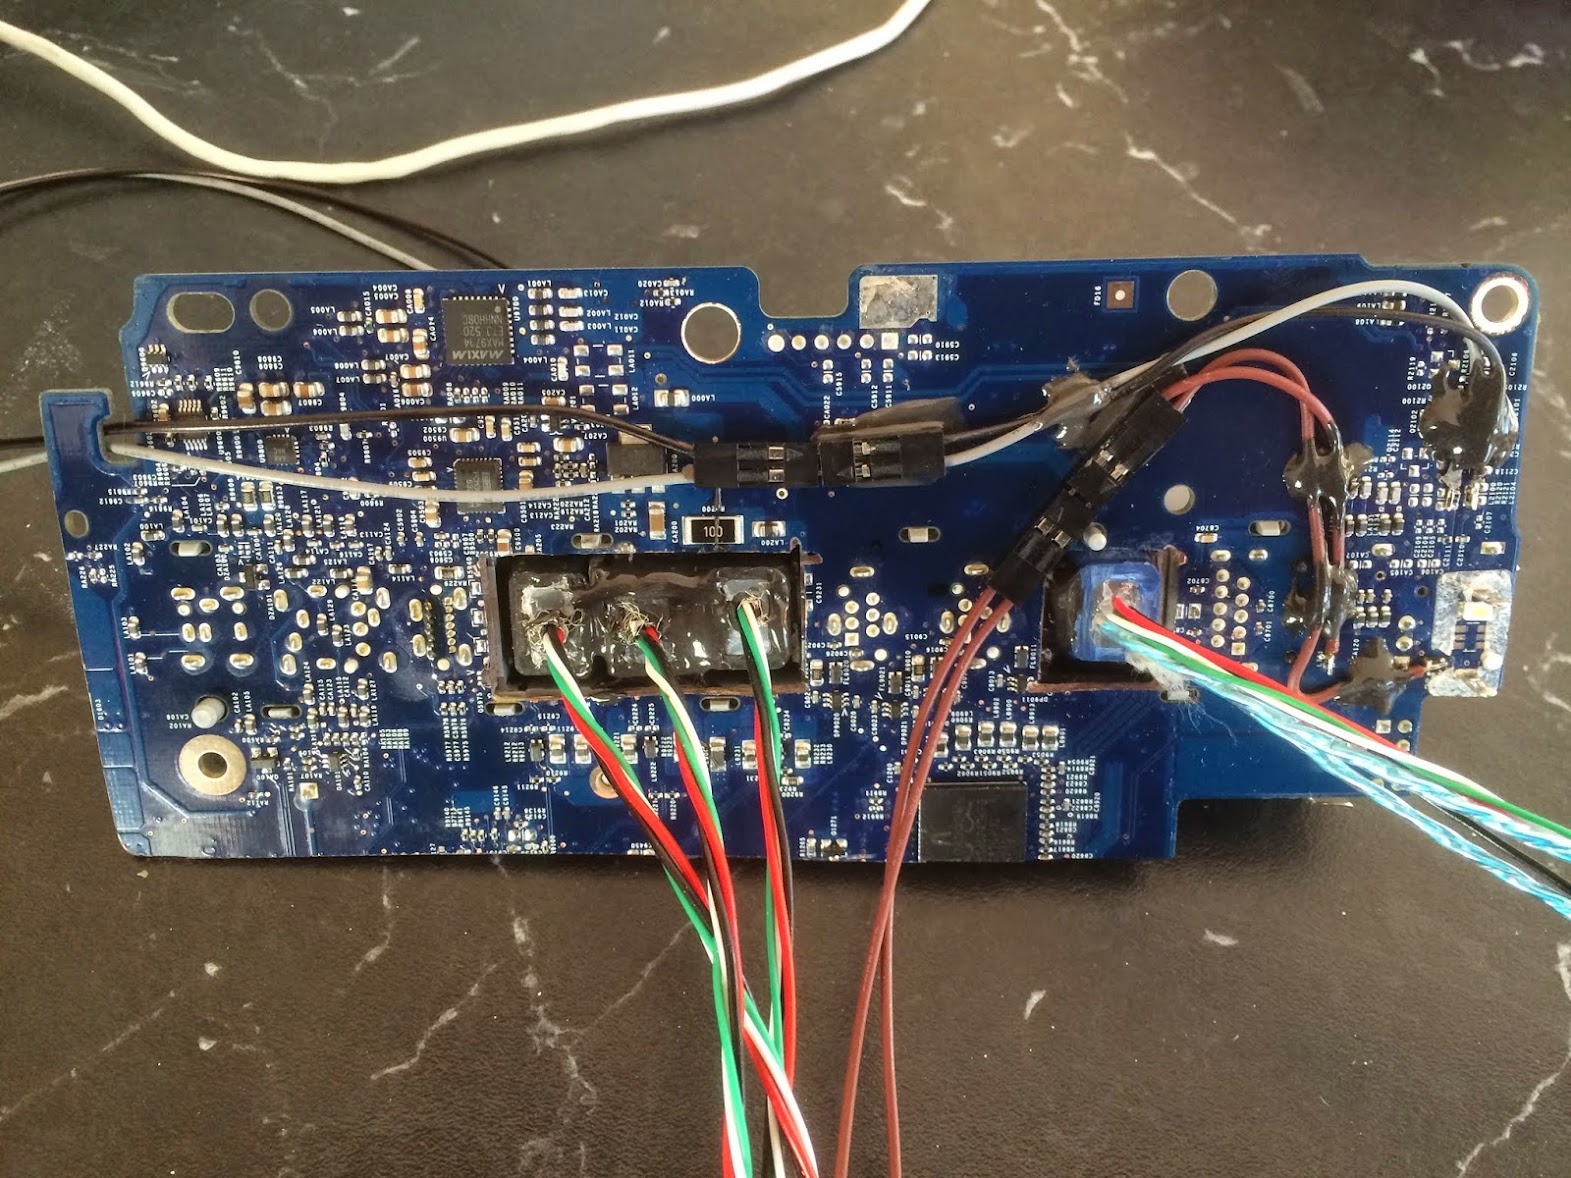
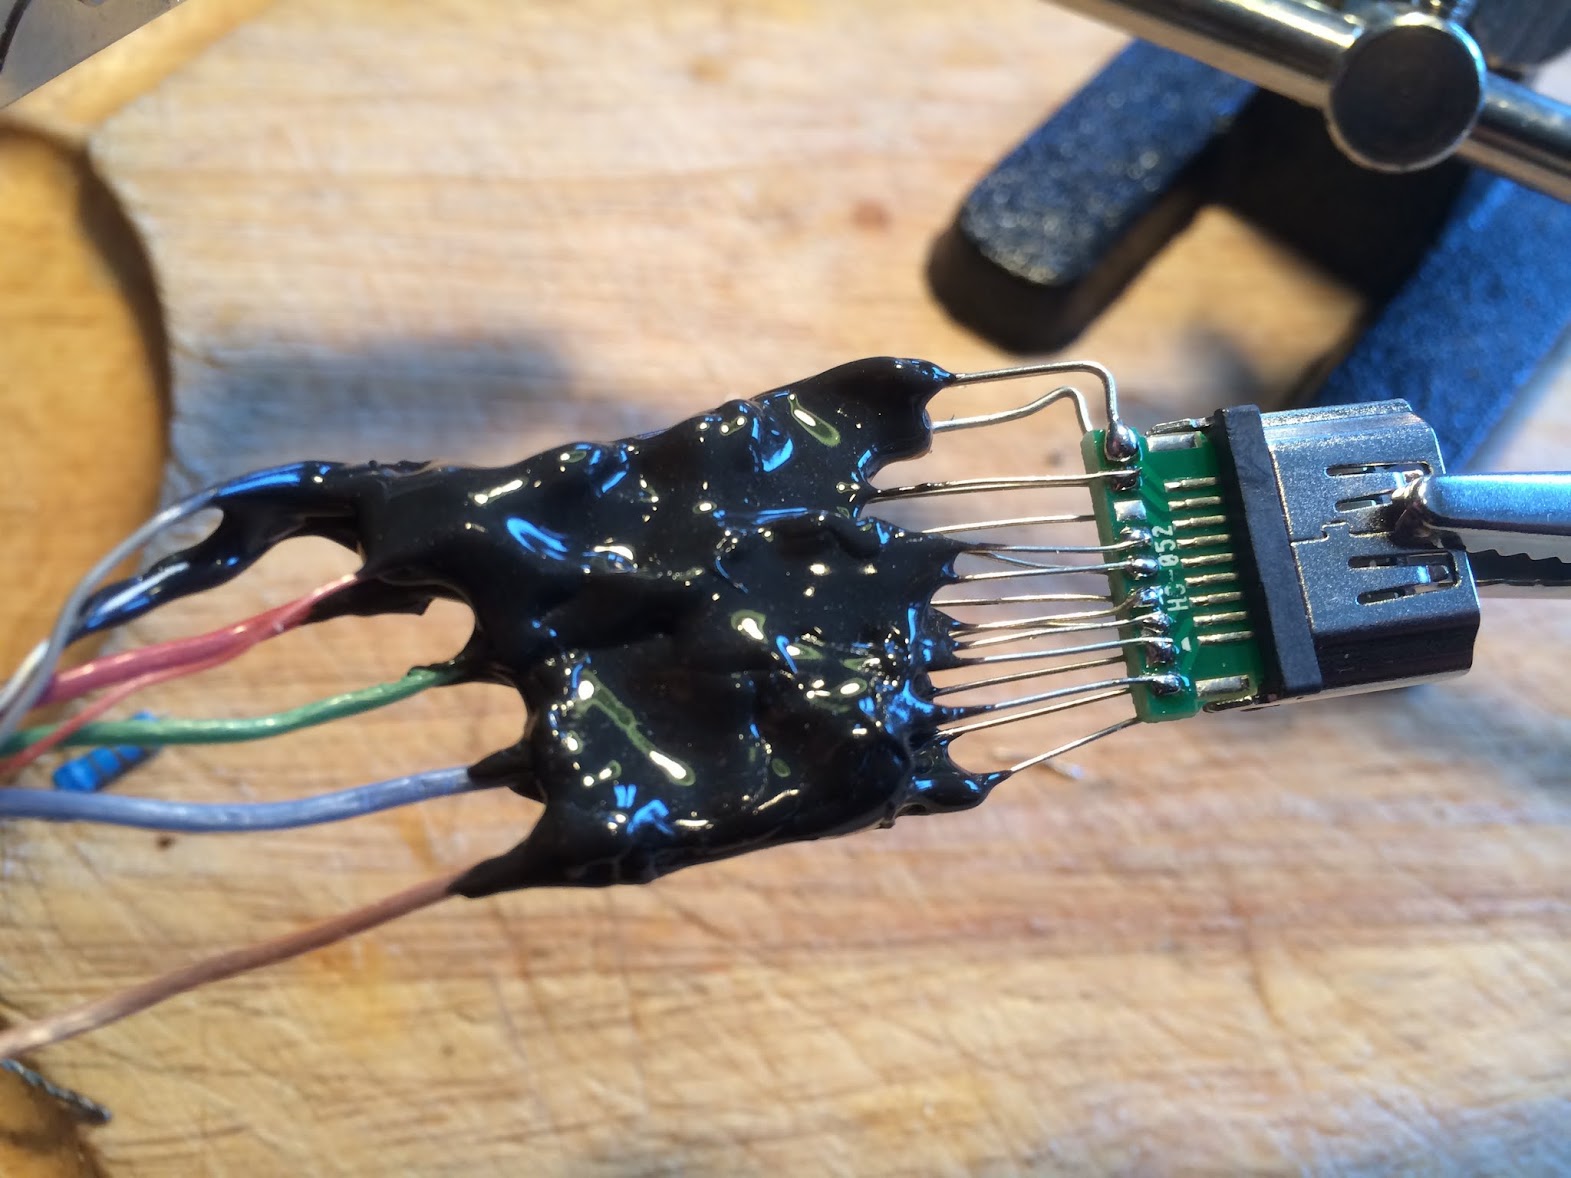
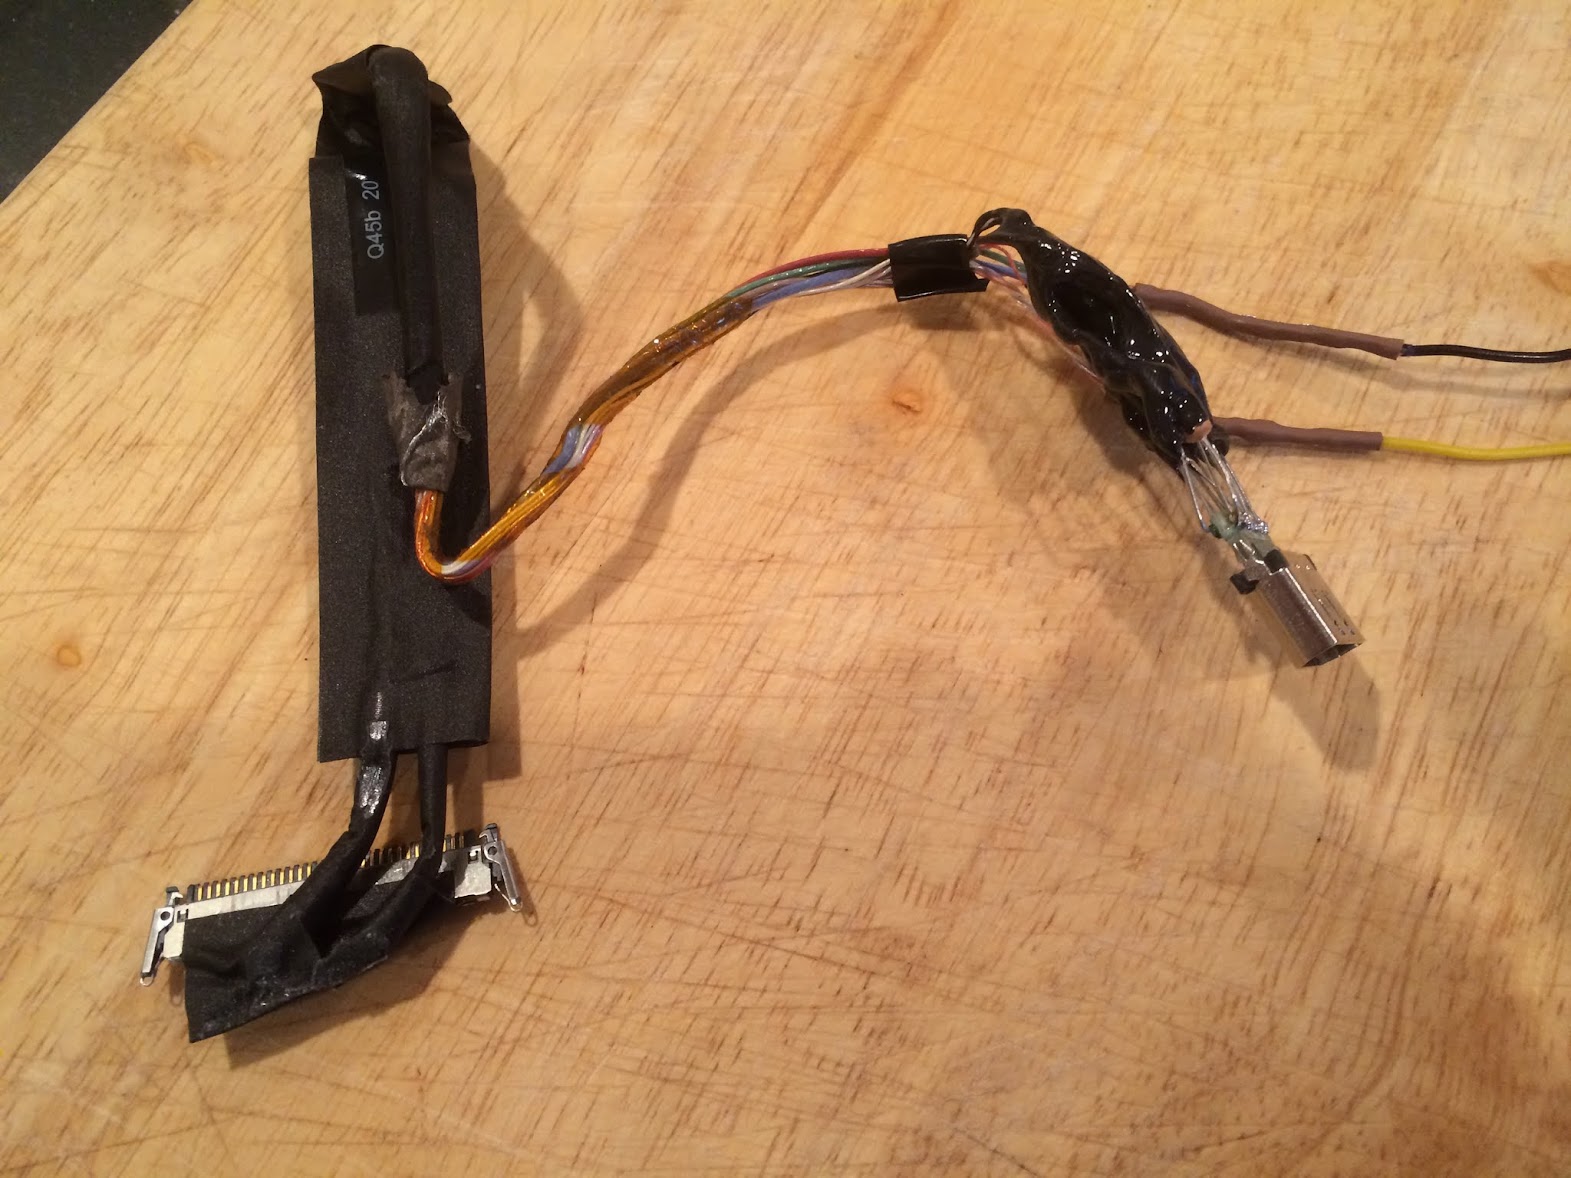
Video Conversion
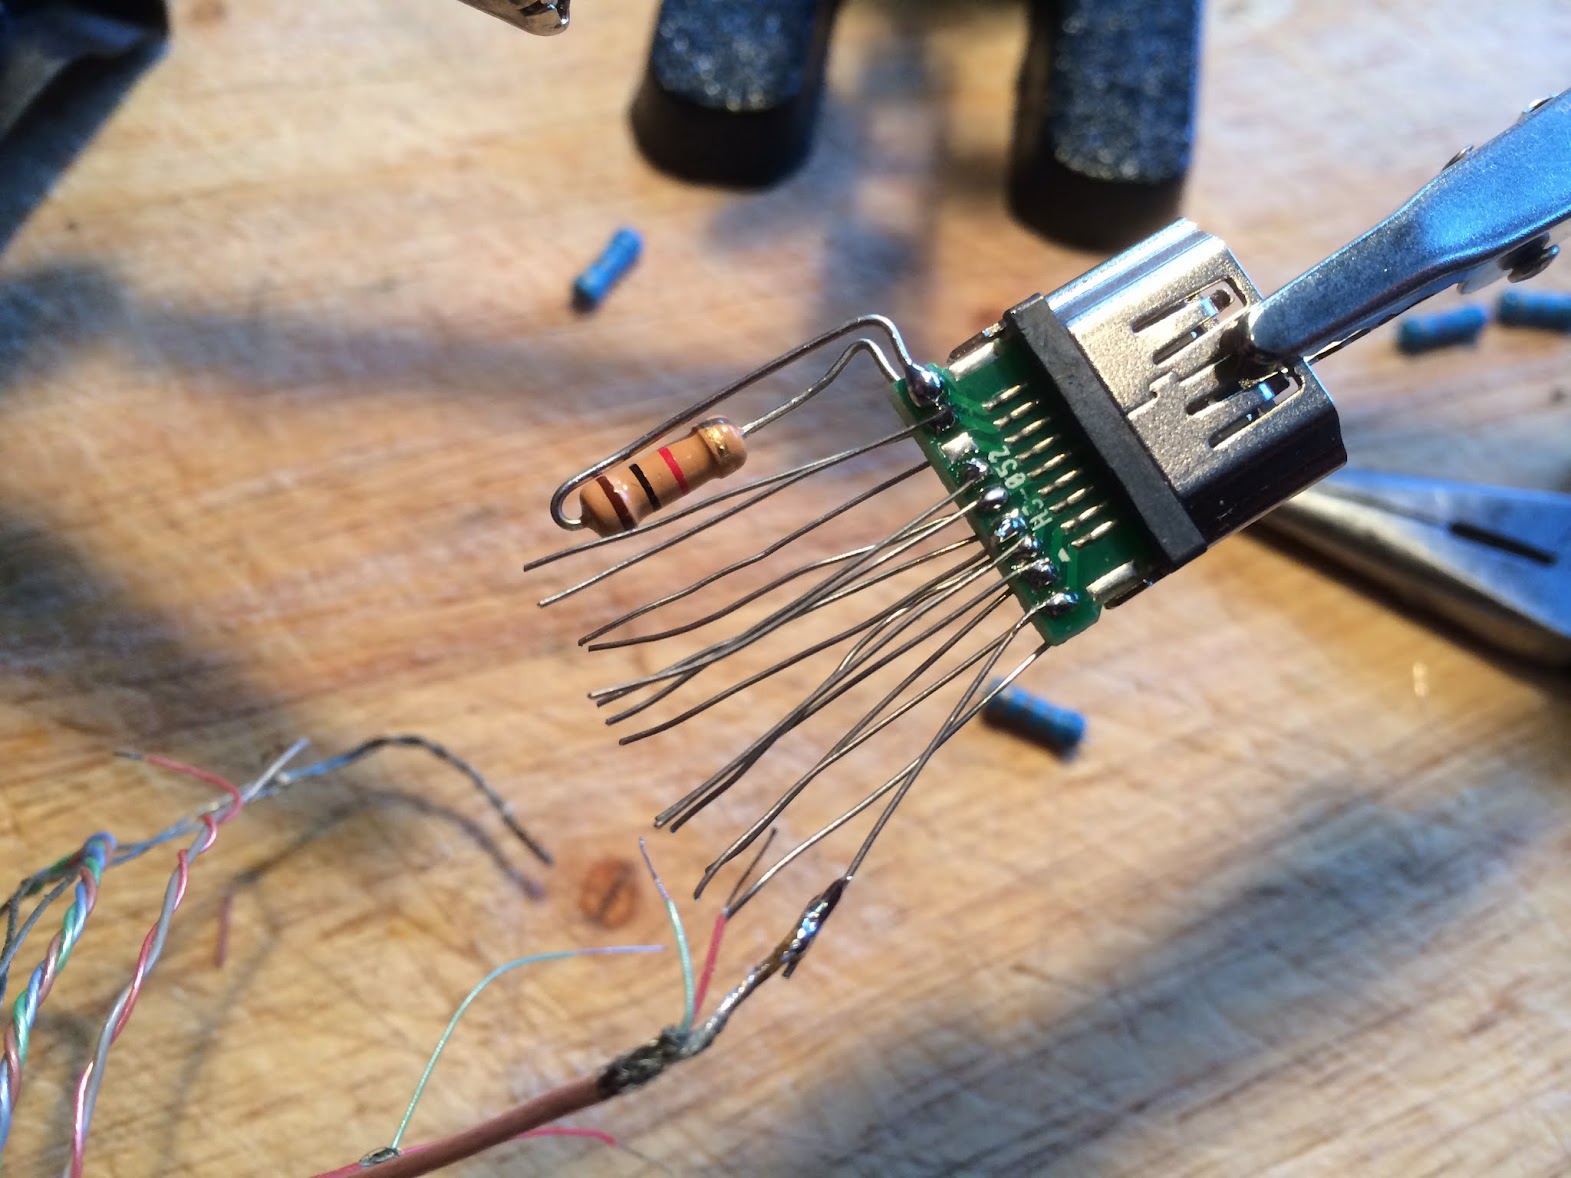
The HDMI to TMDS video conversion was done slightly different this time. I first soldered leads (clipped from resistors) to the HDMI connector, then soldered the tiny 'hair-like' TMDS wires to those leads. As I proceeded, I encased the completed work in JB Kwik Weld to permantly protect each delicate connection. Its not the prettiest work, I know, but it was fool-proof and is as solid as a rock. I was certain to test for shorts and continuity with my Ohm meter before JB Weld was added.


Screen Brightness Control
As in previous iMac builds, I used a sliding potentiometer mounted in the DVD slot to simply and effectively control the LCD brightness. Link is here.
Apple Startup Chime, Sleep LED and Apple Fan Connection
A much different Chime solution was implemented this time. It works fantastic. For complete details see this post.
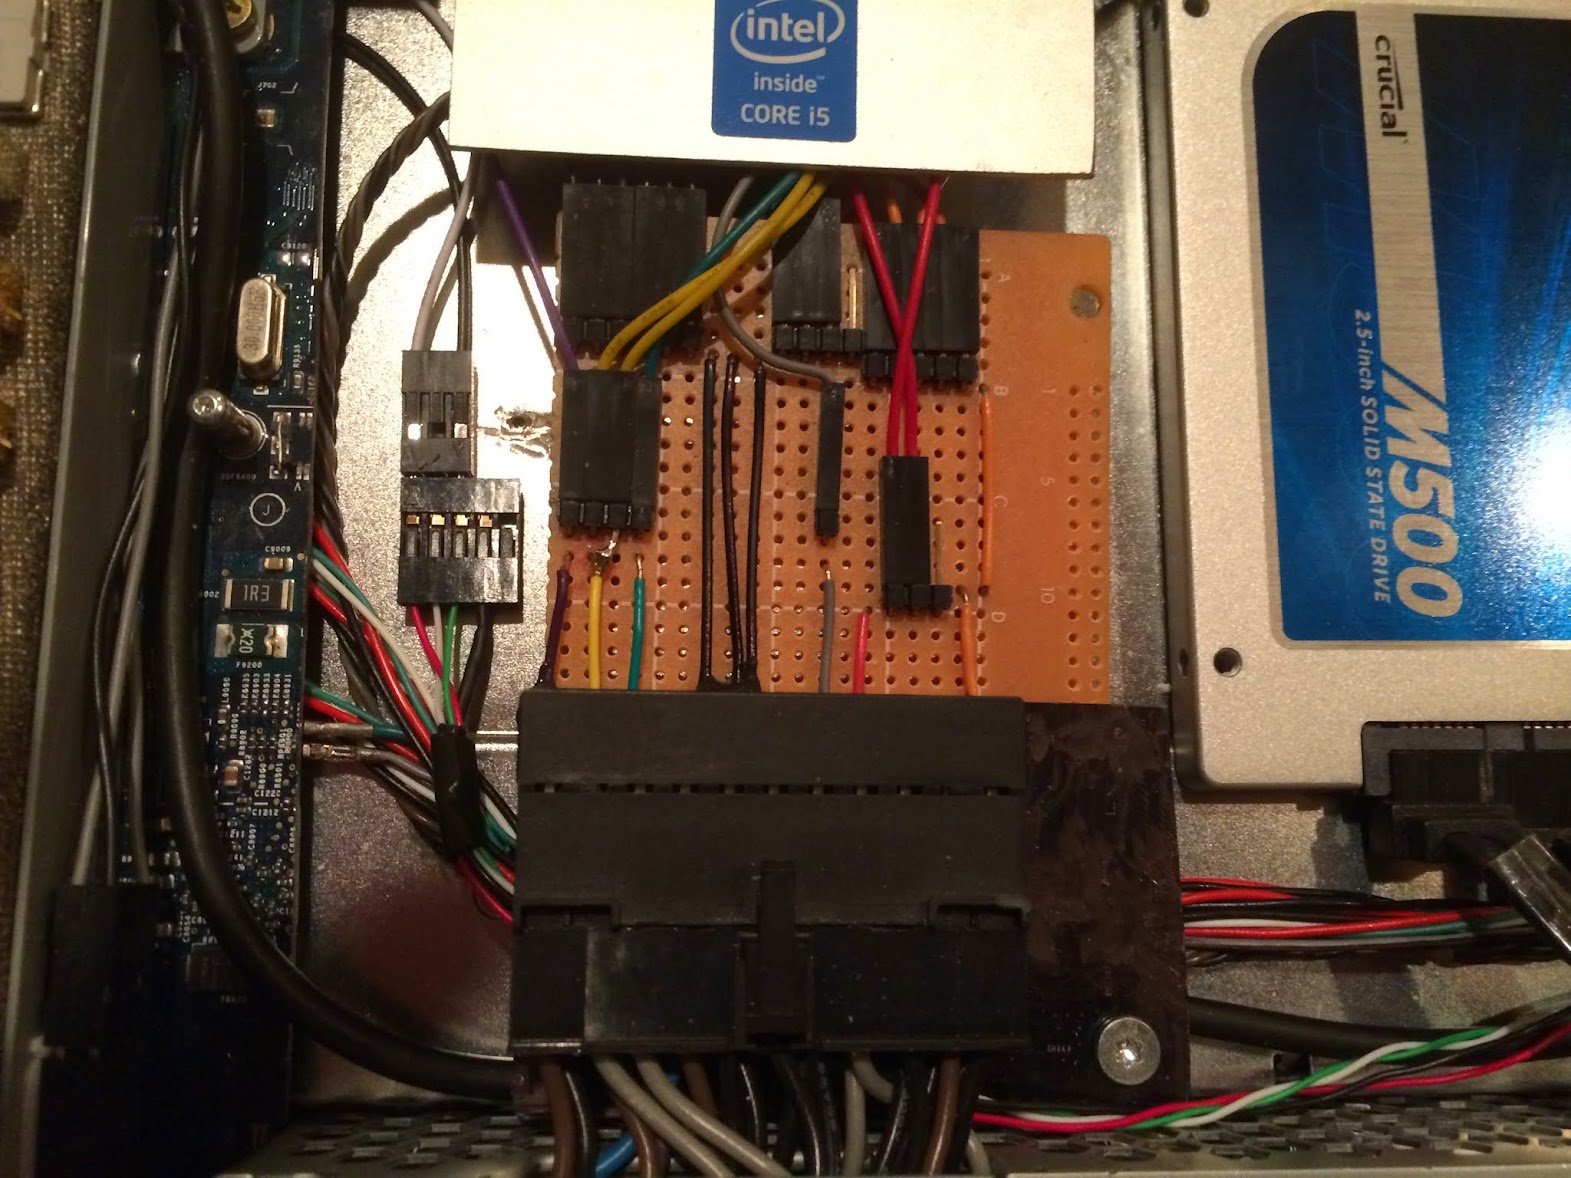
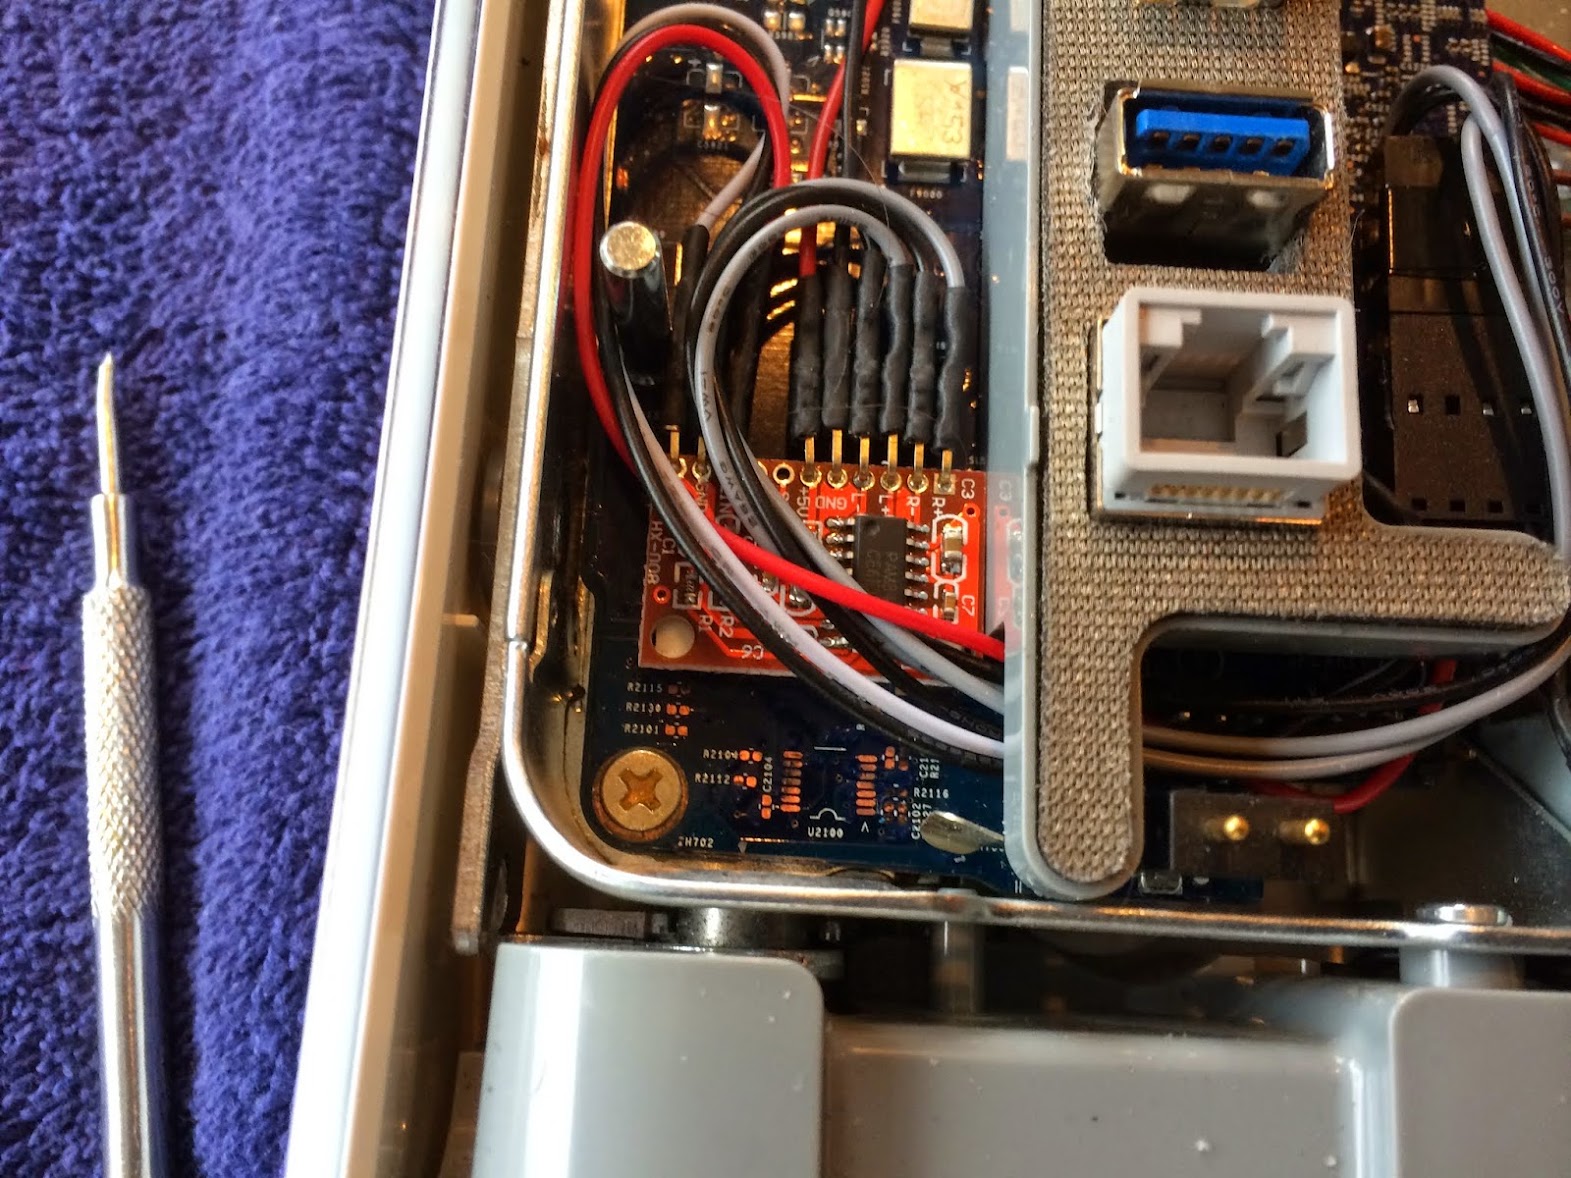
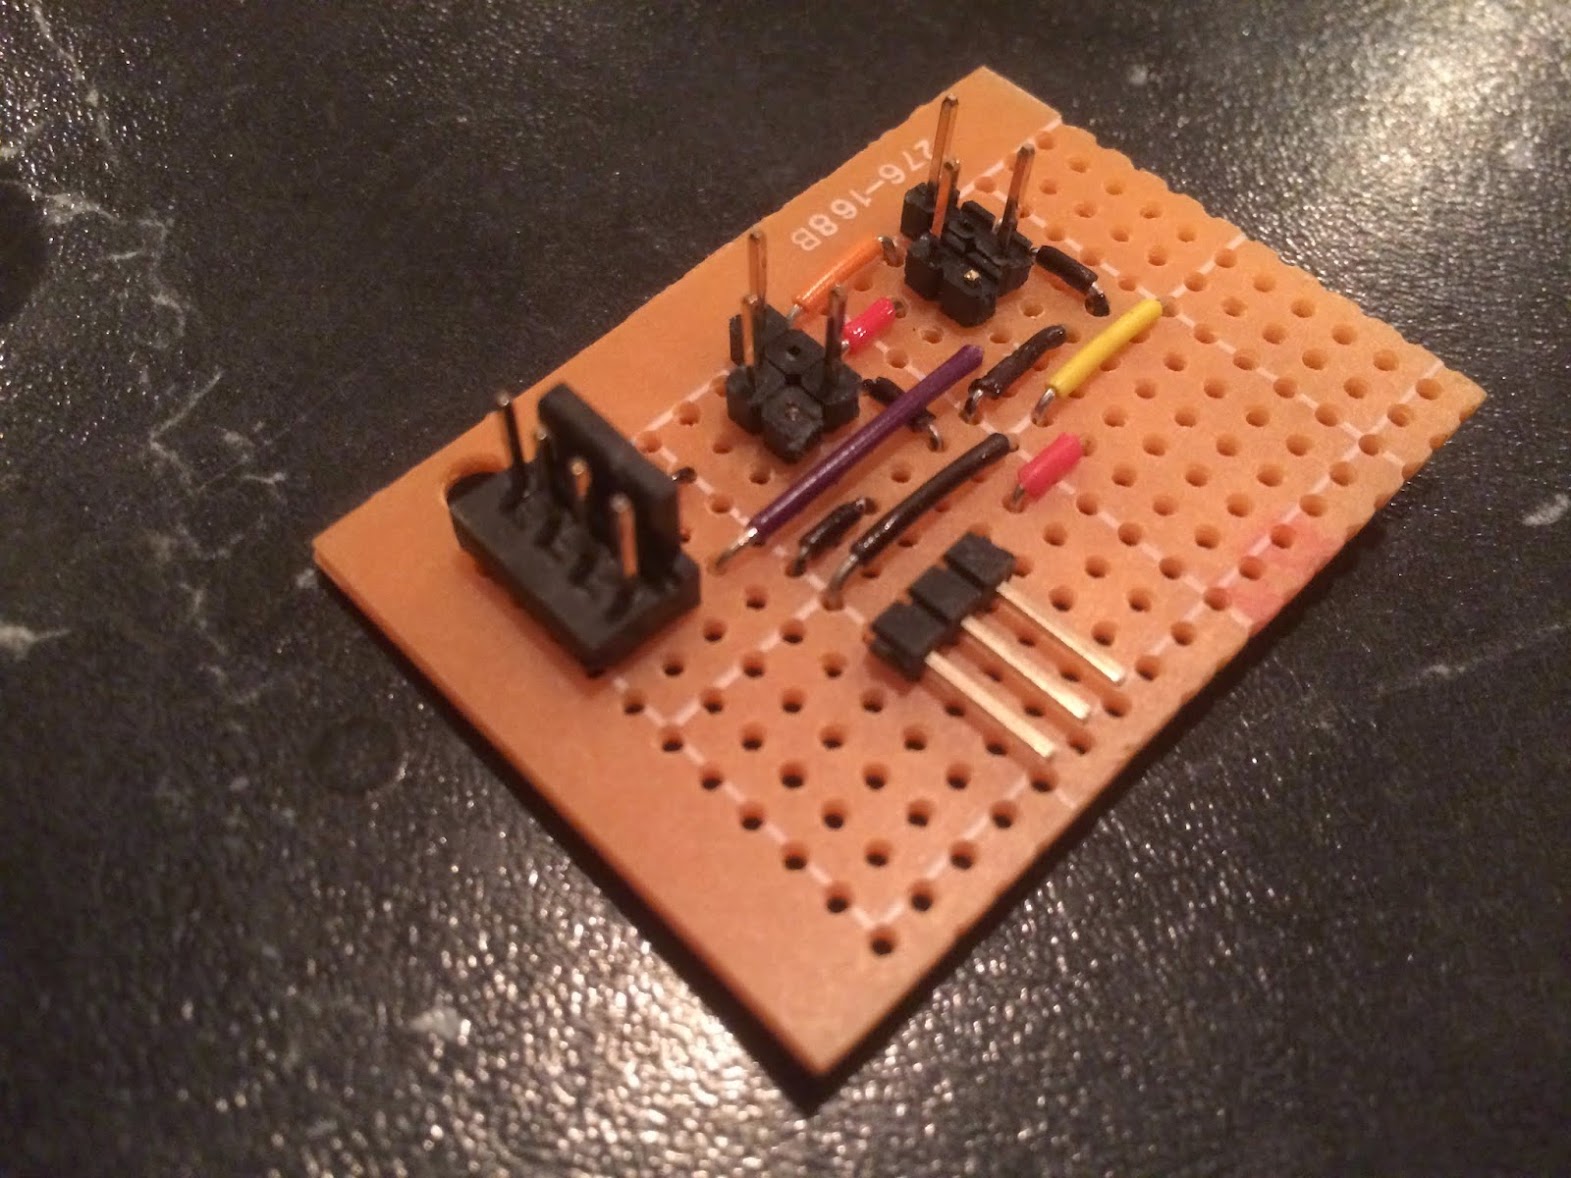
Two Picaxe MicroControllers were used on a single circuit board for the control of the Chime and Pulsing Sleep LED. Both work off USB power supplied from the Intel NUC. All connecting pins are in one row for easy and clean cable routing.

The three Apple Fans in the iMac are maintained. I created a connecting board that exactly matches the Apple connectors for each fan. Plug them in and they all run from a single board.
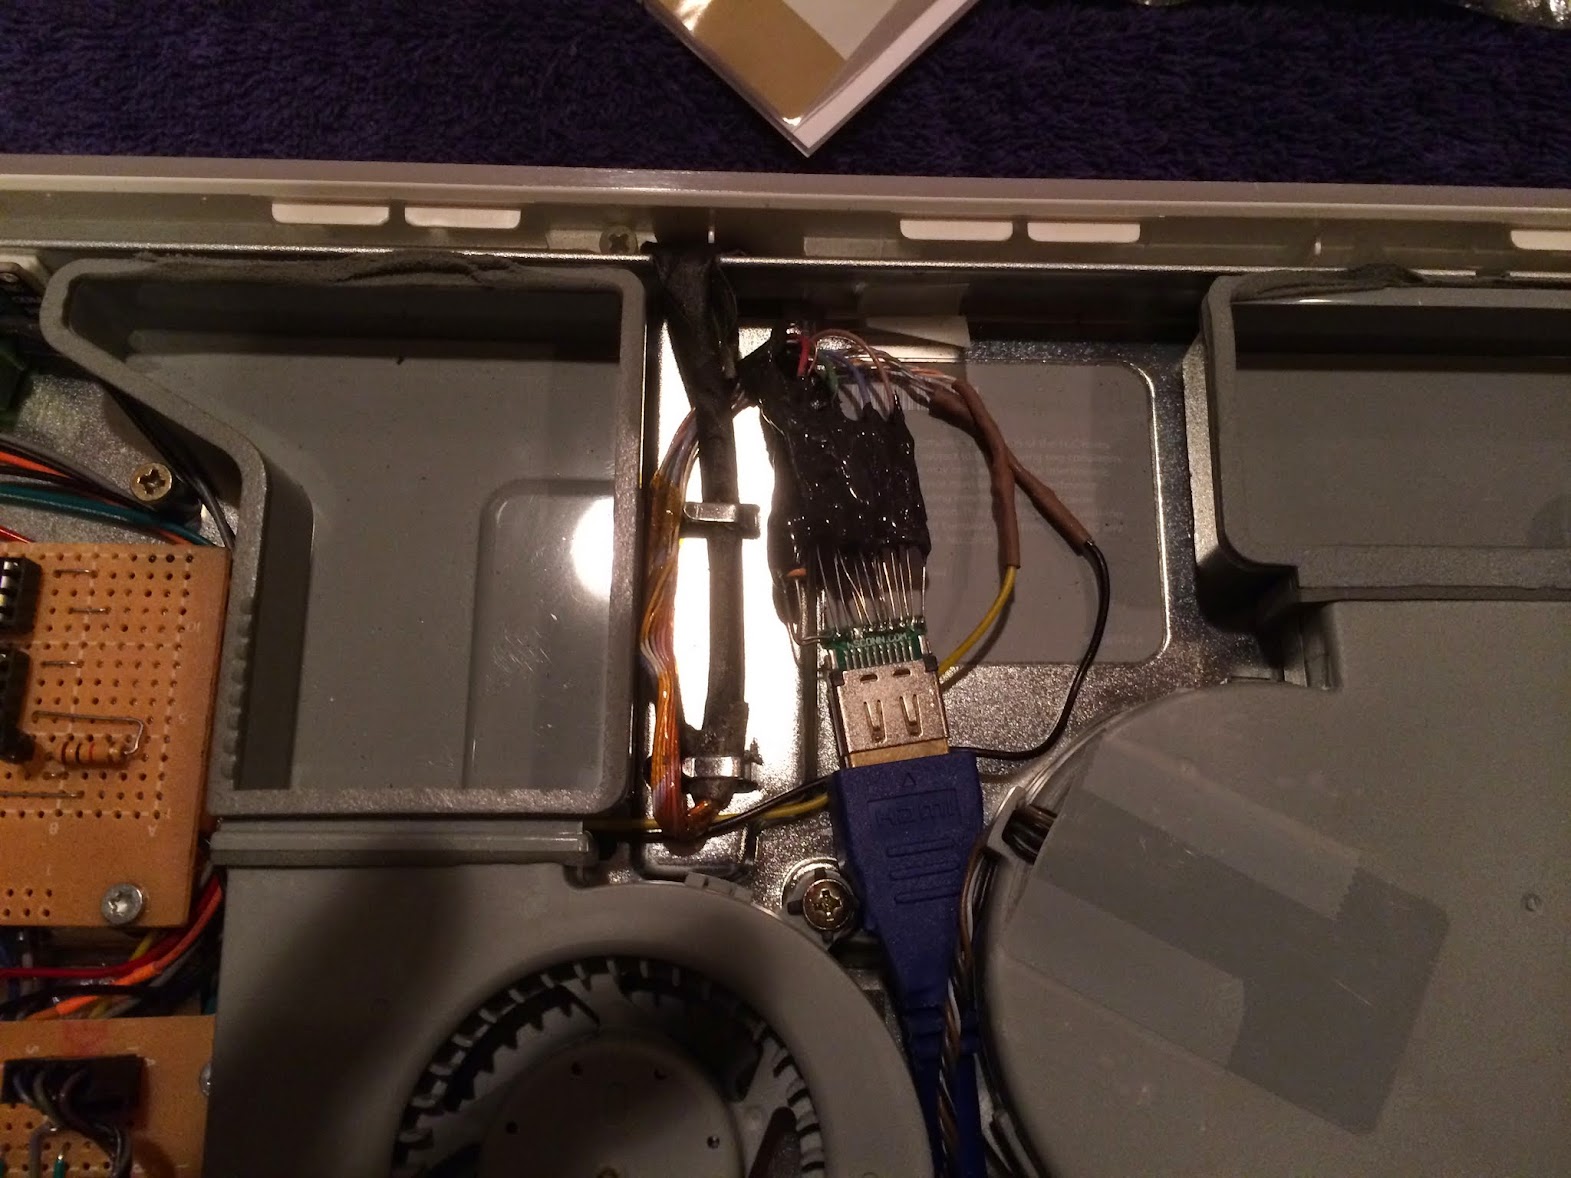
This is what the circuit boards look like in their mounted positions inside the iMac. The MDFly Apple Chime module sits closeby. The chime volume is adjustable through its own dedicated 3W amplifier seen here.

Thats enough for one post. More coming up...
Ersterhernd
This story began on Christmas Day. We had the family over to our place for turkey dinner, and my iMac G5 A1076 build was purring away on the kitchen island. I had completed it about 6 weeks earlier and the system was running like a top. It is linked here.
My dad and my sister were thorougly enjoying using the iMac as the day went on, so much in fact that they asked me if I would build them each one. I said I would look around and try to find machines that would be good suitors for a mod. No guarantees of course, prestine iMacs are getting tough to find.
Craigslist was good to me in January. I managed to find not one, but two (yes TWO) gorgeous specimens without a single flaw on body, stand or screen. Both are A1076 (EMC 2056) ALS models. I subsequently put in orders all over the internet for the parts and supplies I'd need to complete the iMac builds.
Both would be built in a similar fashion to my own completed project. Many of the specific details I will reference from work completed on that thread rather than post redundantly here. I will use this post mainly to highlight any different methods implemented in these two new projects.
Power Map
As previous, two separate power circuits were created; One utilizing the iMac G5 PSU and the other using the Intel NUC Power Brick. This kept the logic simple and the NUC isolated from all power except its own. See this link for details.
Video Conversion
The HDMI to TMDS video conversion was done slightly different this time. I first soldered leads (clipped from resistors) to the HDMI connector, then soldered the tiny 'hair-like' TMDS wires to those leads. As I proceeded, I encased the completed work in JB Kwik Weld to permantly protect each delicate connection. Its not the prettiest work, I know, but it was fool-proof and is as solid as a rock. I was certain to test for shorts and continuity with my Ohm meter before JB Weld was added.
Screen Brightness Control
As in previous iMac builds, I used a sliding potentiometer mounted in the DVD slot to simply and effectively control the LCD brightness. Link is here.
Apple Startup Chime, Sleep LED and Apple Fan Connection
A much different Chime solution was implemented this time. It works fantastic. For complete details see this post.
Two Picaxe MicroControllers were used on a single circuit board for the control of the Chime and Pulsing Sleep LED. Both work off USB power supplied from the Intel NUC. All connecting pins are in one row for easy and clean cable routing.
The three Apple Fans in the iMac are maintained. I created a connecting board that exactly matches the Apple connectors for each fan. Plug them in and they all run from a single board.
This is what the circuit boards look like in their mounted positions inside the iMac. The MDFly Apple Chime module sits closeby. The chime volume is adjustable through its own dedicated 3W amplifier seen here.
Thats enough for one post. More coming up...
Ersterhernd