Contribute
Register

Ersterhernds iMac G5 20 Inch A1076 Project

Status
Not open for further replies.
Joined
Nov 25, 2010
Messages
1,211
Motherboard
AsRock X570M Pro4
CPU
Ryzen 3700x
Graphics
RX 580
Introduction

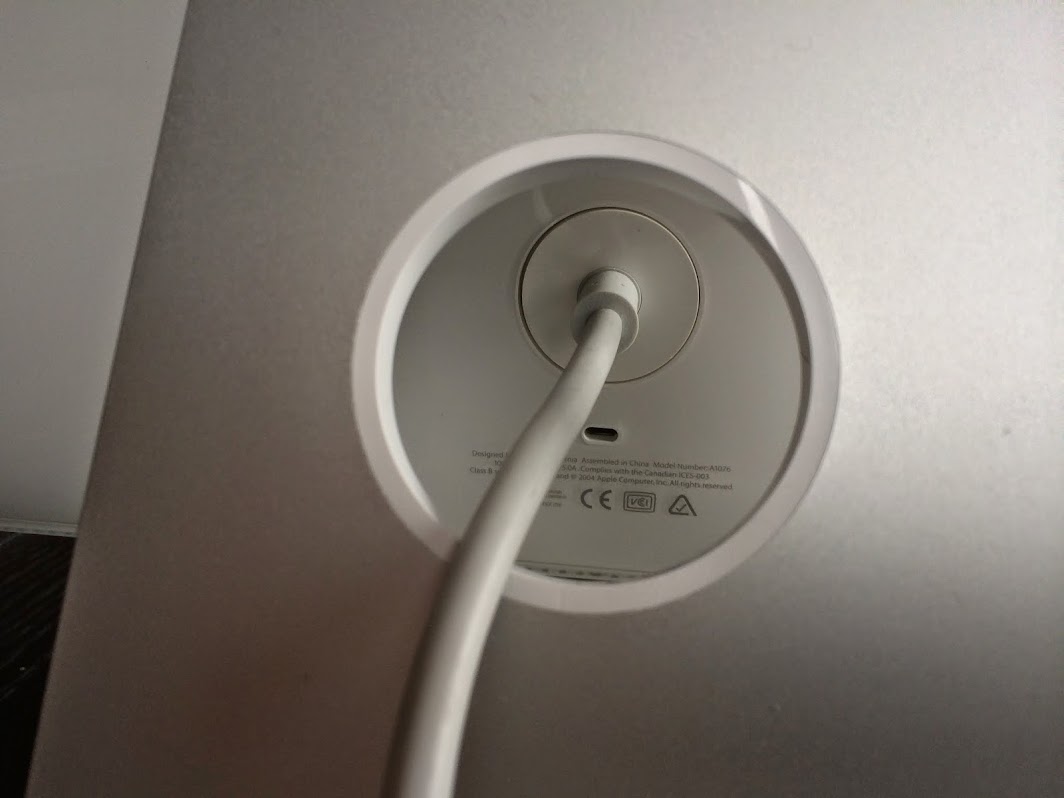
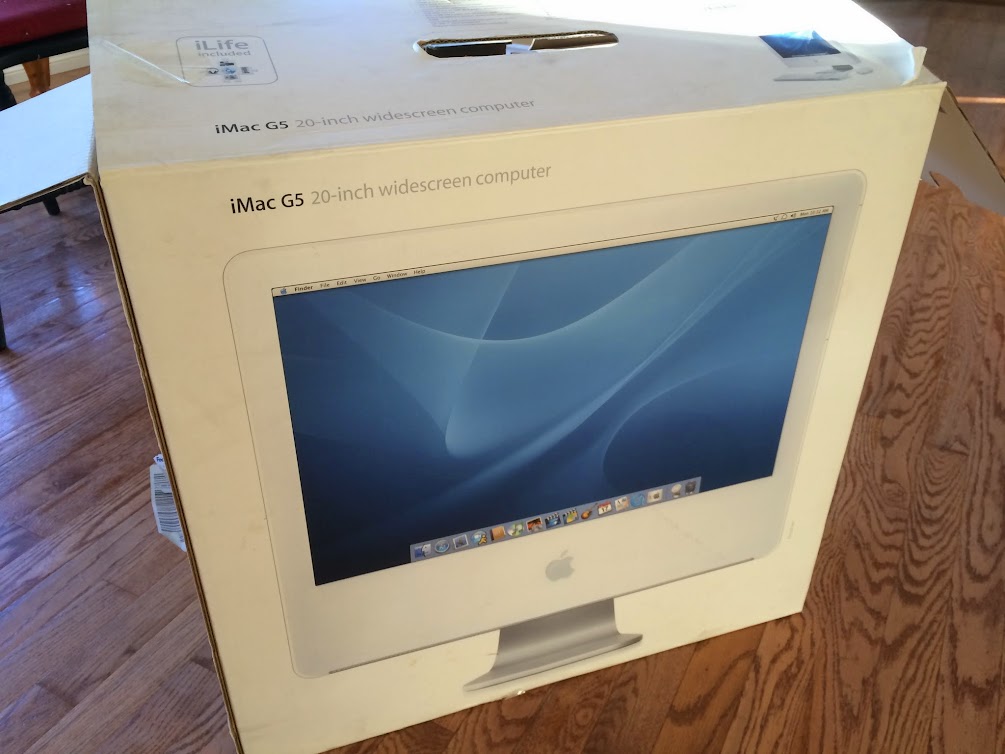
This project began like several others have; while browsing the computer section of Craigslist. A local ad was posted for a mint condition 20" iMac. It was only about a mile from here, so I went over to take a look. The computer turned out to be exactly as described. It was an A1076 (non-iSight) model, originally shipped in 2004. It was a one-owner machine, barely used by an elderly grandmother of the vendor. He explained that she had rarely turned it on in the 10 years she owned it.

The machine was prestine, I tested basic operation and paid him a bargain price for it. Its quite rare to find a 10 year old computer in the near-new condition that this one was in. When I got it home and opened it up, I was awestruck. There was no dust inside, I mean ZERO. The CPU heatsink, fans and air ducts were totally dust free, like new. The capacitors and PSU were shiny new. I'd be surprised if this system had 50 hours on it; the internal components were in literally brand new condition.


IMG_0733.JPG


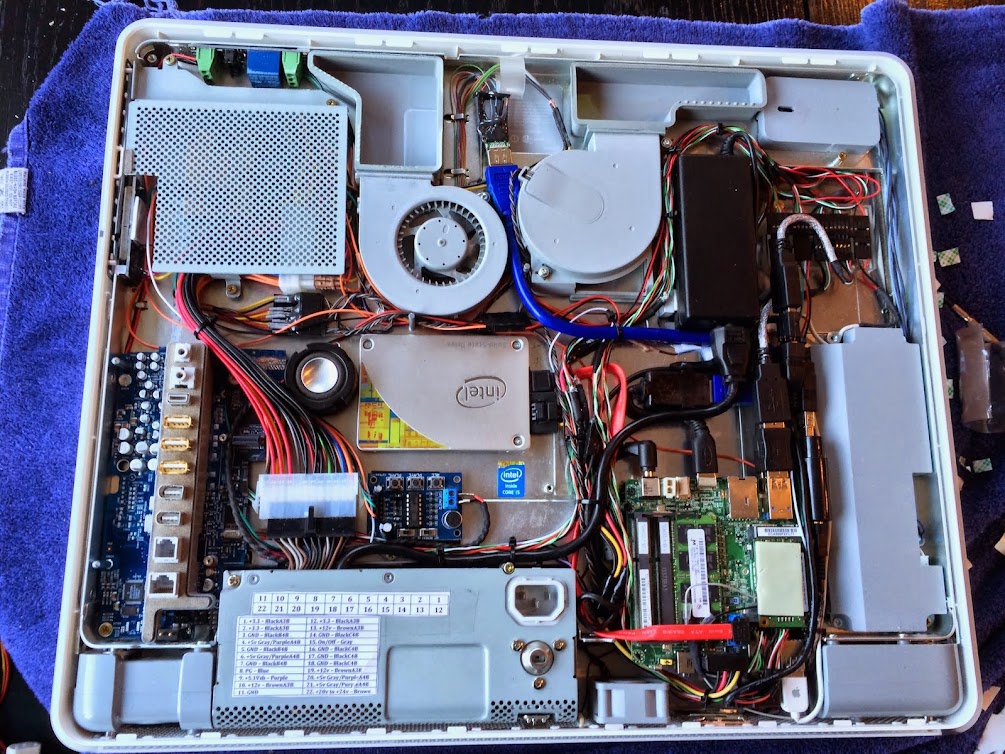
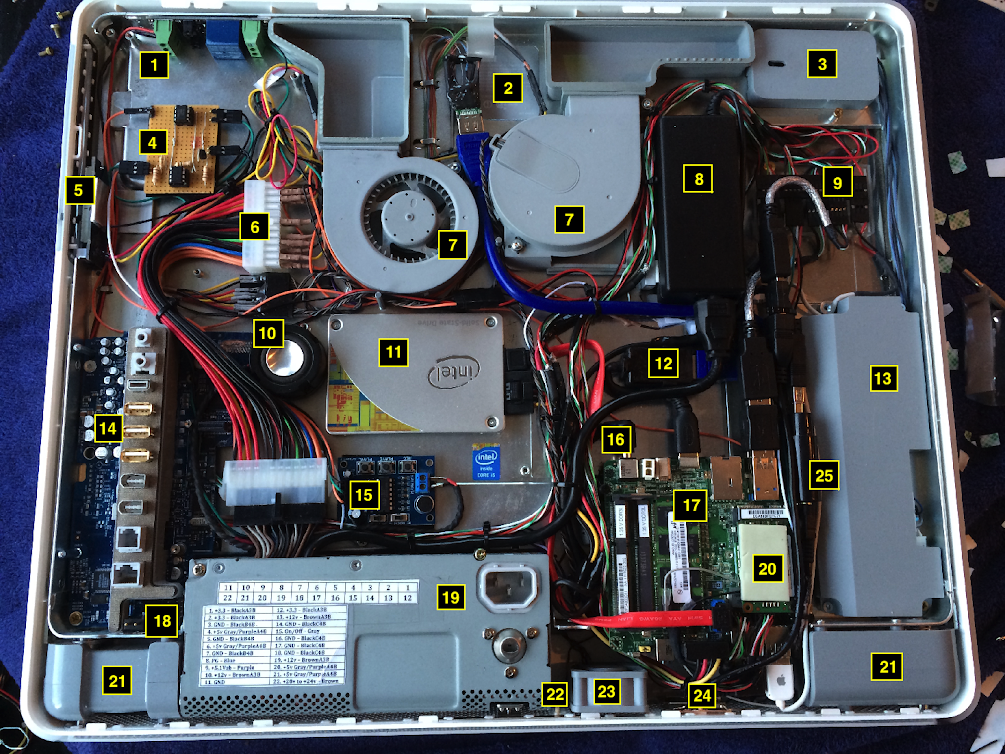
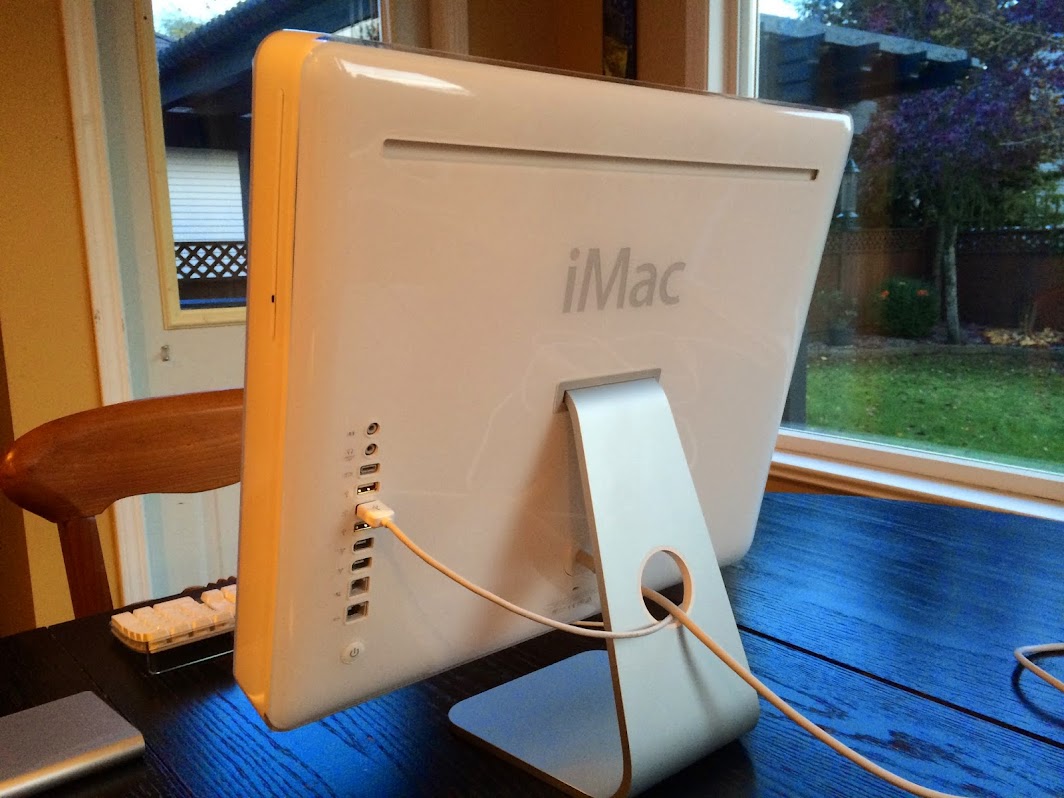
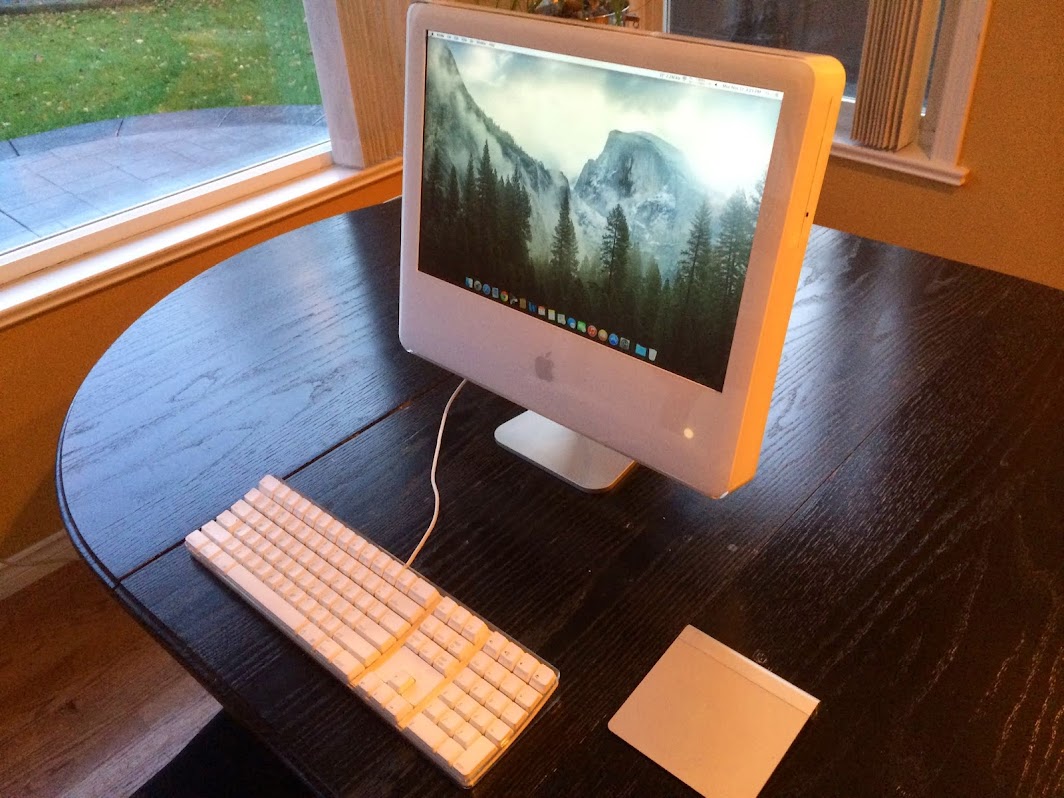
Its been three weeks since I brought the system home and the project of modding it is now fully completed. I'm actually typing this first post of the new thread on the iMac G5 running Yosemite 10.10.1 on an Intel i5 NUC D54250WYK. I'm going to detail the steps I took with this machine to transform it into what is turning out to be a beautiful system to use. It's quiet, fast and of course a completely self contained all-in-one.


Here's a few photos of the completed system.

IMG_0738.JPG


IMG_0739.JPG


IMG_0740.JPG


Just a quick note, I've previously completed 2 other iMac G5 projects. One is an iSight 20 inch model and the other is a 17 inch iSight model. This A1076 model was a completely different animal. Although the iSight models look similar to the older versions on the exterior, they were radically changed internally.

I'd like to recognize kiwi's astounding efforts in producing his recent G5 build. I extensively used the wealth of information that he compiled and posted in his project thread. The model I have is identical to the one he used.

Additionally, I'll take this opportunity to recognize MiniHack for his comprehensive Clover Install Guide to get OSX Yosemite up and running on the Intel NUC D54250WYK. Many thanks!


Ersterhernd
 
Last edited:
The Before & After Snapshot

Apple really crammed the hardware into these old machines. As a result, they often ran too hot. Failed LCD screens and PSU's were common in both 17 and 20 inch models. After being modified over to Intel's NUC platform, this old machine now has a lot more 'breathing room'. The new components use far less power and subsequently produce only a small fraction of the heat that used to pervade this computer.


Apple iMac G5 A1076 in its native form (stock photo)

screenshot_130.png


Modded with Intel NUC D54250WYK

IMG_0729.JPG


Final Hardware Summary

- Intel NUC DC54250WYK with i5 Haswell processor
- Intel HD5000 Graphics
- 8 GB 1333 DDR3 RAM @ 1.35V
- 120 GB Intel 530 SSD (SATA)
- 128 GB Crucial M4 mSATA
- Apple A1181 Bluetooth
- Broadcom BCM94322HM8L ’N’ Series WiFi
- Original 24" iMac WiFi antennas
- Intel NUC 65W PSU (internally mounted)
- Original Apple iMac 180W PSU
- Original iMac G5 Inverter
- Direct HDMI to TMDS soldered video connection
- 5V Relay Isolation Control Panel Module for Apple PSU on/off switching
- Grove Slider Potentiometer for LCD screen brightness control
- 2 x Picaxe 08M2 Micro-Controllers for pulsing sleep iMac LED and Apple Chime
- ISD1820 audio recorder with Apple iMac G4 Speaker (Mac Startup Chime)
- Original iMac G5 cooling fans x 3
- StarTech ICUSBAUDIOB Stereo Audio Adapter
- PAM8403 Mini Digital Audio 5V amplifier
- Original Internal iMac Speakers
- Original iMac Microphone
- 3 x USB 2.0 external rear ports
- Original AC Power Plug
- Original iMac Power Button
- Apple BT Trackpad and Apple Wired Keyboard
- 100% vanilla installation of OS X Yosemite
- Clover UEFI bootloader
- Functional iMessage (02/19/2015)


Ersterhernd
 
Project Index

I've decided to take different approach to how this thread will be laid out. All relevant build topics will be linked from this post. It should work well for anyone looking for specific info.


The Hardware Map & Link Index

iMacG5A1076Layout.png


1. Power-On Relay (Power Map Link)
2. HDMI to TMDS Conversion (Video Conversion Link)
3. Inverter Wiring (Brightness Control Link)
4. Apple LED and Apple Chime Controller (Controller Board Link)
5. Screen Brightness Control (Brightness Control Link)
6. ATX Connection Block (24 Pin Connector Link)
7. Apple Exhaust Fans (Fan Information Link)
8. Intel NUC 65W 19V Power Supply (Installation Link)
9. USB Connections (Six Ports Link)
10. Apple Chime Speaker (Apple Chime Link)
11. Intel 530 Series SSD (Onboard Storage Link)
12. HDMI to Mini-HDMI Adapter (Installation Link)
13. Apple G5 Inverter (Brightness Control Link)
14. External USB Connectivity (USB 2.0 Installation Link)
15. Apple Chime Playback Module (Apple Chime Link)
16. 19V Connection to Intel NUC (Power Map Link)
17. Intel D54250WYK NUC (Installation Link)
18. Power Button and iMac LED (Link to Kiwi's Post)
19. iMac G5 180W Power Supply (Power Map Link)
20. mSATA SSD and WiFi (WiFi Installation Link)
21. iMac G5 Internal Speakers (Audio Installation Link)
22. A1181 Bluetooth (Bluetooth Installation)
23. iMac G5 Intake Fan (Fan Information Link)
24. WiFi Antennas (WiFi Installation Link)
25. USB Audio Device (Audio Installation Link)


Additional Information

Project Performance Summary

MiniHack's Yosemite Install Guide for NUC D54250WYK


Ersterhernd
 
Last edited:
Build Log 01 -- AC/DC Power Map

This iMac uses a fairly simple map by which to take 120V AC power from the mains and distribute it using the required DC voltages inside the computer. The iMac uses its native power cord as originally, and also its native 180W internal power supply. Fortunately, with this system being in near-new condition, the inside of the Apple PSU appears to show no signs of wear at all; it is shiny and new inside without any capacitor bulge or discolored copper. It should last many years in this application, given that it will only typically output about 20% of its capacity under normal use. The Apple PSU sits in standby mode when the NUC is powered off, and comes to life when the iMac native power button is pressed. It then supplies all 3.3 5.0 12.0 and 24.0 volt DC power to the system components.

A second internal power supply is also used. It is the 65W 19V PSU supplied with the Intel D54250WYK. It is used to hold the NUC in standby mode, and power on the NUC when the iMac power button is pressed. The AC power cord to this PSU was simply cut off and the wires were spliced into the AC wires inside the Apple 180W PSU. This allowed only the native power plug to be required on the rear of the iMac, rather than two individual plugs for the two PSU's.


Two internal power supplies with AC spliced to the native iMac power socket for use with the original Apple power cord. A clean and effective solution.

IMG_0762.JPG


The AC lines of the NUC PSU and the Apple G5 PSU are spliced together inside the metal case of the G5 power supply. The original AC cord comes out from the G5 PSU and plugs into the NUC PSU.


On the DC side of the power map, the flow is once again quite simple. The NUC PSU supplies 19V to the D54250WYK via a 5.5mm/2.5mm barrel connector to the NUC's exterior plug. The NUC essentially just sits in wait for the pins 6 and 8 of it's Front Panel Header to short and start the NUC. The iMac native power button is wired directly to pins 6 & 8 to accomplish this. See Kiwi's post for the details of that.


The 19V supply from the NUC PSU to the D54250WYK via the barrel connector.

IMG_0715.JPG


When the iMac power button is pressed and the NUC starts, the next step is to start the Apple 180W PSU for DC supply to the rest of the system. This was accomplished through a relay. By connecting pin 9 of the NUC Front Panel Header to the relay then grounding it to the NUC reset switch GND pin 5, the relay remains powered whenever the NUC is on.

With the other end of the relay wired to the PS-ON pin and GND pin of the iMac PSU, the closed circuit completes and the remainder of the system powers on via the iMac PSU, supplying 3.3V 5V 12V or 24V as required. When the NUC is powered down through OSX, the relay shuts off and so does the iMac PSU, returning to standby mode.


The relay when powered on from pin 9 of the NUC Front Panel Header.
The iMac PSU is powered on when the red light on the relay is lit up. Relay link here.

yw1Jmj.jpg


Ersterhernd
 
Build Log 02 - HDMI to TMDS Video Connection

Without a doubt, this was the most critical part of the entire build. Sending a clean video signal to the iMac 20" LCD would determine the success or failure of the project. I had previously attempted to connect this Intel NUC D54250WYK to a 20" iMac G4 LCD using and HDMI to DVI converter, but was plagued by an artifacting issue on the LCD. Kiwi managed to find success with his project using an 'HDMI only' solution and soldering the tiny hair-like iMac video wires directly to HDMI. I knew I had to attempt the same, even though it would be very difficult.


Step One - Desolder the native iMac TMDS connector wires
(all glue on the connector was first removed with nail polish remover)

IMG_0655.JPG


IMG_0656.JPG


IMG_0657.JPG


Step Two - Solder the tiny TMDS wires to the HDMI connector PCB
This was by far the most difficult soldering task I've ever done. It took hours to complete.
I used this handy method to make my own fine-tip soldering iron. Free and worked great.

kOOmhd.jpg


Step Three - Test the connection with the HDMI port of my HP ProBook (HD3000 graphics)

SUCCESS!

IMG_0669.JPG


Step Four - Secure the soldered connections with JB Kwik Weld to protect the wires from breakage

screenshot_06.png


Step Five - Route the Video Cable through an access hole cut into the midplane of the iMac.
The exhaust fan mounts over top of the wiring. The 30-pin video connector is under the midplane.

IMG_0668.JPG


Step Six - Final Securing of Wires and HDMI Connector to prevent any movement
The blue HDMI cable is permanently glued to the exhaust fan so there is NO movement.

IMG_0696.JPG


Step Seven - Test with the D54250WYK NUC HD5000 graphics (Fingers Crossed!)

SUCCESS!

IMG_0682.JPG


For complete wiring diagrams see Kiwi's post here. Many thanks to him for pioneering this effective conversion solution. The build would not likely have been possible without it.


Ersterhernd
 
Build Log 03 - Inverter Pinout and Brightness Control

The LCD brightness of this A1076 model is VERY bright at the highest setting. Some form of screen dimming is required to control it. The pinout for the inverter is shown below, all wires must be connected for it to work properly. If no dimming is used, the Brightness wire is plugged into 3.3 volts. The 24V requirement is easily handled with the iMac native PSU, which has a 24V pin so no upconversion is required.


InverterPinout-1.jpg


The dimming on this machine is the same as my previous 2 iMac G5 builds. It utilizes a Grove Slider Potentiometer. The unit has a very nice feel and works beautifully when connected to the Brightness wire of the inverter cable. All that is required is a stop glued onto the slider to prevent the voltage from going low enough to shut off the backlights.


The Grove Slider Potentiometer

screenshot_08.png


Mounted in the DVD slot of the iMac, with the slider knob sticking through to the exterior for quick brightness adjustment of the LCD. The DVD slot turned out to be a perfect place for this function.

screenshot_09.png


The small black brighness adjustment knob sticks unobtrusively through the DVD jacket on the side of the iMac. Brightness adjustment is a snap.

screenshot_10.png


Ersterhernd
 
Build Log 04 - Apple Chime and LED Controller

Two MicroControllers are functional in this iMac. Both are Picaxe 08M2 chips, which have been programmed to perform their specific function. Picaxe 'A' is the Apple Startup Chime Controller, and Picaxe 'B' controls the front panel LED on the iMac. Both are shown below...

Z5cB9y.jpg


The wiring is as follows:

1. 5V to ISD1820 sound recorder
2. GND for ISD1820
3. To Playe pin on ISD1820
4. To pin 9 on NUC Front Panel Header
5. To iMac LED +
6. To USB 5V Supply
7. To USB GND
8. To iMac LED -


The ISD1820 sound recorder and speaker that plays the startup Chime in this machine.

ys5GnM.png


Video of Picaxe controlled Apple Chime function

[video=youtube;CyXzjWAAi-Q]https://www.youtube.com/watch?v=CyXzjWAAi-Q&list=UUKec_H3wAJbsvZsYh6aGObw[/video]


Video of Picaxe controlled Sleep 'breathing' iMac LED function
(LED Pulsing begins @ 25 secs)

[video=youtube;2aXKSVgnkJw]https://www.youtube.com/watch?v=2aXKSVgnkJw&list=UUKec_H3wAJbsvZsYh6aGObw[/video]


For a detailed explanation of the Apple Chime function please see this link from a previous build log.

For a detailed description of the iMac Apple LED functionality please see this link.


Ersterhernd
 
Hi ersterhernd

I'm speechless. Very well done. :thumbup:

I'm a bit jealous, my G5 iMac is still taken apart...

Good hacking
MacTester
 
Hi MacTester!

I remember how awestruck I was on the day you revealed your completed HemiMac for the first time. The best part about this project was that it only cost me 80 dollars for the iMac, thats it. The rest of the work was simply reutilizing parts I already had sitting in stock.

As you know, I had to compromise on my last attempt to use this Haswell NUC by placing it in a 17" unit. I was never happy about that, and am now very satisfied that its doing the job it was intended to do in a 20" iMac.

This was fun, too. It really didn't throw me any problems from start to finish. One thing I'm going to do is order a couple of spare video cables and attempt to solder a spare HDMI conversion in case this one ever causes trouble. That'll be a job for a rainy day.

Hope all is well with you and the family. Say hi to everyone for us.


Cheers!
 
Build Log 05 - ATX Connection Block

As previously stated, the condition of the internal 180W PSU in this computer was absolutely mint. It would have made no sense to proceed without reutilizing it. Perhaps the most important feature is that of the 24V pin to supply the LCD Inverter without any added requirement for voltage upconversion.


The 'mint condition' iMac 180W PSU with labels for certainty of accurate connections

IMG_0699.JPG


The actual connection to the PSU is handled by a 24-pin Startech ATX cable, 8 inches in length. This moves the connection block up to a more desirable and safe location in the case, where is can be protected with a cover plate. There can be no issues with wire movement or a short could occur. The Startech cable is linked here. Two of the 24 pins are not used because the Apple PSU is only 22 pins. Both ends of the cable are firmly fixed to the iMac midplane with heavy duty velcro, there is absolutely zero movement.


The Startech 8 inch ATX Cable fixed firmly in position

VxUoAY.png


The other end of the ATX cable is where all required wiring is plugged in. I purchased a bunch of male ATX pins from FrozenCPU, which fit perfectly into the Startech Cable. The pins can be found here. EDIT: Apparently FrozenCPU has ceased operations (Feb 2015) so I'm not sure where these pins are available.


The male ATX pins I used to connect to the PSU Cable

IMG_0741.JPG


The completed pins soldered to wires and protected with shrink tubing.
They provide a snug fit into the Startech cable so there is no risk of coming loose.
Wires are color coded orange 3.3V, red 5V, yellow 12V, purple 24V, green PS-ON and black COM.

screenshot_12.png


Using the original iMac DVD bracket (cut down to fit) I have a fashionable safety cover that is secured with three screws. It effectively hides the mess and protects the wiring.

IMG_0728.JPG


Ersterhernd
 
Status
Not open for further replies.
Back
Top