- Joined
- May 27, 2010
- Messages
- 2,364
- Motherboard
- Dell Optiplex 9030 All in One
- CPU
- i5-4690K
- Graphics
- HD 4600
- Mac
- Classic Mac
- Mobile Phone
This is my iMac G3 mod that owes some inspiration from this new Lian Li case:

The Lian Li is a Mini ITX case and also is a very boxy aluminium design, so apart from the concept of putting the motherboard on show inside a "TV" like housing the similarities end there.
The iMac was originally my wifes and served her for many years before the CRT went on the blink. It was too nice to throw away, too worthless to sell and the idea of putting a low res 14" monitor in it did not appeal and this combination of factors mean it has sat on top of my cupboards for some time since (probably 3 years or more).
The idea though of putting all my hardware center stage inside this box is appealing and it has room I believe for an mATX system to be mounted.
This first post is all about the teardown and checking the concept.
Here is how it looked before I came along and took it to pieces.


I did not use a teardown guide, but I have documented the process here. First I turned the iMac over and removed the cover for the video output as well as the RAM access slot:

Next, there are four screws accessible for taking off the bottom main plastic part.


Once those are undone you can tip up the bottom part and remove it:

There are two screws that need to be undone to remove the front trim part - and here you see the grey cover that needs to be removed to access one of them:


and the other:


Once these are undone the front will pull off.

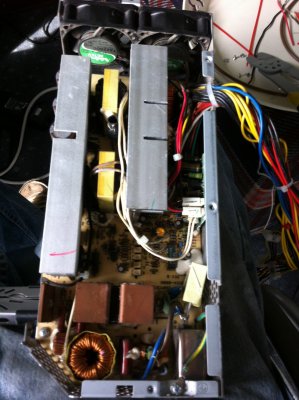
I chose to then work on removing the original motherboard, but first the faraday cage needs to be removed. Here are some shots of it as well as of the little iMac speakers:


The faraday cage is held on by a few easily accessible screws and comes off simply enough.


Underneath the cage we see the mobo:

and the neat little combined HDD tray and DVD carrier.
The mobo once disconnected comes off easily enough and you are left with a bottom plate exposed:


This plate will not come off now though, so instead I turned to removing the speakers:

They have three clips which attach - one central clip that has a prong that needs to be depressed form underneath, and two outside clips. Press the central prong in and then slide the speaker outwardly to remove.
Turning back to releasing the top plastic, undo these screws (which are hidden under two grey clips above the crt top):

as well as a screw at the back of the shroud (not shown here sorry) which attaches the translucent "grape" coloured cover to two side plastic parts and then tilt and slide the cover downwards and it will come off.

Look at the clips that are shown in the photo below and you will see why you need to slide the shroud downwardly to get it removed:

After this you are left with a couple of plastic side pieces and a front plastic part that attach to the metal tray and which hold the CRT and the high voltage PCB tray.

At this point disassembly is relatively straightforward in that if you find a screw you unscrew it. HOWEVER, at this stage do STOP. You have exposed the CRT and it now needs to be discharged. Failure to do that now and putting yourself in the wrong place can result in a very nasty electric shock that can potentially be fatal.
Watch this on what to do and precautions to take:
http://www.youtube.com/watch?v=bDAiLtTDuf4
You will also find on Google an enormous amount of warnings about death from CRT…….mostly written about by people who do not have much electronics knowledge. I did find this interesting too:
http://lowendmac.com/tech/crt_danger.html
In any event, I suggest you do follow all instructions for avoiding discharging the tube through your own body and please do it safely. Once safe you can carry on taking stuff apart. Usual note - please do not hold me responsible for any injury you might sustain. Be careful and everything will work out fine. Most important though do not simply go poking a screwdriver at the CRT before you understand the risks and what you are doing.
Having disassembled my iMac I put the parts together again without CRT and PCBS to make sure it all would re-attach perfectly and to make sure I had all the parts I needed.
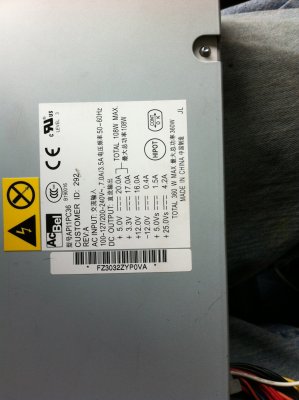
Of note I kept the side IO piece which will be re-used and I also broke off the power inlet from the high voltage PCB to keep as it will screw attach to the metal support plate and can be easily and sturdily re-cycled for the build later.
Here are some pictures now of the basic parts re-assembled:


and that is where I am right now.
Things to come:
Making a tray for the motherboard; making fan support (to utilise the area around the "handle" at the back); making a front "screen"; sorting out everything else!!!
The Lian Li is a Mini ITX case and also is a very boxy aluminium design, so apart from the concept of putting the motherboard on show inside a "TV" like housing the similarities end there.
The iMac was originally my wifes and served her for many years before the CRT went on the blink. It was too nice to throw away, too worthless to sell and the idea of putting a low res 14" monitor in it did not appeal and this combination of factors mean it has sat on top of my cupboards for some time since (probably 3 years or more).
The idea though of putting all my hardware center stage inside this box is appealing and it has room I believe for an mATX system to be mounted.
This first post is all about the teardown and checking the concept.
Here is how it looked before I came along and took it to pieces.
I did not use a teardown guide, but I have documented the process here. First I turned the iMac over and removed the cover for the video output as well as the RAM access slot:
Next, there are four screws accessible for taking off the bottom main plastic part.
Once those are undone you can tip up the bottom part and remove it:
There are two screws that need to be undone to remove the front trim part - and here you see the grey cover that needs to be removed to access one of them:
and the other:
Once these are undone the front will pull off.
I chose to then work on removing the original motherboard, but first the faraday cage needs to be removed. Here are some shots of it as well as of the little iMac speakers:
The faraday cage is held on by a few easily accessible screws and comes off simply enough.
Underneath the cage we see the mobo:
and the neat little combined HDD tray and DVD carrier.
The mobo once disconnected comes off easily enough and you are left with a bottom plate exposed:
This plate will not come off now though, so instead I turned to removing the speakers:
They have three clips which attach - one central clip that has a prong that needs to be depressed form underneath, and two outside clips. Press the central prong in and then slide the speaker outwardly to remove.
Turning back to releasing the top plastic, undo these screws (which are hidden under two grey clips above the crt top):
as well as a screw at the back of the shroud (not shown here sorry) which attaches the translucent "grape" coloured cover to two side plastic parts and then tilt and slide the cover downwards and it will come off.
Look at the clips that are shown in the photo below and you will see why you need to slide the shroud downwardly to get it removed:
After this you are left with a couple of plastic side pieces and a front plastic part that attach to the metal tray and which hold the CRT and the high voltage PCB tray.
At this point disassembly is relatively straightforward in that if you find a screw you unscrew it. HOWEVER, at this stage do STOP. You have exposed the CRT and it now needs to be discharged. Failure to do that now and putting yourself in the wrong place can result in a very nasty electric shock that can potentially be fatal.
Watch this on what to do and precautions to take:
http://www.youtube.com/watch?v=bDAiLtTDuf4
You will also find on Google an enormous amount of warnings about death from CRT…….mostly written about by people who do not have much electronics knowledge. I did find this interesting too:
http://lowendmac.com/tech/crt_danger.html
In any event, I suggest you do follow all instructions for avoiding discharging the tube through your own body and please do it safely. Once safe you can carry on taking stuff apart. Usual note - please do not hold me responsible for any injury you might sustain. Be careful and everything will work out fine. Most important though do not simply go poking a screwdriver at the CRT before you understand the risks and what you are doing.
Having disassembled my iMac I put the parts together again without CRT and PCBS to make sure it all would re-attach perfectly and to make sure I had all the parts I needed.
Of note I kept the side IO piece which will be re-used and I also broke off the power inlet from the high voltage PCB to keep as it will screw attach to the metal support plate and can be easily and sturdily re-cycled for the build later.
Here are some pictures now of the basic parts re-assembled:
and that is where I am right now.
Things to come:
Making a tray for the motherboard; making fan support (to utilise the area around the "handle" at the back); making a front "screen"; sorting out everything else!!!